A Guide to WooCommerce Direct Checkout Link
-
Fadiyah Sameh
Cart abandonment – the nightmare every online store owner fears.
It is estimated that online retailers lose over $18 billion in revenue each year due to customers abandoning their shopping carts.
But why? Why do people abandon carts after adding a product?
There are a number of reasons why WooCommerce stores fail to engage customers. One of them is the complicated checkout process.
17% of shoppers abandon their carts due to the long or complicated checkout process. Sometimes they leave because they don’t want to create an account to place an order or just don’t want to go through the process of adding to the cart, then go to the cart page, and then finally finish the order on the checkout page.
The key to earning your customer’s satisfaction is to provide them with a smooth buying experience. Therefore, you may often need to create WooCommerce direct checkout without cart link.
In this article, we will discuss all about creating a WooCommerce direct checkout link and also learn how to add buy now button in WooCommerce.
Why create a WooCommerce direct checkout link?
We have already mentioned how the lengthy checkout process impacts a shopper’s buying decision.
Considering the $738 billion in combined US and EU e-commerce sales, the potential for a 35.26% increase in conversion rate translates to $260 billion in lost orders that are recoverable solely through improved checkout flow and design.
Creating a direct checkout WooCommerce link will remarkably improve the checkout process. And when you improve the checkout process, you will also improve the customer’s buying journey in your store.
- 70% of customers agree that a quick checkout process makes them more likely to buy something from an online store.
- A study by the Baymard Institute found that a large eCommerce store’s conversion rate could go up by up to 35% if the checkout process was made better.
- Speedy checkout process will make customers happy, resulting in more repeat purchases.
Besides these benefits, there are a number of scenarios and use cases where you will need to avoid the WooCommerce add-to-cart button and opt for the WooCommerce direct checkout link.
Here are some of the use cases:
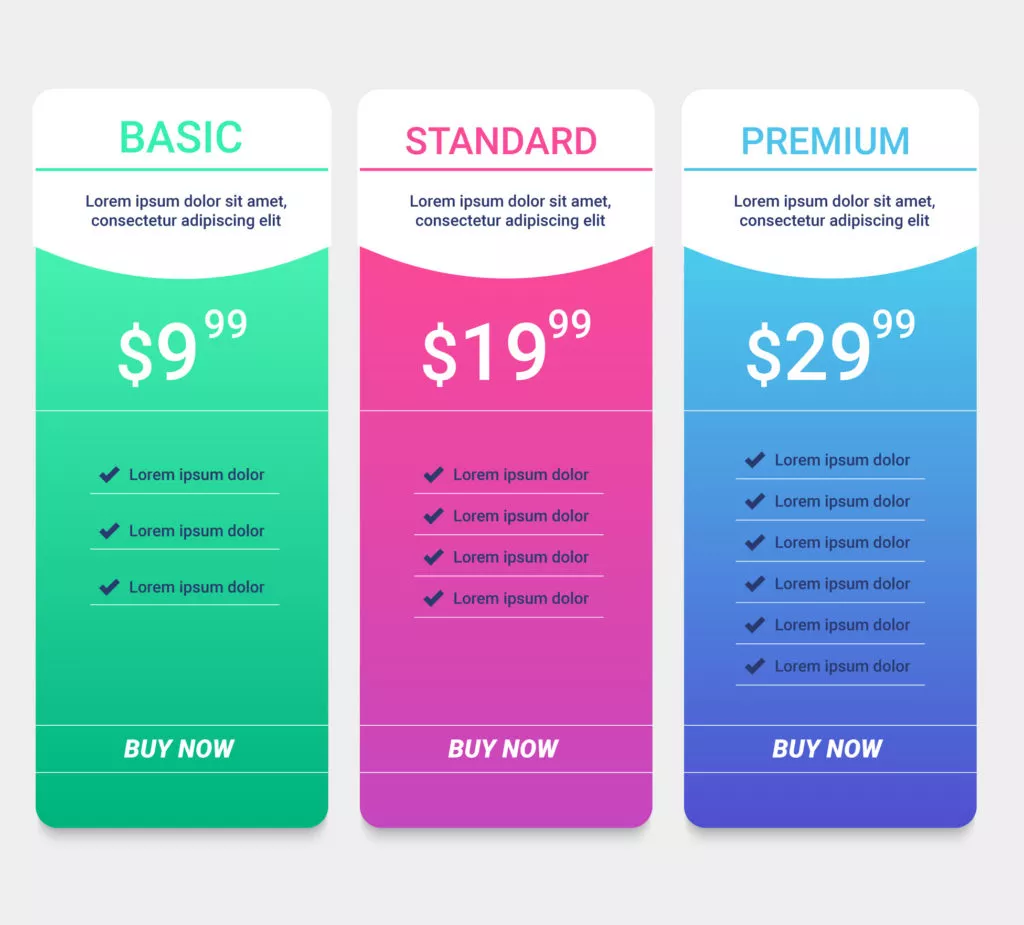
WooCommerce membership plans
If you have a subscription-based WooCommerce membership website, you will need to create subscription plans or packages for your members.
And your members wouldn’t like to go through the WooCommerce add to cart button link, then click through the cart page and at the end checkout page. They will most certainly feel annoyed because they are not buying multiple products but rather a single plan.
Membership plans/packages are generally promoted on different pages, such as the home page or particularly on the membership page. They are not suited for the shop page.
Therefore, it would look unprofessional of you to let your customers go through those pages (WooCommerce add to cart link, cart page, etc.) when you are selling a specific set of packages or monthly plans.
So, you need to provide WooCommerce direct checkout without cart link to your customers.
Custom abandon cart email
Abandoned cart emails are sent to shoppers who put items in their carts but didn’t finish the checkout process. According to a study of 500 of the biggest brands in the world, 44.1% of abandoned cart emails are opened, and 29.9% of the clicks on those emails lead to a recovered sale.
As a WooCommerce store owner, it is inevitable that you will have to run an abandoned cart email campaign. However, you can’t put the general product page link when designing a personalized cart abandoned email.
This can overset or displease your customers if they have to go through all the pages again. Your best choice is to provide the WooCommerce direct checkout link.
Sharing a WooCommerce direct checkout link on social media
Social media is an excellent method for converting visitors into customers and building communities around your products. If you have a substantial Instagram following, adding swipe-up links to your stories is an excellent way to convert viewers into customers.
For instance, you can tell a story about a product and tell your shoppers to swipe up to purchase it. The link will bring up your store’s checkout page, fill it with the item, and make it very easy for your visitors to buy.
Service-based store
If you have a service-based WooCommerce store or offer some sort of services besides your physical products, you need to use a WooCommerce direct checkout link for the service plan.
For example, suppose you sell network connecting devices such as routers, switches, server-related devices, etc. Along with these products, you also offer network setup services. For that, you have created different setup service plans in your Woo store.
You can’t possibly put these services as retail products on your shop page; rather, make a separate page for the plans and create custom sections for them with WooCommerce direct checkout link.
The same goes for the stores that sell single products.
Sending WooCommerce direct checkout link to customers
Although a customer may appear to be ready to pay, they may still need help completing the purchase for a variety of reasons. Customers can be sent directly to the checkout page with a preconfigured cart rather than having to navigate through the usual homepage, product page, cart page, and checkout page funnel.
In this way, you can ensure they don’t lose interest or fail to convert, streamlining and speeding up the process.
When it comes to providing support, this is especially helpful. What happens, for instance, if a customer who has contacted customer support with questions about a product also sends a message indicating that they are prepared to make a purchase?
Instead of responding by providing a link to the product page, simply provide a link that takes customers directly to the checkout page.
Special discounts via email, social media, or chat
Suppose you want to offer your customers a special discount on some products, and you want to include an automatically apply coupon code. You can integrate that into your WooCommerce direct checkout link.
That way, you can save them from going through all the pages and enjoy the discount without manually entering the coupon code.
Bulk order WooCommerce direct checkout link
If someone wants to buy a large stock of products, they would want some sort of discounts or special shipment offers. They would also want the checkout process to be different than adding all the products one by one manually.
You can create a custom WooCommerce direct checkout link with the quantity and discount offer. So that when they click the link, it will take them directly to the checkout page with the added quantity and discount or shipment process.
WooCommerce direct checkout link inside website content
If you run a blog alongside your WooCommerce store, which is, by the way, a great idea to earn organic traffic, you can insert WooCommerce direct checkout links inside your content.
For example, suppose you sell wireless headphones, and you are publishing an article on the best wireless headphones. You can write about the ones you sell and put a custom purchase or buy this product button within the content.
Content marketing is a great way to gain ranking in search engines, earn organic traffic, promote your products and ultimately increase sales. If you can smartly place your WooCommerce direct checkout link, you will have a high chance of getting conversions.
How to create a WooCommerce direct checkout link?
There are two ways to do it.
- Manual
- Using a plugin
We will begin with the manual process.
How to create a WooCommerce direct checkout link manually?
As you know, there are a couple of variations/types in WooCommerce products.
- Simple products
- Variable products
- Grouped products
We will check how you can create a WooCommerce direct checkout link for each of these variations.
Let’s start with simple products.
Creating direct checkout link for simple products
Creating a WooCommerce direct checkout link manually using your product ID is the quickest and easiest way to get the link up and running.
Here’s the basic format of the link:
https://www.yourwoostore.com/checkout/?add-to-cart=ID
Replace the domain with your WooCommerce site URL and place your product ID at the end.
Now, how to find your product id?
Go to your WordPress admin panel, and go to Products>> All Products.
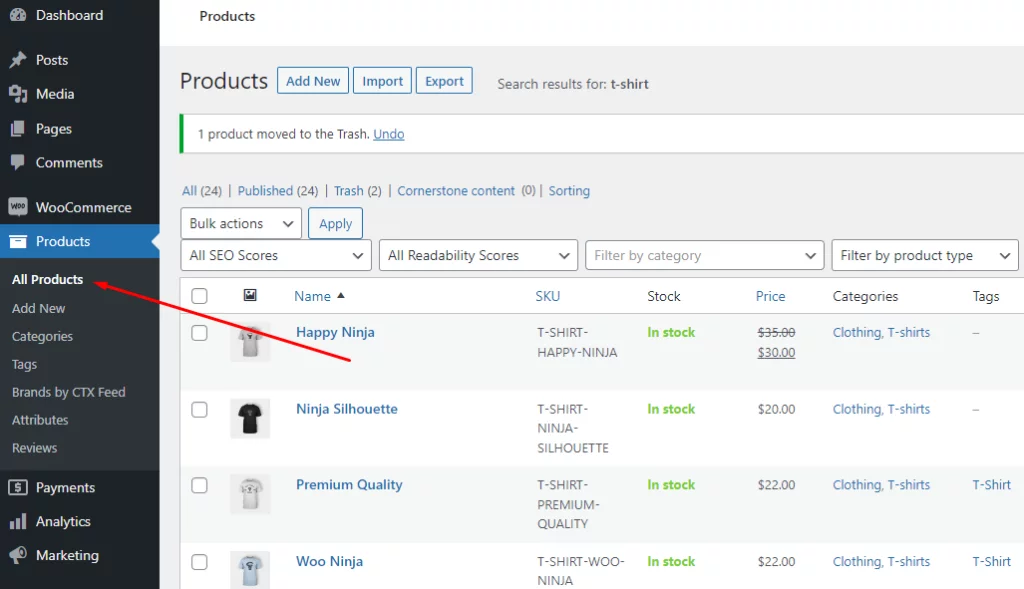
Hover over any of your products, and you will see the product ID pops up along with other options.
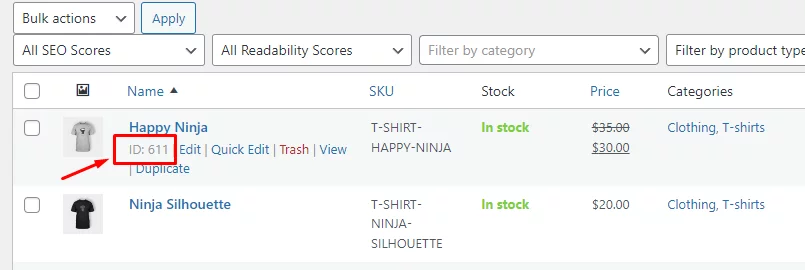
Copy the product id and paste it at the end of the format link we showed. For example, we have product ID 611 in the image above, and we want to create a WooCommerce direct checkout link for this product.
It will look something like this at the end:
https://www.yourwoostore.com/checkout/?add-to-cart=611
Let’s test it out.
Create a WooCommerce direct checkout link for one of your products using the above process and format and test in a new window of your browser. We created a valid link using that particular product ID and using our demo site URL.
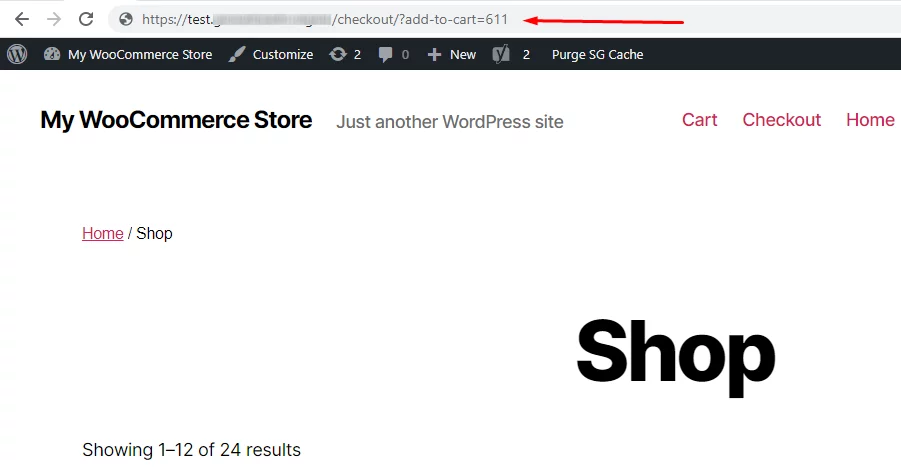
Hit enter and check where it takes you.
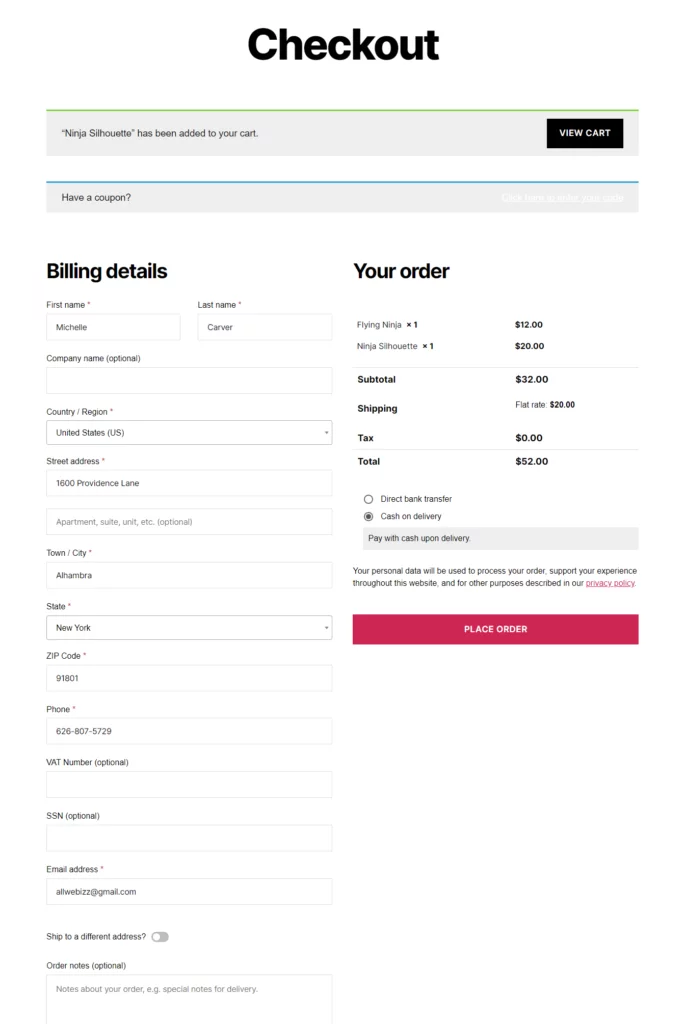
Voilà! Your product has been added to the cart, and you have been taken to the checkout page directly. You didn’t have to manually add the product to the cart, then visit the cart page, and only after that had access to the checkout page.
This was for simple products with no variations. What about variable products that have different attributes?
That’s what we will discuss next.
Creating a direct checkout link for variable products
Variable products have different IDs for different variations. In order to create a WooCommerce direct checkout link, you need to find out those IDs first.
Go to Products>>All Products again. Now, select the Variable product from the Filter by product type dropdown, and hit the Filter button.
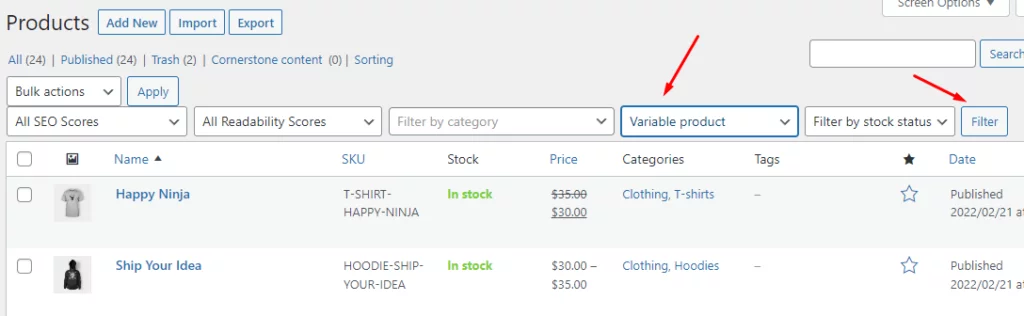
Now you will see only the variable products in your store. Enter the one you need and scroll down to the Product data section.
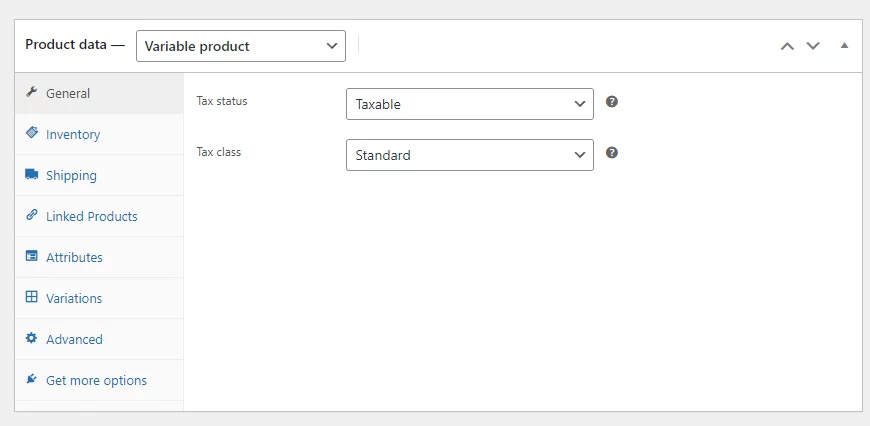
Click on the Variations tab, and you will see the different IDs for every variation.
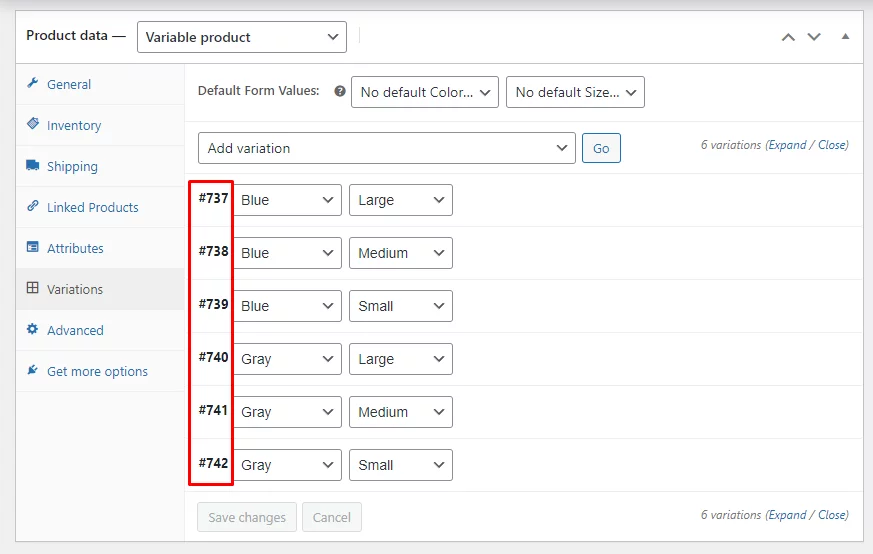
You can create a WooCommerce direct checkout link with any of those IDs. For example, you want to create a direct link for a blue, medium t-shirt. The ID is #738, and the link will look like this:
https://www.yourwoostore.com/checkout/?add-to-cart=738
The URL format is the same as the one we used for simple products, as you can see. The main difference is that you can’t use the product ID to make a direct link. Instead, you have to use the ID for the specific variation you want to link to.
Creating a direct checkout link for grouped products
In like manner, you have the option of creating a direct checkout link for grouped Products. The process is identical to that of creating a checkout link for individual products.
Grab the ID of your grouped product from the products page, and then add that ID to the direct checkout URL. Simple as that.
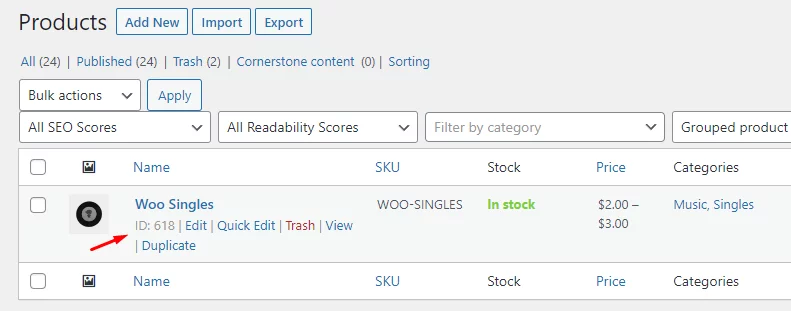
For example, a grouped product’s ID is 618. If you want to create a direct checkout link, then it will look something like this:
https://www.yourwoostore.com/checkout/?add-to-cart=618
You now have a personalized link to the checkout page that will take your customers to the page where they can complete the purchase of your entire grouped product.
Creating a direct checkout link for subscription-based products
You do have to create a product for the subscription plans the same way you do for the standard products. Therefore, creating a direct checkout link for subscription plans are same as for simple products.
Your customers will be brought straight to the checkout page whenever they click on one of the examples of a direct checkout link that we have shown for simple, variable, or grouped products.
However, they will only add one unit of that particular product to the order. What if you want to add more than one quantity of products?
Let’s find out.
How to change the quantity for WooCommerce direct checkout link
Suppose you want to offer people a bundle of products instead of one single unit of product. And you want to provide them with a WooCommerce direct checkout link.
How do you do that, or is it possible?
Yes, it’s possible to add quantity to the URL. You just need to include &quantity=# at the end of your URL.
Adding quantity in a simple product’s direct link
Let’s say you want to add 5 units of a product and create a custom direct checkout link for that product. All you have to do is add this &quantity=5 at the end of the URL.
If we use the same simple product URL from earlier sections, it will look like this.
https://www.yourwoostore.com/checkout/?add-to-cart=611&quantity=5
Let’s put that in a browser and check.
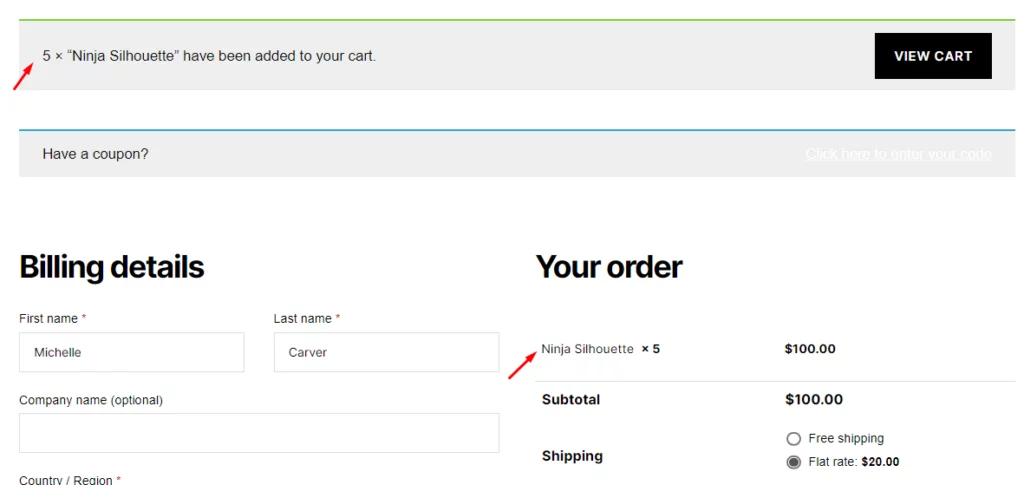
As you can see, 5 units of the product have been added to the cart, and you are directly taken to the checkout page.
Adding quantity in a variable product’s direct link
The process is pretty much the same for the variable products. As we showed before, go to the products page, find a variable product and jump to its product data section.
Then, select the ID from variations and create your direct link with that. Additionally, add the quantity you want to set.
It may look like this:
https://www.yourwoostore.com/checkout/?add-to-cart=738&quantity=3
Adding quantity in a grouped product’s direct link
Creating a WooCommerce direct checkout link with quantity for grouped products is a bit different than the others.
You must enter a quantity for each linked product. Additionally, you can define multiple quantities for one product while not specifying any for another.
Add the product ID of the linked product to the format of &quantity[id]=# in order to generate a direct checkout WooCommerce link with quantities for grouped products. Additionally, you will be able to add multiple attributes of quantity to the link.
For instance, if we had a grouped product 611 that was linked with two different single products (IDs 510 and 513) and we wanted to add 2 units of 510 and 5 units of 513 to the cart, then our WooCommerce direct checkout link would look like this:
https://www.yourwoostore.com/checkout/?add-to-cart=611&quantity[510]=2&quantity[513]=5
When specifying the quantity for your grouped products, be sure to use only the product ID of your linked products.
Adding coupon codes in WooCommerce direct checkout link
What if you want to include a discount code in your direct checkout link in WooCommerce?
You need to be able to auto-apply the discount when your shoppers click the direct checkout link. We have already covered how to automatically apply coupons in this article.
Nevertheless, let us show you quickly how to do it and insert the coupon code in a WooCommerce direct checkout link.
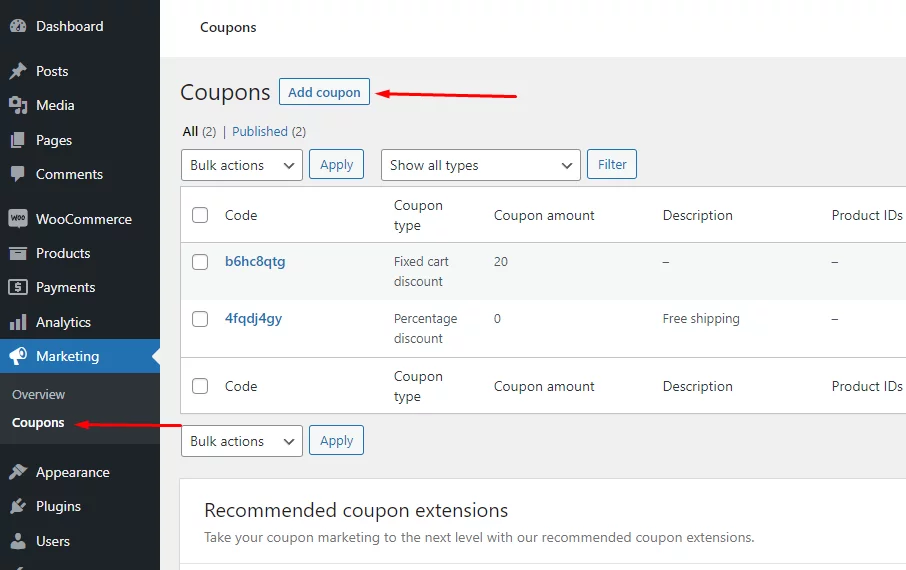
First, go to Marketing>>Coupons, and click on the Add Coupon button to create a new coupon.
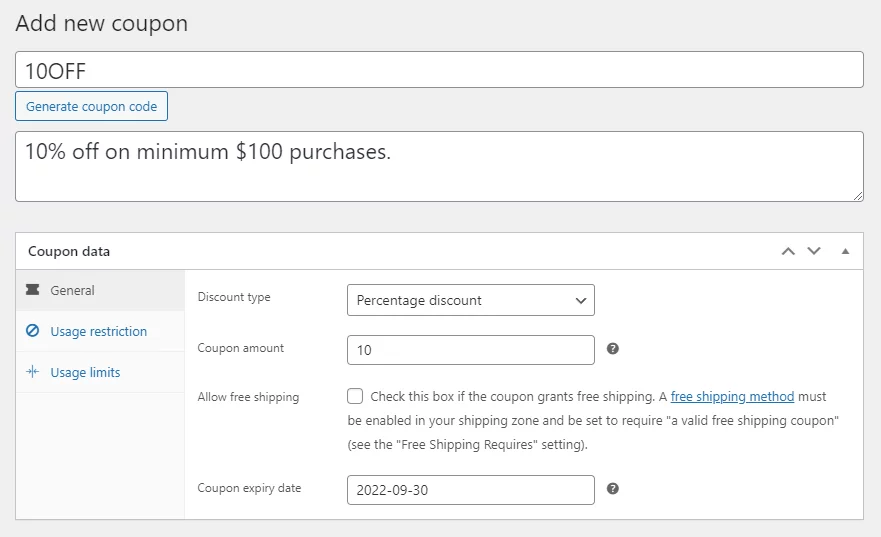
Input your desired data in the required fields.
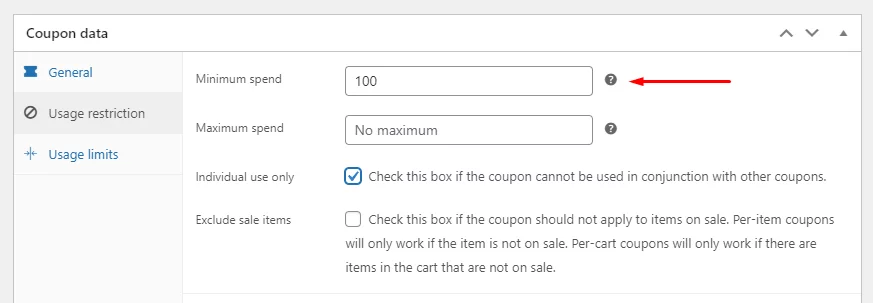
Make sure your usage restrictions are in place.
Go ahead and publish the coupon. However, unfortunately, WooCommerce doesn’t allow you to automatically apply the discount code for your customers.
To accomplish this, paste the following code into your functions.php. You will find the functions.php file in Appearance>>Theme File Editor.
Here’s the code:
/**
 * WebAppick – Apply Discount Coupon automatically to the cart
 */
function iso_woocommerce_coupon_links(){
            	if (!function_exists('WC') || !WC()->session) {
                            	return;
            	}
            	$query_var = apply_filters('woocommerce_coupon_links_query_var', 'coupon_code');
            	if (empty($_GET[$query_var])) {
                            	return;
            	}
            	WC()->session->set_customer_session_cookie(true);
            	if (!WC()->cart->has_discount($_GET[$query_var])) {
                            	WC()->cart->add_discount($_GET[$query_var]);
            	}
}
add_action('wp_loaded', 'iso_woocommerce_coupon_links', 30);
add_action('woocommerce_add_to_cart', 'iso_woocommerce_coupon_links');
But how do you configure the direct checkout link with the coupon code?
To do that, you need to put this parameter &coupon_code={code} at the end of your link. Thereupon, your link will look like this:
https://www.yourwoostore.com/checkout/?add-to-cart=611&quantity=5&coupon_code=10OFF
Creating WooCommerce direct checkout link with a plugin
Manually creating direct links to the checkout page is a simple and efficient process. Knowing the product ID and the desired quantity is all that’s required. But you’ll have to build the links for each product one by one.
When you have a small shop with only a handful of products, this isn’t a big deal, but when you have a large store with hundreds or thousands of products, it can become a major hassle. This is a perfect scenario for when a plugin comes in handy.
There are a number of plugins for this task. We will use the Direct Checkout for WooCommerce plugin to demonstrate the process for you.
From your WordPress admin panel, go to Plugins and then click on add new. Search with direct checkout.
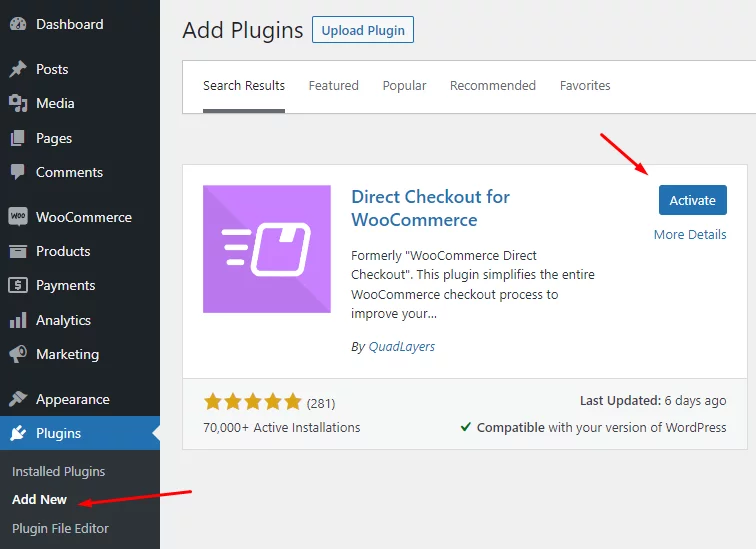
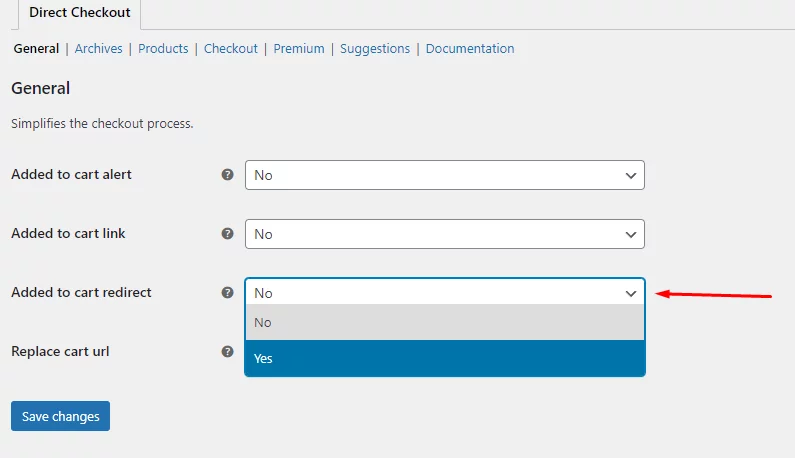
Install and activate the plugin. This will create a separate settings tab in the WooCommerce settings. Click on the tab to check the available options.
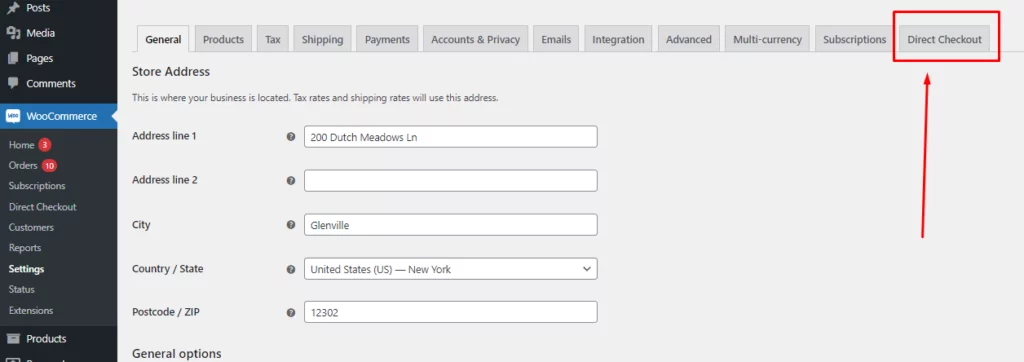
From Added to cart redirect dropdown, select yes.
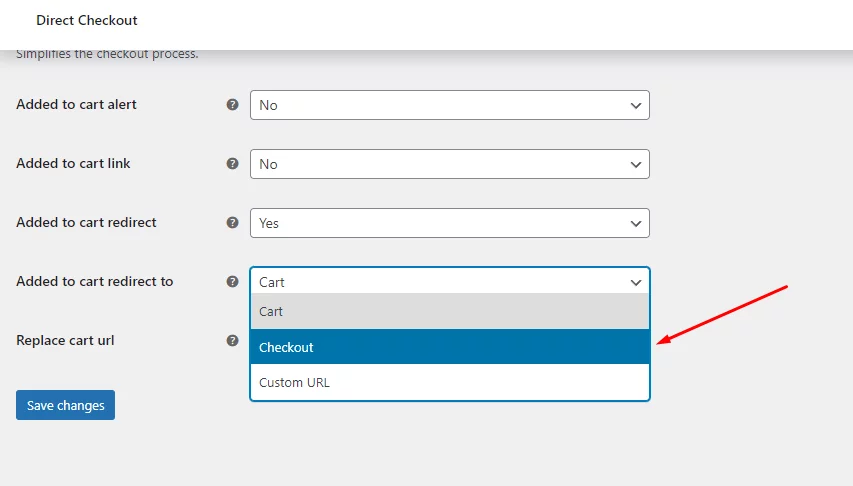
Now, a new option called ‘Added to cart redirect to’ will pop up. Click on the dropdown and select Checkout.
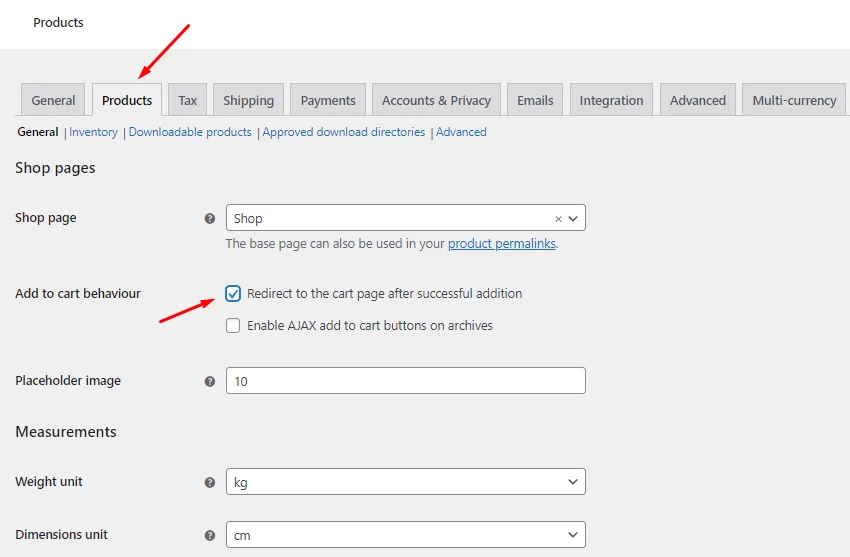
Save and go to the Products tab. From there, enable this option: Redirect to the cart page after successful addition.
Let’s check if it takes us directly to the checkout page after adding a product. Go to your shop page and add a product to the cart.
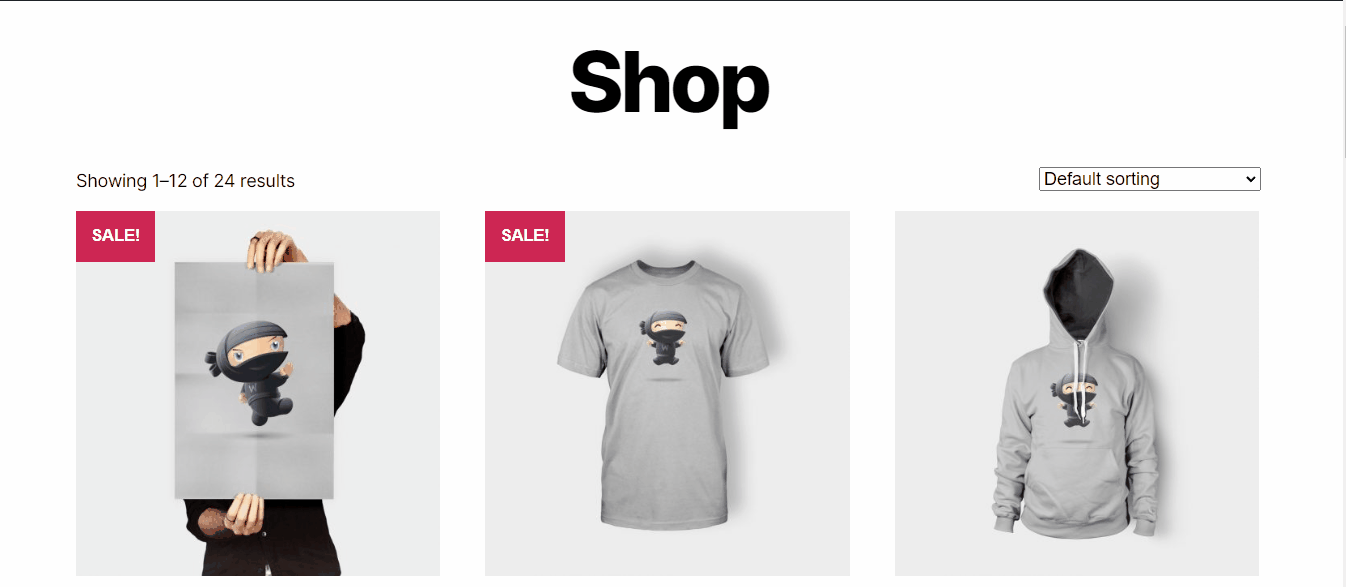
As you can see, it’s taking us directly to the checkout page. This is a quick way to speed up the purchase process. However, this will redirect all your customers to the checkout page as soon as they click on any of the add-to-cart buttons.
That sometimes can have a negative impact. What if your customer wants to add more products to the cart and doesn’t want to move to the checkout page right away?
In that case, manually creating a WooCommerce direct checkout link only for the specific products you want customers to be taken to the checkout page should be a better choice.
However, the best solution is to provide a buy now button beside the add to cart button.
How to add a buy now button in WooCommerce
WooCommerce direct checkout link is a great option when you want to take your shoppers directly to the checkout page for specific products. However, it’s kind of unreal to do this for a large number of products or all products.
Therefore, your best choice would be to display a buy now button beside your add to cart button. Again, you can do this in two ways.
Manually or with a plugin.
Adding the buy now button manually
As we did before, you can add some codes in the functions.php and display the buy now button for your products.
Jump to your function.php from Appearance>> Theme file editor and paste the following code at the end of the file.
add_action( 'woocommerce_after_shop_loop_item', 'cssigniter_buy_now_button', 15 );
add_action( 'woocommerce_after_add_to_cart_button', 'cssigniter_buy_now_button' );
function cssigniter_buy_now_button() {
            	global $product;
            	if ( 'simple' !== $product->get_type()
            	|| ! $product->is_purchasable()
            	|| ! $product->is_in_stock() ) {
                            	return;
            	}
            	$id = $product->get_ID();
            	$classes = implode(
                            	' ',
                            	array_filter(
                                            	array(
                                                            	'button',
                                                            	'product_type_' . $product->get_type(),
                                                            	'add_to_cart_button',
                                            	)
                            	)
            	);
            	ob_start();
            	?>
            	<a
            	href="<?php echo esc_url( wc_get_checkout_url() ); ?>?add-to-cart=<?php echo absint( $id ); ?>"
            	class="<?php echo esc_attr( $classes ); ?>"
            	rel="nofollow">
            	<?php echo esc_html_e( 'Buy Now', 'your-text-domain' ); ?>
            	</a>
            	<?php
            	echo ob_get_clean();
}
Lets us explain the code a little.
For the product listing pages, we have used the woocommerce_after_shop_loop_item hook, with a priority of 15, to ensure that our button appears immediately following the “add to cart” option. To show the button on the product detail page, we have used the woocommerce_after_add_to_cart_button hook.
First, we make sure we’re working with a basic product, then we make sure it can be purchased and is in stock, and finally, if everything checks out, we collect the necessary CSS classes to make our button look good and create it.
To speed up the checkout process, we create a custom URL for our button that instantly adds the product to the customer’s cart and takes them directly to the checkout page.
Let’s check it out. Go to your shop page or any of the product pages.

As you can see, there’s a buy now button alongside your add-to-cart button. Clicking that will take you directly to the checkout page.
However, this code only works with simple products. For variable products, the process is complex. Therefore, you should install a plugin that displays the buy now button for all product variants.
Replacing add to cart button text with buy now
Remember the Direct Checkout for WooCommerce plugin we used earlier to create the WooCommerce direct checkout link?
You can use that to change the name of your add-to-cart button and rename it to buy now or purchase or whatever you like.
To do so, go to WooCommerce>>Settings and click on the Direct Checkout tab. Now click on Achieves from the sub-tabs. From Replace Add to cart text dropdown, select yes.
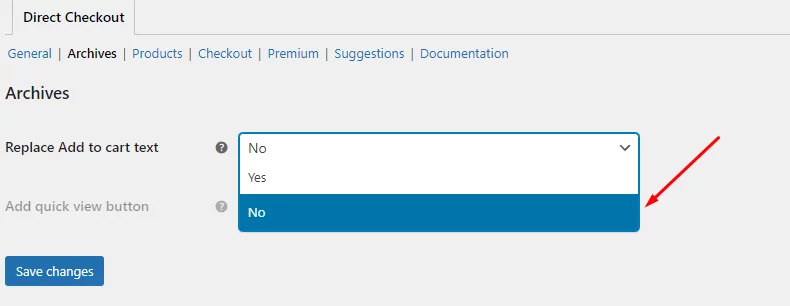
Now select the product types for which you want to replace the add-to-cart button name.

Input your replacing name and save changes.

Go to your shop or any product page to verify if it’s working or not.

As you can see, all your add-to-cart buttons are now turned into buy now buttons. If you click any simple product, it will directly take you to the checkout page.
However, if you click on any variable products page, it will take you to the dedicated product page and let you choose variations, and then will take you to the checkout page.
The best option for you is to use a dedicated buy now button plugin that can create a separate buy bow button for all product types.
Adding buy now button using a plugin
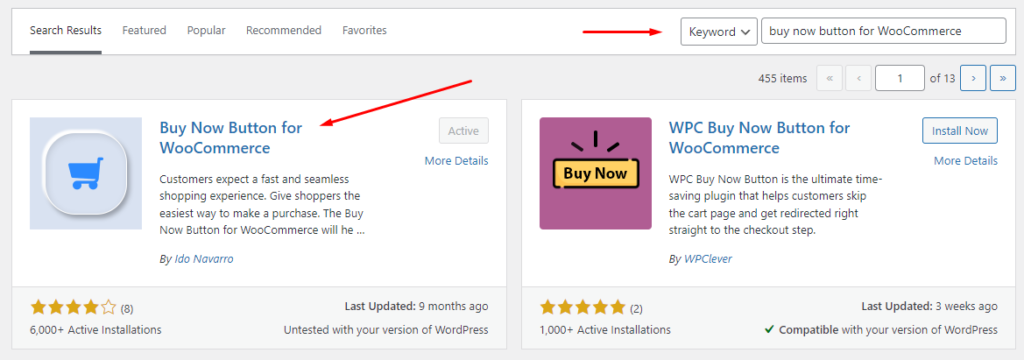
This process is as simple as it gets. For this task, you will need a free plugin called Buy Now Button for WooCommerce.
Go to Plugins>>Add new plugin and install this plugin.
That’s about it. Jump to your shop page or any product page, you will find the buy now button. Most importantly, go to any variable product’s page and check.
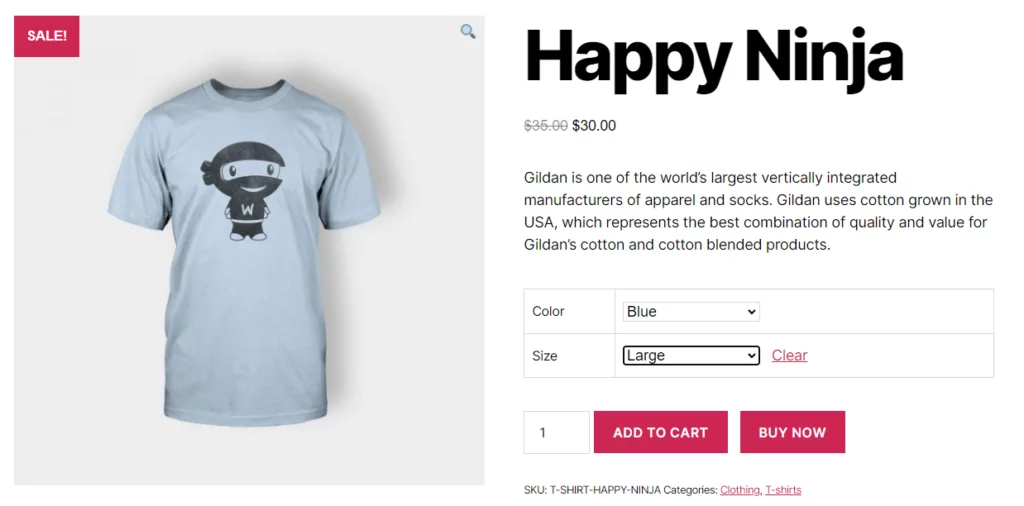
As you can see, the buy now button is also available for your variable product pages. Moreover, you don’t need to worry about styling the button. The plugin automatically adopts the tone and style of your theme and displays a perfect-sized, properly colored button.
How to create an invoice immediately after checkout?
Speeding up your checkout can significantly improve your visitor’s shopping experience. However, your customer’s journey doesn’t end there.
You still need to fulfill the order. Right after your customers complete the checkout process and place an order, they should receive an order confirmation email. Along with the order confirmation email, you need to attach an invoice.
Invoice is an essential item of the order fulfillment process; you can’t simply ignore it. This document can play a salient role for you.
How?
Invoices are record-keeping documents that can serve as legal paper for both you and your customers and save you from fraudulent lawsuits. It also comes in really handy in the event of a dispute.
If you have a custom invoice template, it will show your professionalism, impress your shoppers and earn their trust. It also will serve as a marketing tool if done right.
Overall, an invoice can grow your reputation and build a loyal returning customer base.
How to create and attach an invoice after checkout?
Despite all the great features of the core WooCommerce plugin, unfortunately, it doesn’t come with options for creating invoices. However, plenty of plugins and extensions are available for you to create invoices in WooCommerce.
One such plugin is the Challan.
Challan is a freemium plugin that auto-generates invoices immediately after a customer completes an order and attaches that invoice to the order confirmation email.
You can also manually download the invoice from the order pages. Along with the invoices, this plugin also lets you download packing lists, credit notes, and shipping labels.
Your customers can also download the invoice from the WooCommerce redirect after the checkout page, which is known as the order complete or the order received page. In addition to that, they can also download the invoices from their My Account page.
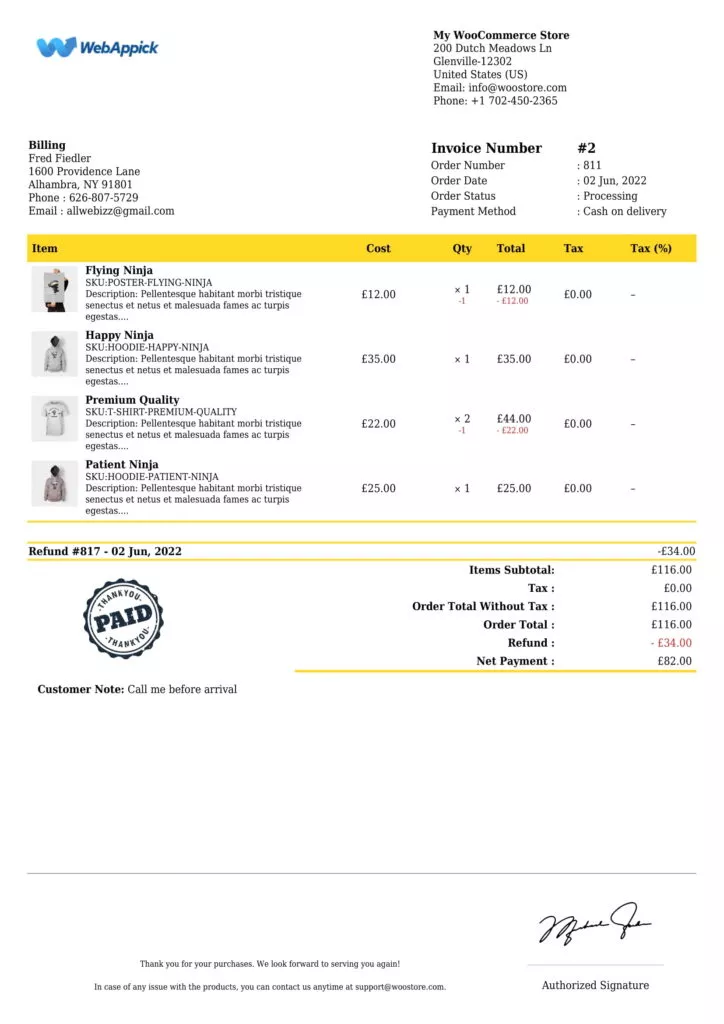
The biggest advantage of Challan is you can completely personalize your invoices. You can add your brand elements, custom notes, paid stamps, and authorized signatures. Challan offers you a set of well-designed pre-made templates.
In addition to that, you can customize the invoice template with CSS and also add a background image.
Here’s an example of Challan’s invoice.
Frequently Asked Questions (FAQs)
You can create a WooCommerce direct checkout link both manually and with a plugin. Use the Direct Checkout for WooCommerce plugin to quickly accomplish this task.
The general format for creating a checkout link manually. Replace URL with your domain name and ID with your product ID, which you can find on the product page.
You can add some codes to your function.php to redirect all add-to-cart button clicks to the checkout page. If you want to redirect individual products, you can do that manually by creating the WooCommerce direct checkout link, which we have covered in this article.
Most of the direct checkout plugins are straightforward to use. Install them and change the redirect settings from the plugin’s dedicated settings tab.
Wrap up
Whether you are trying to promote a specific product and want customers to take immediate action or trying to grab an abandoned cart customer, or skip cart pages for your single or subscription plan products, the WooCommerce direct checkout link can save your customer ample time and speed up the checkout process.
This, in turn, can increase your conversions and bring more sales resulting in more revenue as a result.
We hope this article helped you learn how to create direct checkout links or buy now buttons for your store. Let us know if you have any suggestions or comments.

For Bundling products it is not working. please provide the solution if any. Thank you
Hi, Thanks for reaching out. To get a solution for any technical issue, please, reach out to our support team from here.