How to Set Up the Flycart – Woo Discount Rules Plugin to Apply Discount Rules in Your Product Feed
After installing the ‘Discount Rule for WooCommerce by Flycart’ plugin, you can follow these steps to apply a new discount rule.
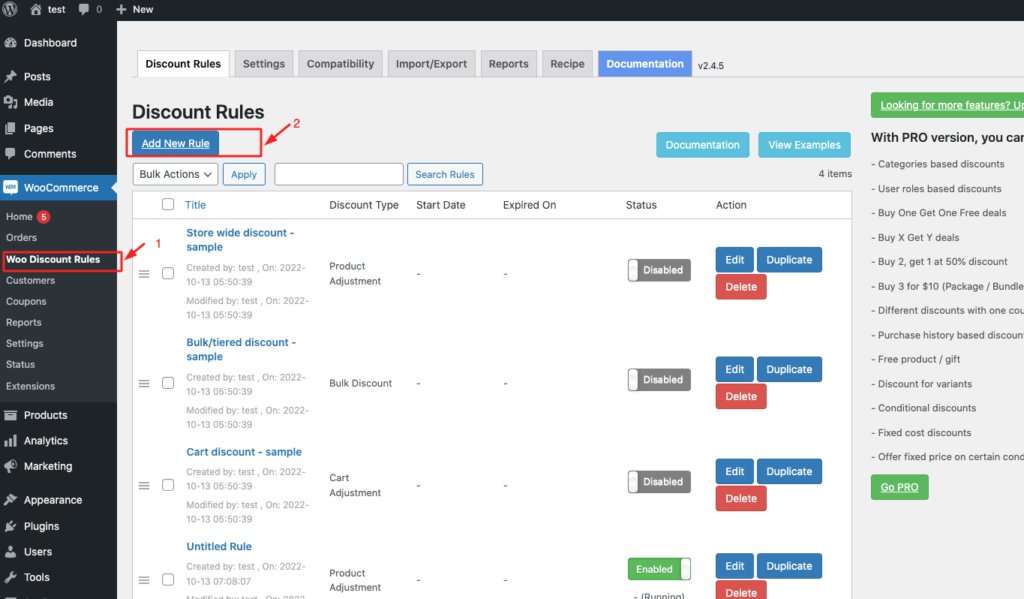
Step 1: First, Go to, WooCommerce > Woo Discount Rules > Add New Rule
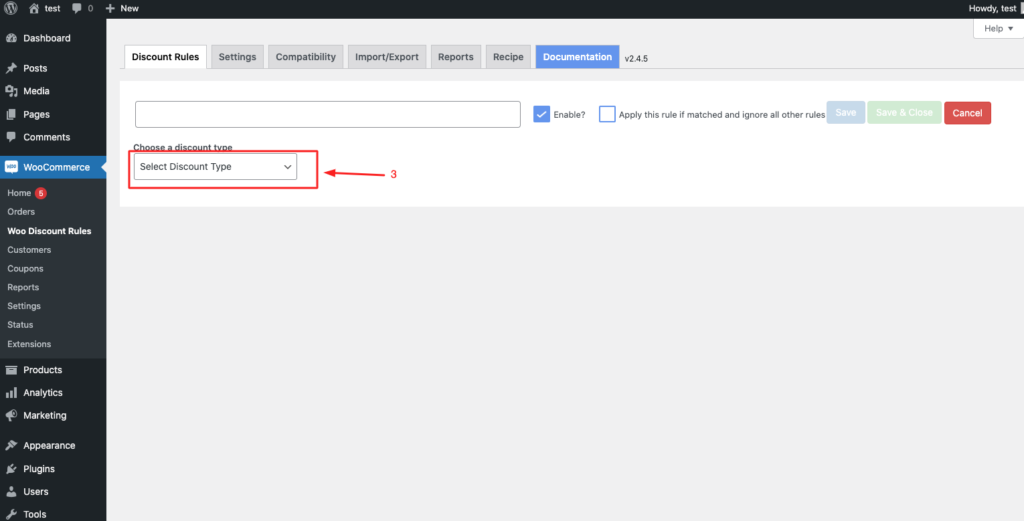
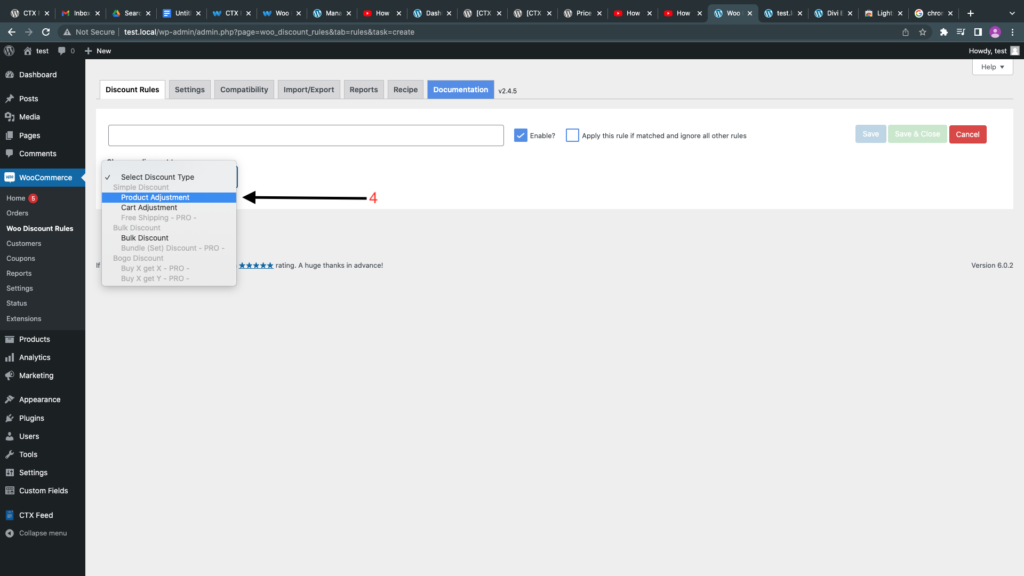
Step 2: Now go to Select Discount Type
Step 3: Select ‘Product Adjustment’ from this dropdown option.
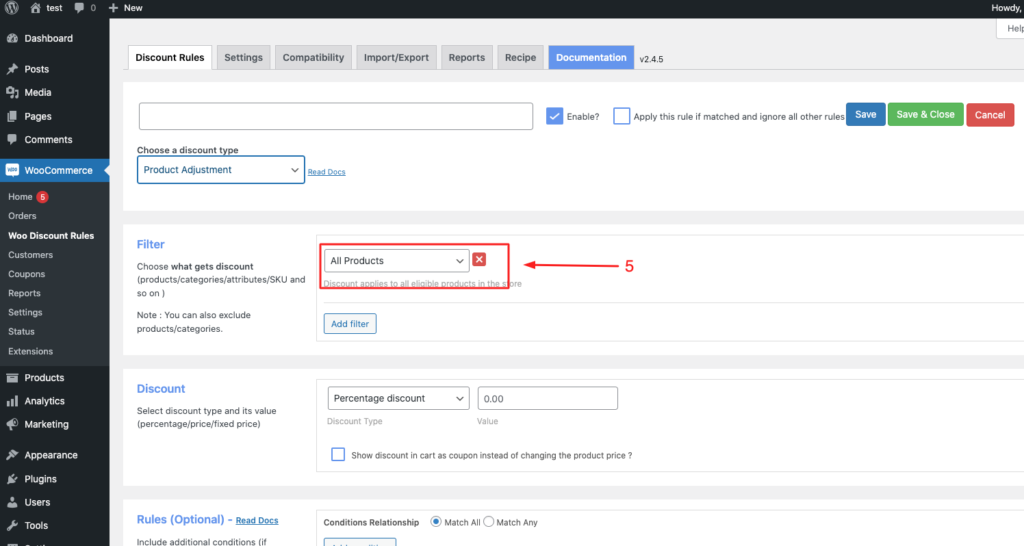
Step 4: Select ‘All Products’ from the Filter section.
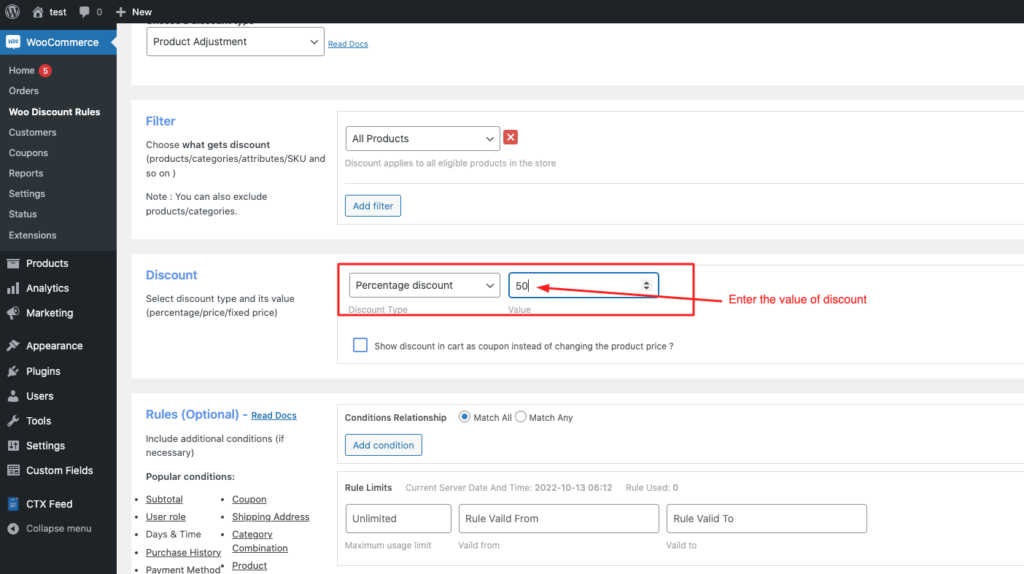
Step 5: In the Discount section, you can apply the rules like ‘Percentage discount’ or ‘fixed discount.’ For example, I input ‘50’ for the 50% discount on all of our products.
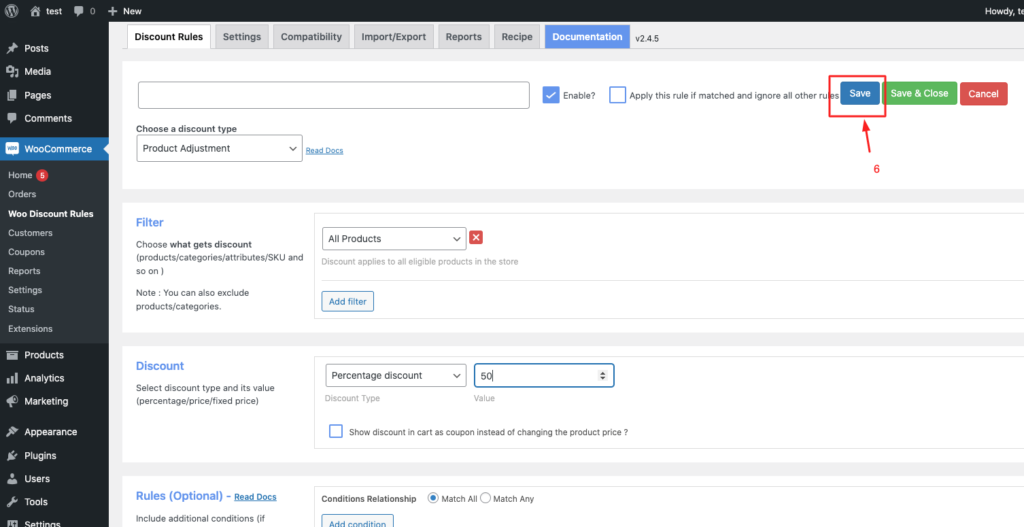
Sep 6: Now click ‘Save.’
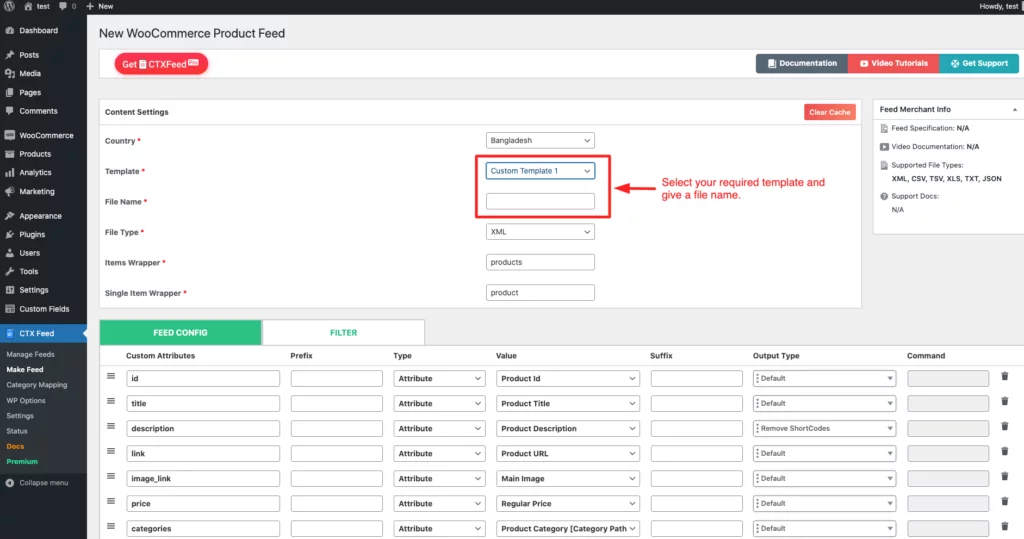
Step 7: Now, you can make your feed as usual.
Step 8: From the bottom of the page, click ‘Add New Attribute.’
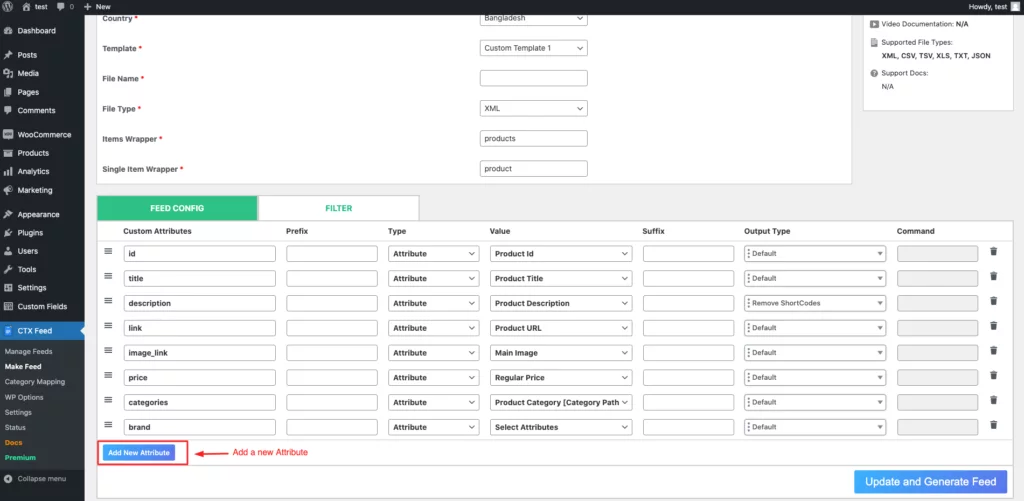
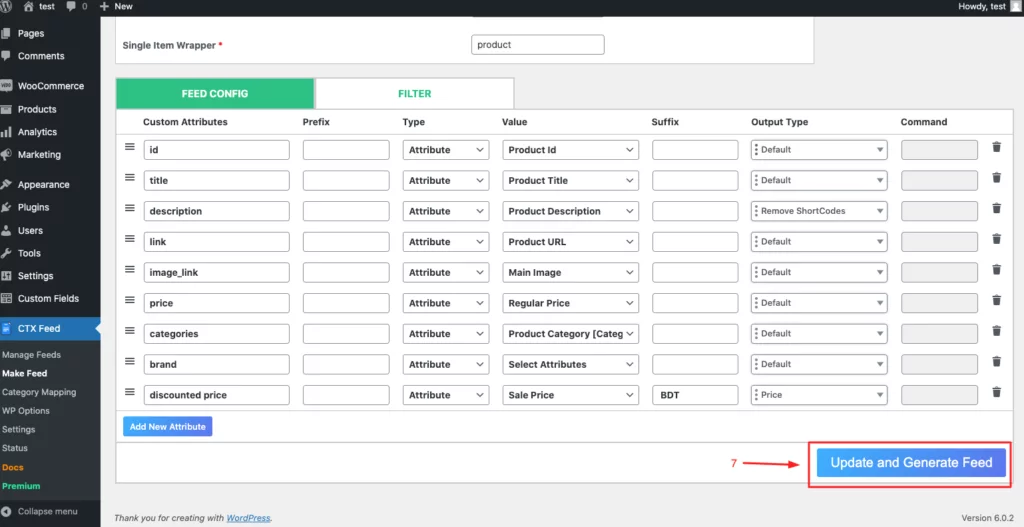
Step 9: Give the attribute name as ‘discounted price’ or anything you need. And then, select ‘Sale Price’ in value.

Step 10: Now click ‘Update and Generate Feed.’
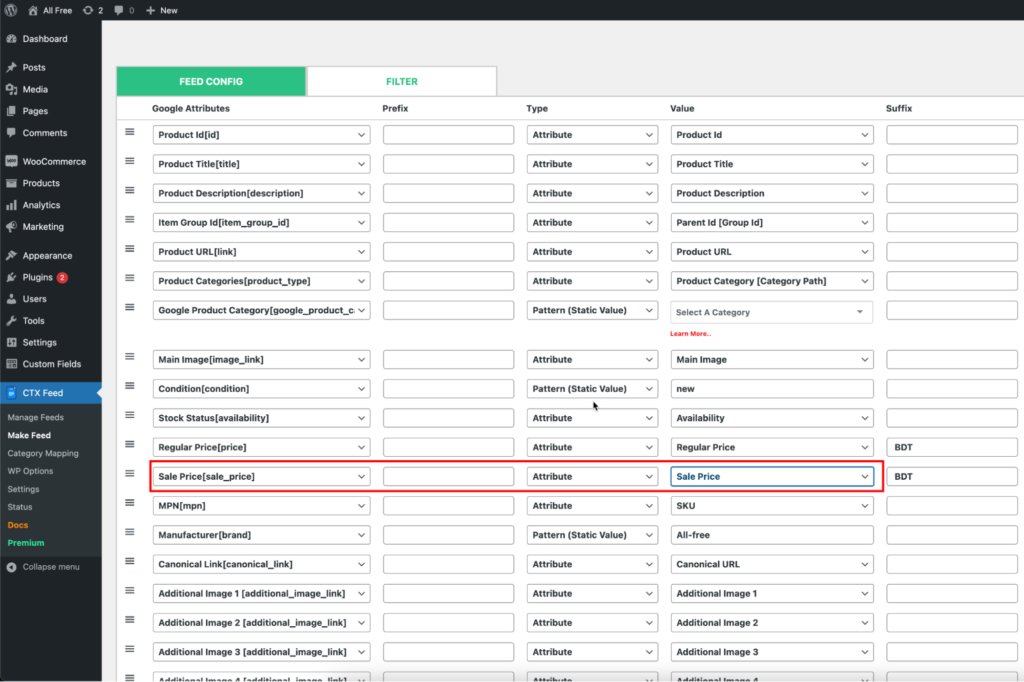
Step 11: Step 8,9 & 10 is applicable in case you are creating a custom template with custom template 1. But, If you are creating a Google Merchant or Facebook feed, just use “Sale Price” as the Sale Price [sale_price] attribute value, as shown in the screenshot below –
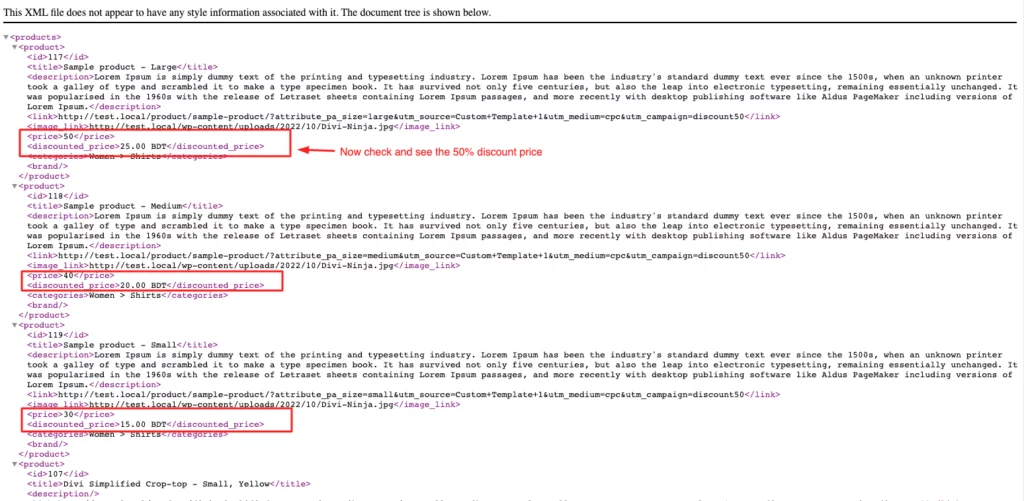
Step 12: Now check this feed.