How to Configure Google Merchant Shipping Attribute?
In order to add Shipping information of your WooCommerce products into Google Merchant, at first you will have to add shipping class information to your WooCommerce products.
If you have already configured shipping information in your WooCommerce store you can proceed to Section-02.
Section-01:
How to Add Shipping Information in WooCommerce?
Go to Shipping settings from Woocommerce Settings.
Woocommerce> Settings> Shipping.

Add zones you want to ship your products from shipping zone tab and choose the shipping options according to your preferences.

Move forward to Shipping Classes tab. You can add different classes for different type of products. Remember the slug of the shipping class, you will need this to configure Google Merchant later.

After setting up with shipping zone, shipping options, shipping classes let’s get back to Shipping zone. Now you will have to add Shipping Methods.
Once you add a shipping method, you will get options to configure your Shipping method with the shipping classes you’ve created earlier. Choose the options according to your requirements and add shipping class costs.

Now, you have successfully added Shipping Information in your store. And that leads you to the last step of this section, which is adding shipping classes to your products.
Go to your products section of your store and select Quick Edit for the product you want to add shipping information. In the quick edit, you will find the classes you have created in the shipping class drop-down. Select your desired shipping class from the list.

Now after you configured all of your products with appropriate shipping classes you can generate the product feed of your products. You will have to add a new row in your feed configuration. Select Attribute > Shipping Label[shipping_label] under Tax & Shipping from the attribute drop-down and set the Value to Shipping Class.

And after you the generate product feed, you will find the shipping label in your product feed.

Section-02:
How to Configure Google Merchant Shipping with CTX Feed.
Let’s log in to Google Merchant Center.
Move to the shipping tab of Merchant Center. Here you will get an option to add new Shipping Services. Create a shipping service and select shipping service area from the drop-down. After adding service area you will get more options to specify your service.
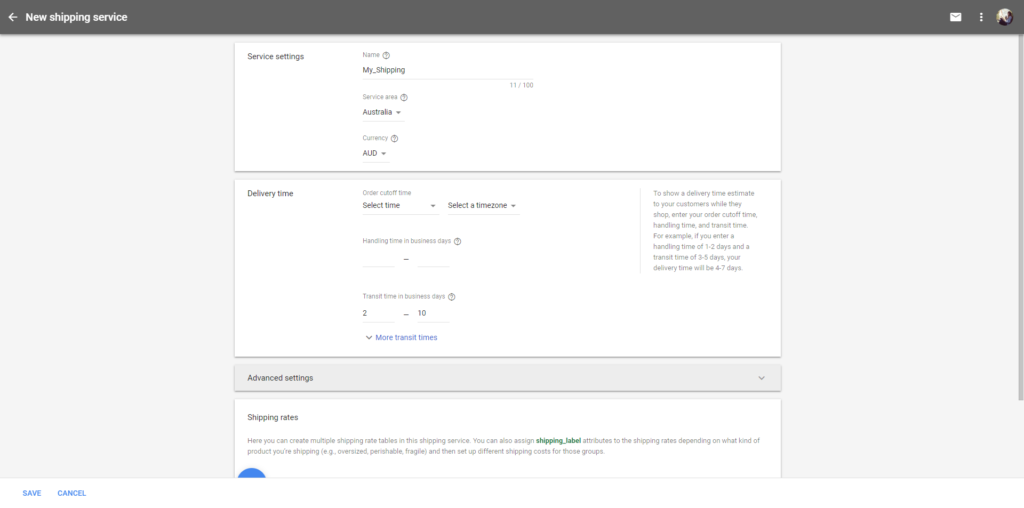
Once you have set up, move forward to shopping rates and click on add shopping rates button.
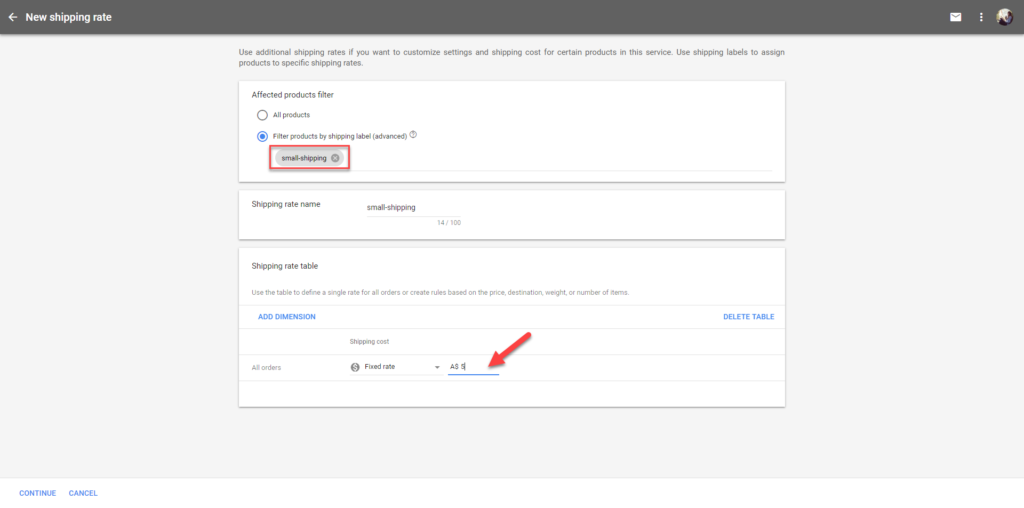
Now from the window you will select Filter products by shipping label instead of All Products. And under that you will have to put the slug of the shipping class you’ve created earlier. It will specify those products which have the slug in the shipping label associated with them. Then you’ll put your shipping cost and click continue. Now save the settings of your Shipping Services.
You can also learn How To Configure Google Merchant Shipping Attributes Into Feed with CTX feed WooCommerce product feed generator plugin in this following video tutorial:


You must be logged in to post a comment.
Hi, we use the Easyship plugin to calculate shipping costs with the product weight and dimensions based on customer location. How do we show this in the feed?
Hi David,
Using attribute mapping, you can create an attribute with Description and Short Descriptions combined. To know more about how you can do it, please, go through this documentation – https://webappick.com/docs/ctx-feed/google-merchant/conditionally-merge-multiple-attributes/
But, if you want to fill the description field with any of them if one is missing you can use the Dynamic attribute feature(Pro feature) and you can find more about Dynamic Attribute from here – https://webappick.com/docs/ctx-feed/google-merchant/how-to-make-dynamic-attribute/
To get more help, reach us from here – https://webappick.com/my-account/contact-support/
Thank you,
Thank you very much for this great plugin!
One question: Is there a way to send both descriptions (short and the normal one) to google?
Background: I matched the google attribute “product description” with the woocommerce value “product description”. But I also want google to get the woocommerce value “product short description”, because many of my products only have the description in this field.
Thanks for your help!
Hi Bob,
Please follow this doc to solve your purpose: https://webappick.com/docs/ctx-feed/google-merchant/if-field-a-is-empty-then-get-b-rule/
Hi, i am testing out the free plugin, i was wondering how do you set the shipping if you have a “FLAT RATE” shipping and “Free Shipping”?
Hi, Victor,
You can’t set any cost for the shipping class, but for the flat rate, yes, you can.
You can set “FLAT RATE” shipping and “Free Shipping” from Google Merchant Center.
Thank you very much for this content, this helped me a lot ^^
You are Welcome. We appreciate your time and are also happy that you’ve found a solution.