How to configure the Dynamic Attribute?
What is a Dynamic Attribute?
Using Dynamic Attribute you can modify or change your product information easily with conditions. Dynamic Attribute return values depend on the conditions and values of product attributes you set. Well, this functionality is only available to premium version of the plugin only.
Let’s watch this video to learn step by step how to configure dynamic attributes:
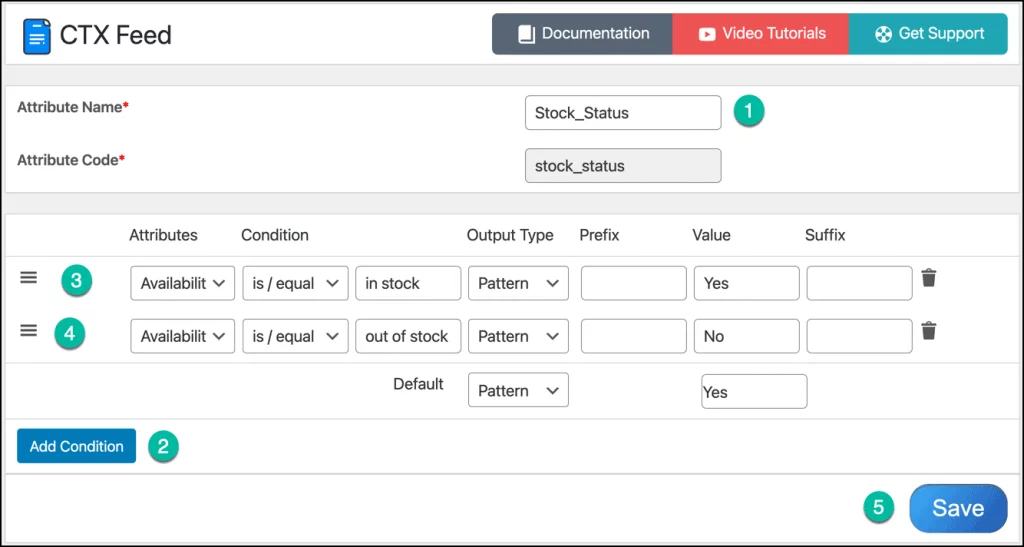
Creating dynamic attribute is pretty easy to initiate, Follow these steps:

- Go to CTX Feed > Dynamic Attributes. Press button Add New.
- Fill in the following fields:
- Attribute Name – Give a name to the attribute as you wish.
- Press Add Condition button
- Select an attribute at the left corner. This list contains all the product attributes or info from product title, description, category to product meta and taxonomies.
- Select a condition. There are 9 conditions available.
- is / equal
- is not / not equal
- equals or greater than
- greater than
- equals or less than
- less than
- Contains
- does not contain
- between
- Input condition value to compare with the product attribute.
Note*: If you want to compare with empty then you have to keep this input field empty. - Select Output Type:
- Attribute – Allows returning attribute value for the specified condition.
- Pattern – To return a static value for the specified condition. By selecting a pattern you can type the static value on the Value field.
- Default – Sets a default value for the dynamic attribute at the end. If all the conditions are false, then the dynamic attribute will return this value.
9. Press button Save.
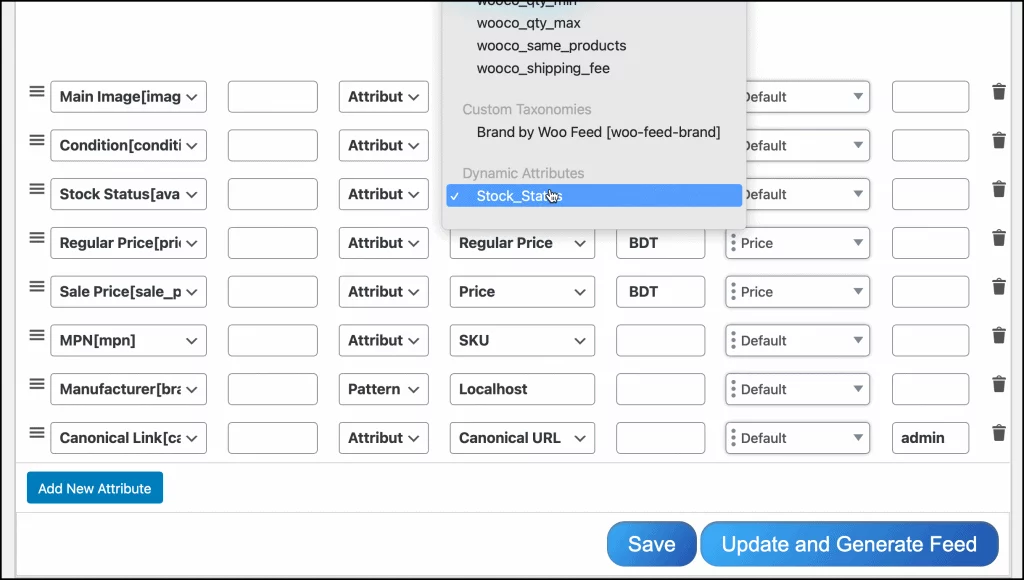
After creating a Dynamic attribute you need to apply the dynamic attribute into your feed configuration.
The Dynamic Attribute may not be available instantly into your feed configuration. You need to clear the plugin cache. Go to CTX Feed > Manage Feed and click on the Clear Cache button.

After clear the cache, Go to the feed configuration and apply the Dynamic attribute to your preferred merchant attribute. See the example screenshot below:

You must be logged in to post a comment.
How to use between attribute
Hi, For number you can use 10,20 to define between.