How to Translate Challan PDF invoices with WPML 4.0 or higher
Challan is a full-fledged PDF invoice and packing slip generator for WooCommerce stores. This plugin seamlessly integrates with most of the major plugins. Just like that, users can translate their products into multiple languages by integrating WPML & Challan altogether.
This documentation will guide you to translate product information and generate translated documentation. Here’s the step-by-step process of translating your Challan invoices into multiple languages.
Prerequisites
Besides installing WooCommerce & Challan, you have to ensure that your website meets WPML’s minimum requirements. Then install the following plugins –
- WooCommerce Multilingual
- WPML Multilingual CMS (the core plugin)
- WPML String Translation
- WPML Media Translation
Check the image below to get the full list of required plugins for this process.

Install these plugins and configure WPML by following the screen tips.
Step #1: Add Language
Look for the WPML menu on the admin panel sidebar and navigate to –
WPML -> Languages -> Site Languages
You can change your default language or add/remove other languages from this section.
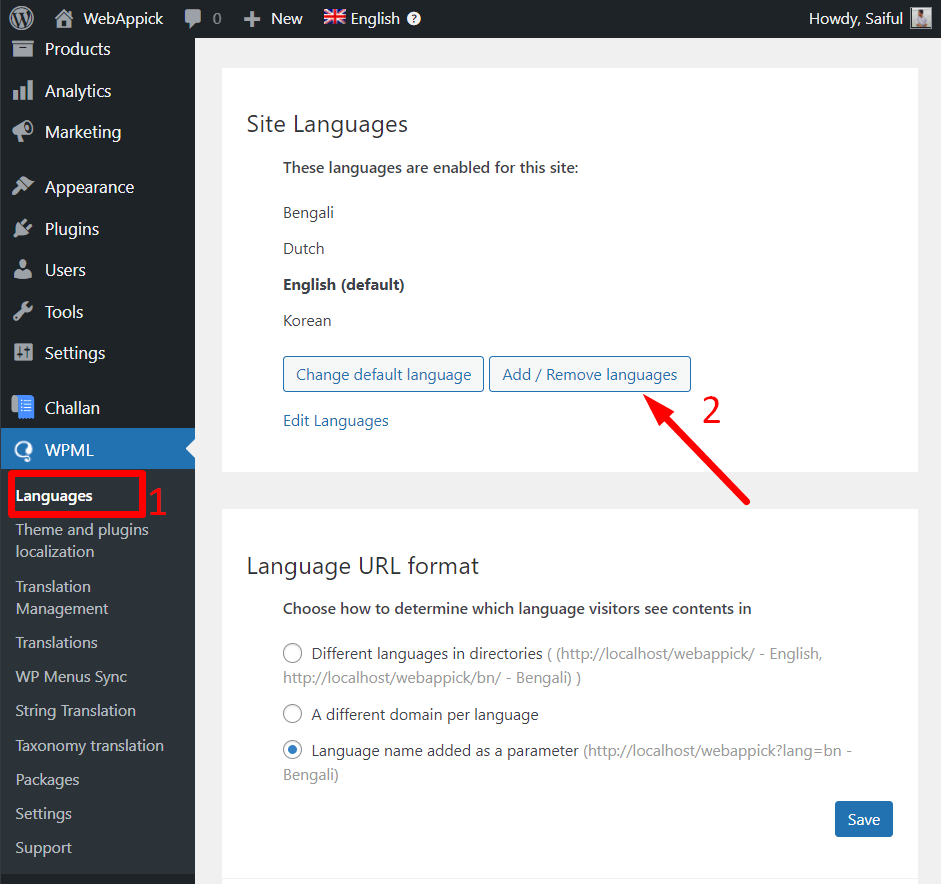
WPML supports almost all major languages. Choose whichever you prefer for your website. We have chosen the Korean language in this tutorial. Here are the supported languages by WPML –

However, the latest version of WPML supports automatic translation for most of the world’s languages. Here’s the list of WPML supported languages for Automatic translation.
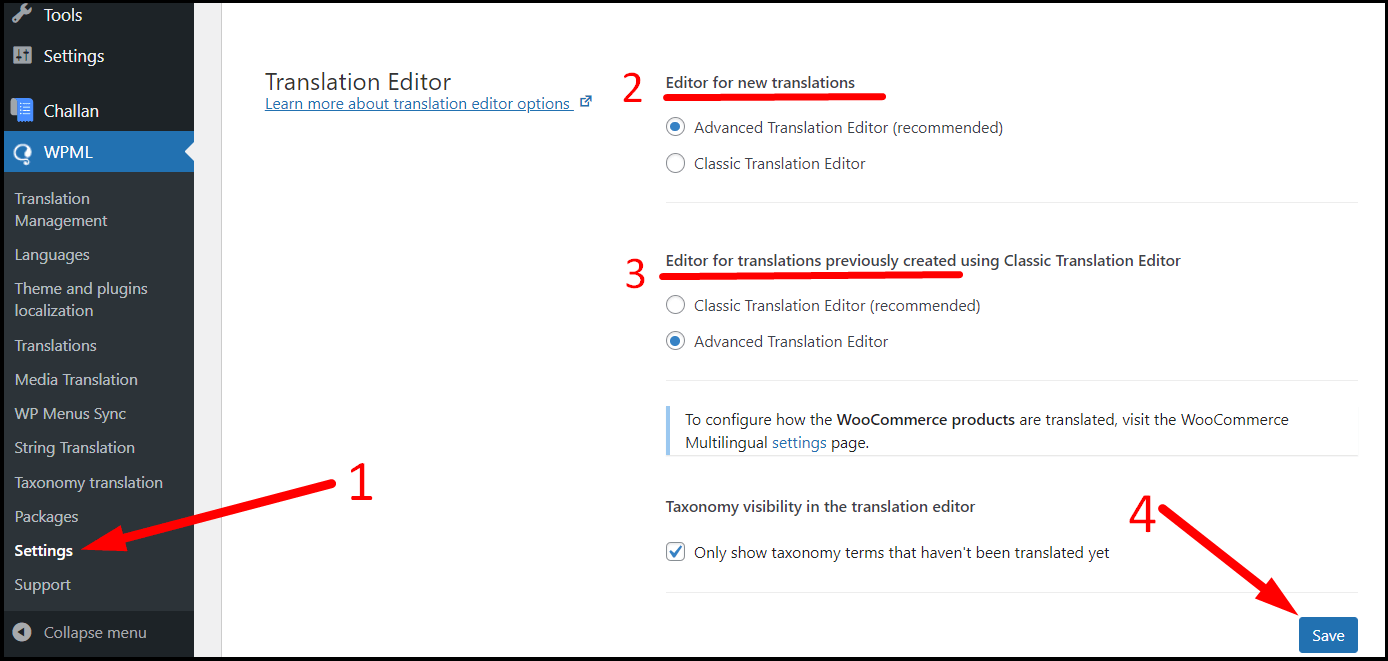
Step #2: Enable Advanced Translation Editor
While setting up WPML, there will be two different translation methods. You can also change it by navigating to WPML -> Settings.
- Translate everything &
- Translate some
As the name suggests, the first option will automatically translate the whole website and the second option will translate whichever part you want to translate.
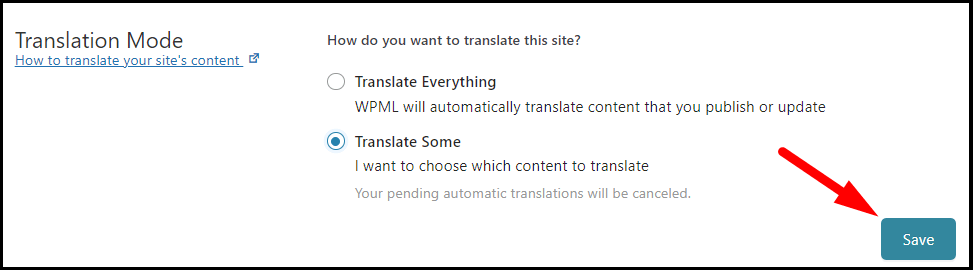
However, WPML offers a reviewing option before publishing the translated version online.
Now, you have to enable the advanced translation editor for further translation.
Step #3: Changing Product Information
Now we have to translate the product description into our preferred language. To do this, you have to navigate – Products -> All Products. Then check the rightmost column of the product page to access the translation panel.
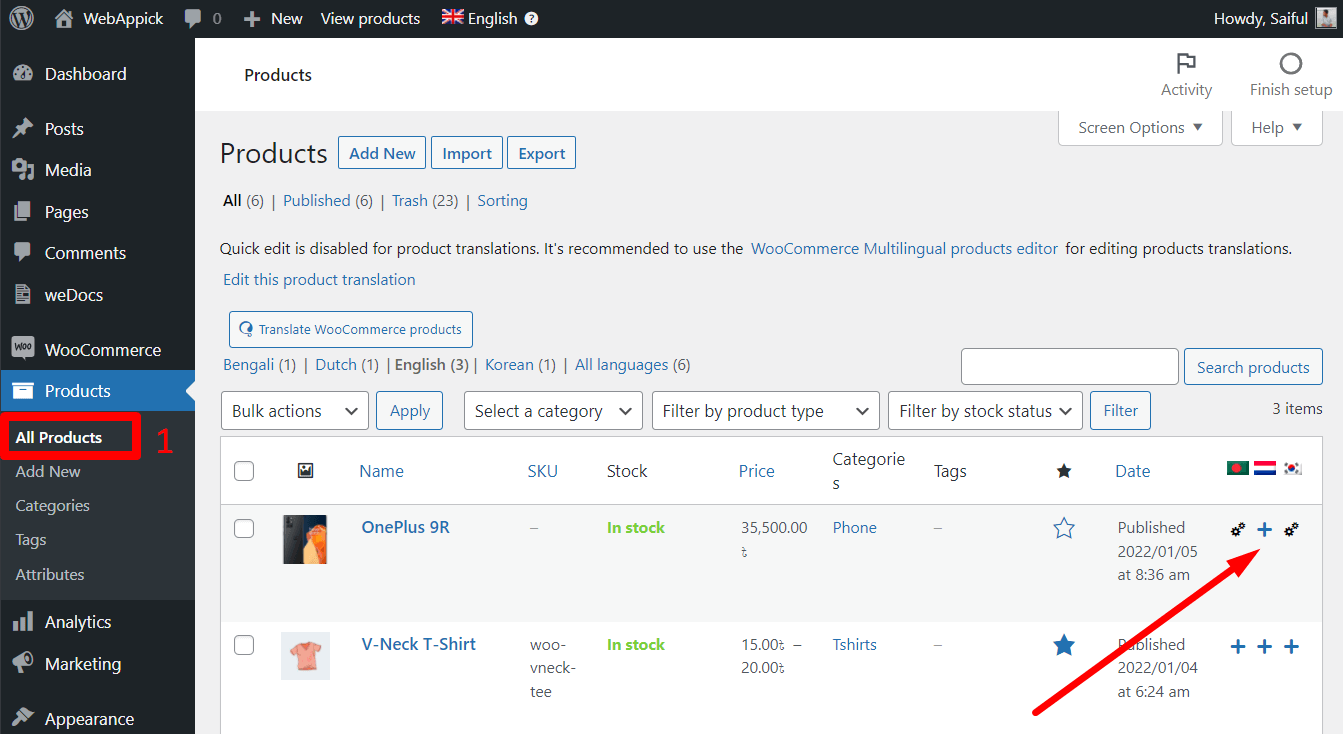
Click on the plus (➕) sign under your desired language to translate the products. However, after translating for the first time, the plus sign will be changed into the settings (⚙) icon. You have to click on that settings icon for further modification.
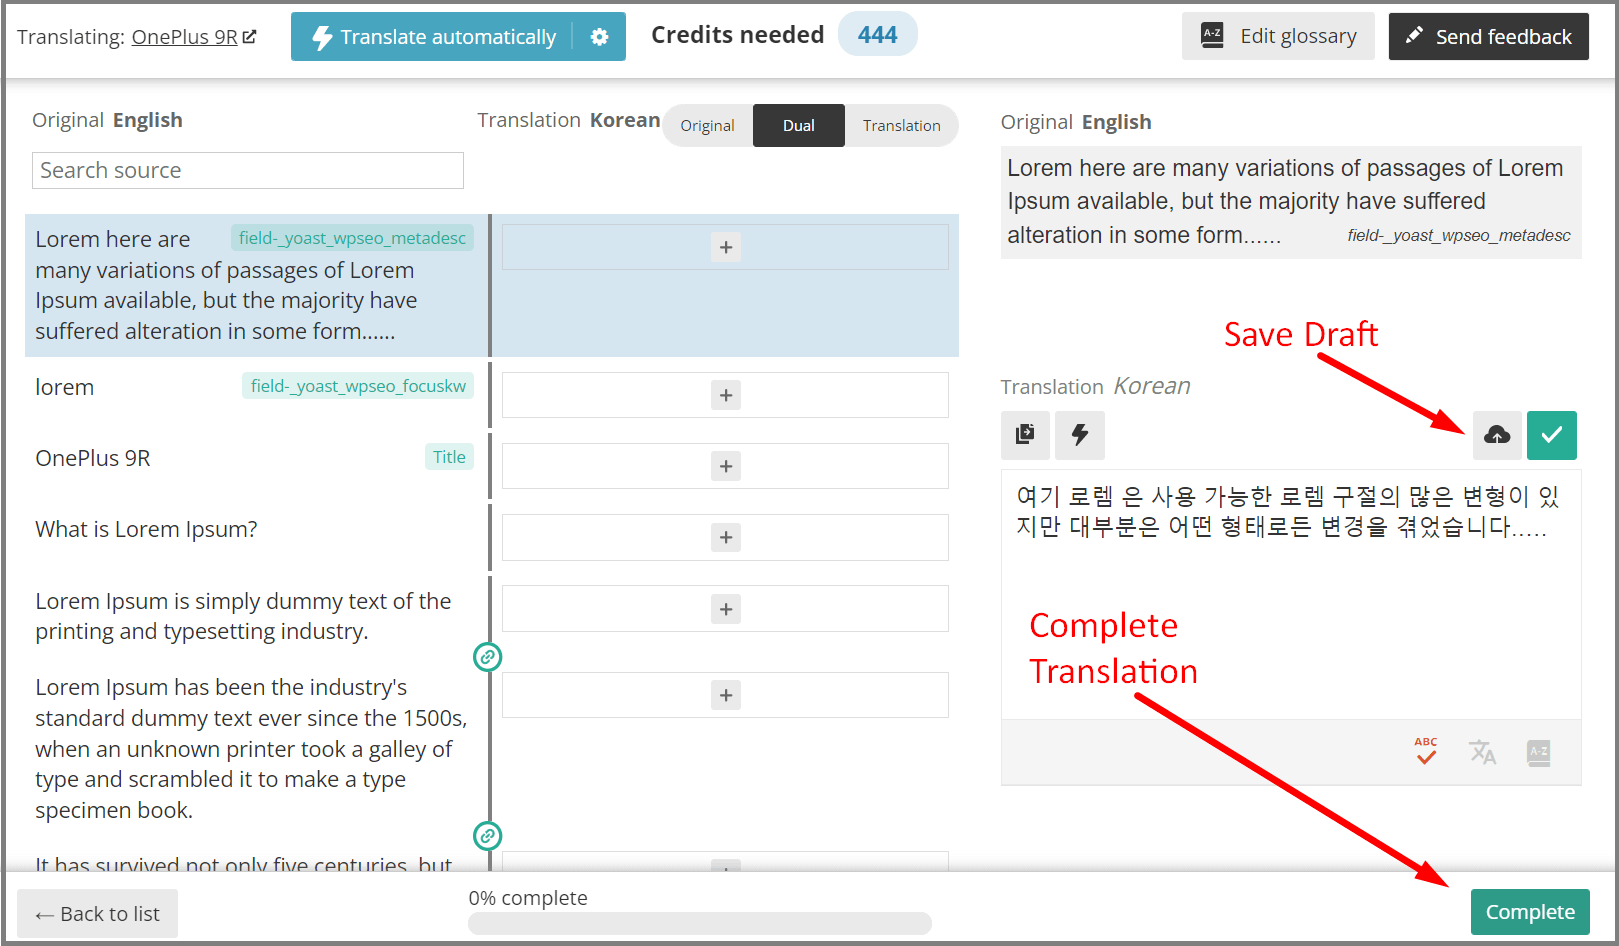
Note: This advanced translator will redirect you to WPML’s own translation domain. There’s nothing to worry about that.
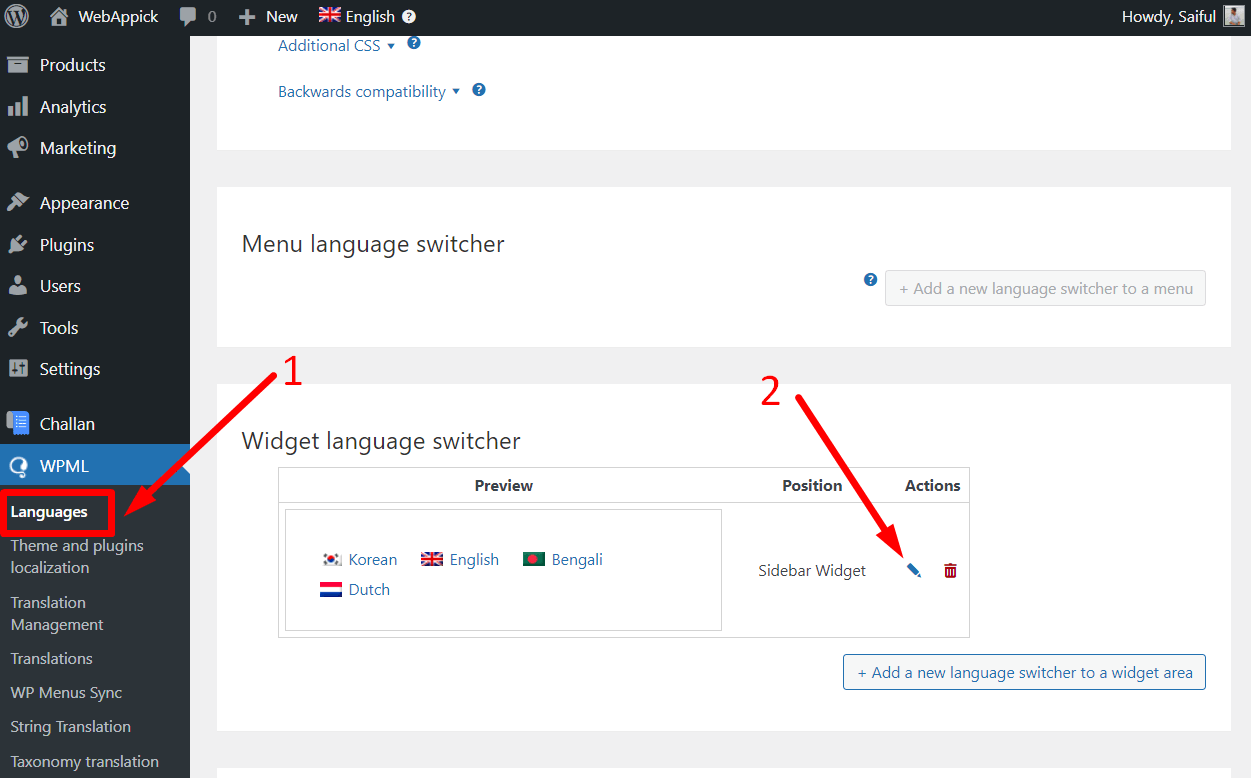
Step #3: Adding Language Switcher Widget
To add the language switcher widget, navigate to
WPML -> Languages -> Language switcher options
Now change the website language from the user-end. The language will be automatically changed into your desired language. You can add the language changing option from the “Widget language switcher” option.
From here, you can change the following options –
- Widget location
- Language presentation style
- Flag size etc.
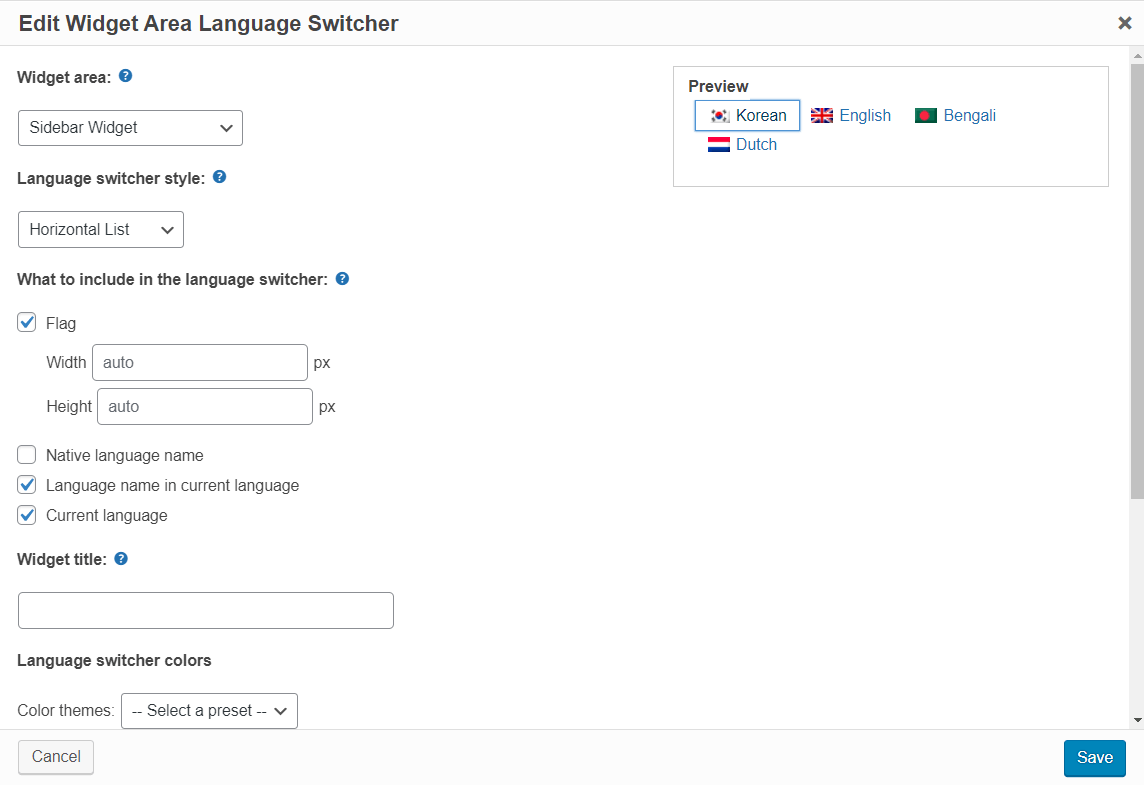
You can preview the changes from the Preview box on the right-side pane. Once you are done with the settings, click the Save button. You can change the language switcher widget into multiple formats such as horizontally, vertically, or in a dropdown style.
Step #4: Changing Website Language
Let’s have a look at whether our product description changes or not. Here’s our default product description page –
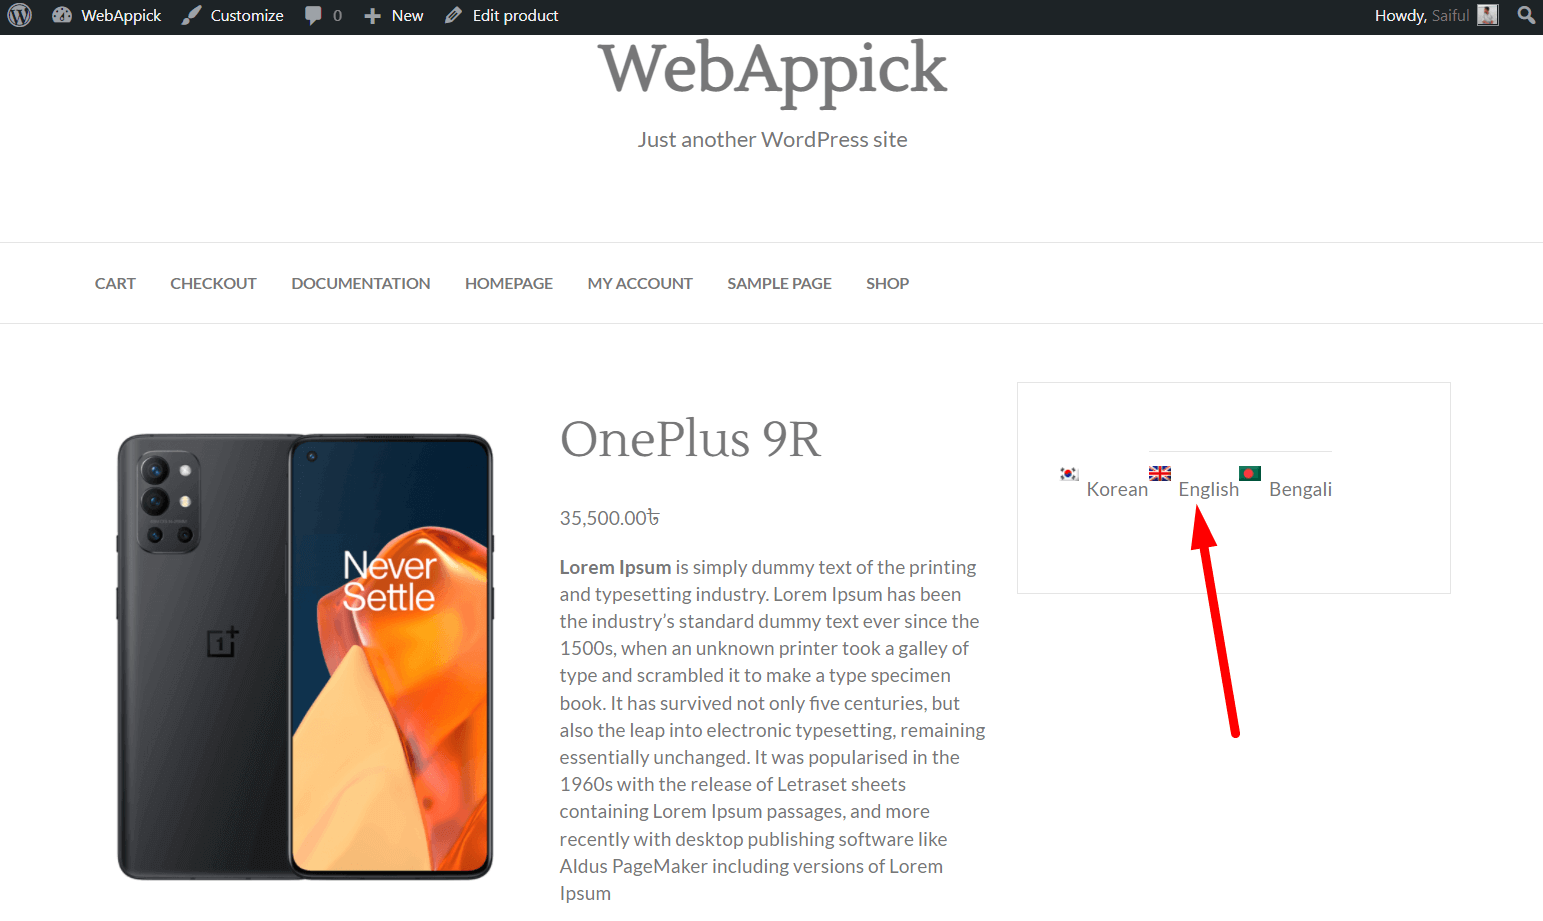
Now, click on your desired language to check whether the product language changes or not. Let’s click on the Korean language.
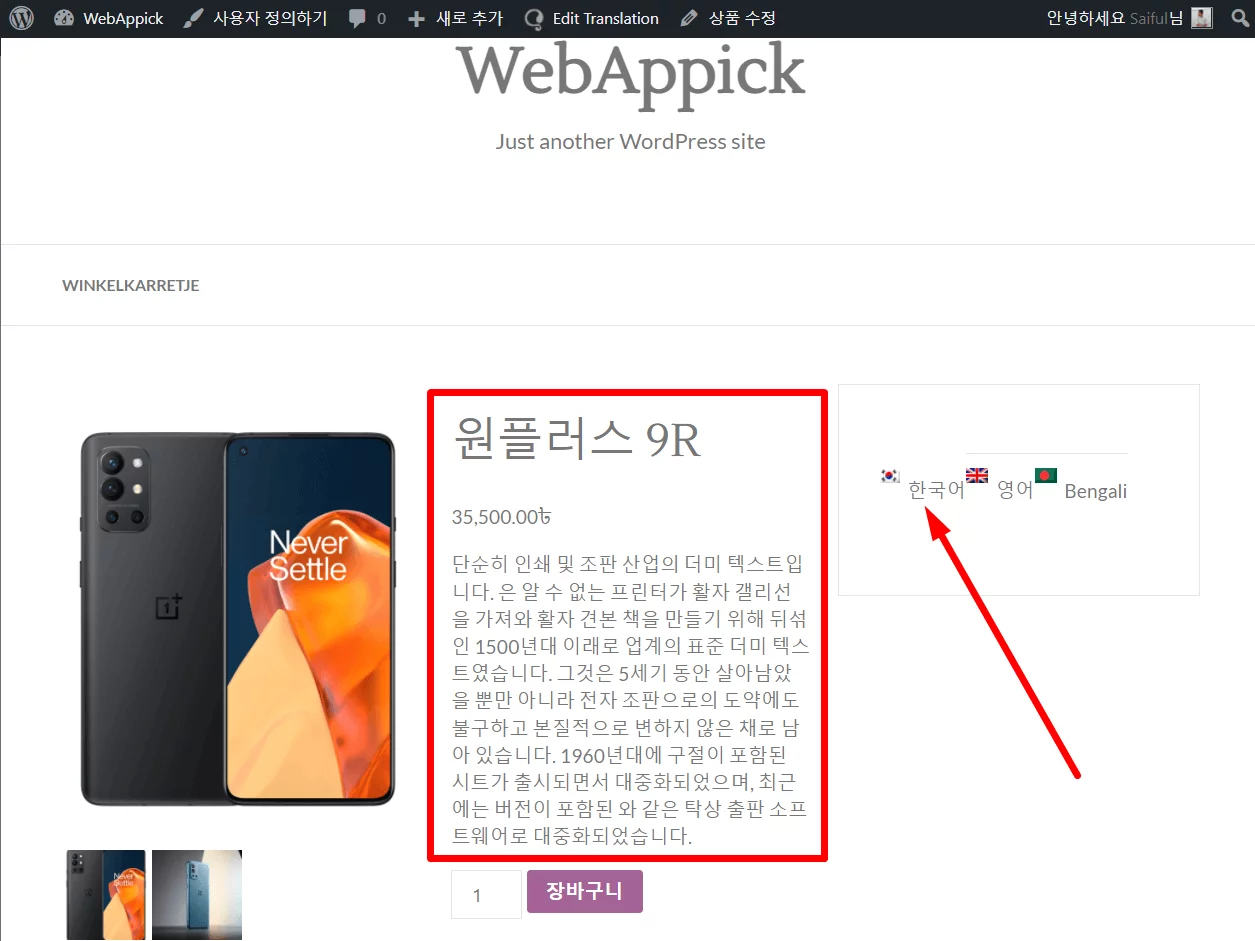
So, our product has been successfully translated into the Korean language. Now, it’s time to generate an invoice for this product with Challan.
Step #5: Generating Translated Invoices
Both the eCommerce owner and shoppers will get the translated invoices if Challan & WPML is installed there.
When a customer placed an order from the translated website, they will get the translated invoice.

If you are the shop owner and want to check the generate a translated PDF invoice, you have to proceed to the WooCommerce -> Orders and check the orders. Click on your desired order and generate an invoice from the Challan sidebar.
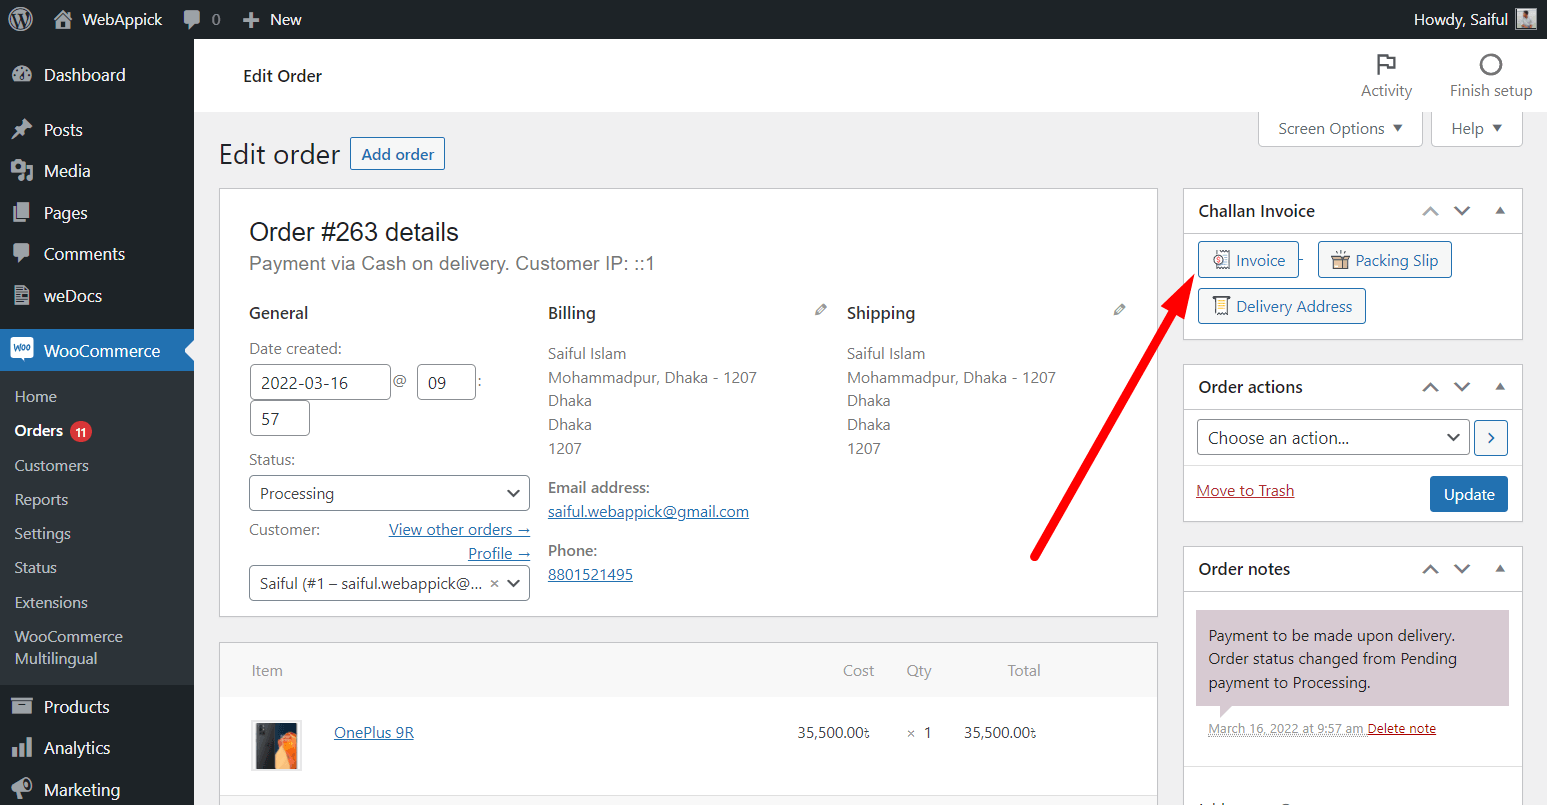
After clicking on that Invoice button, you will get the translated invoice like below –
That’s how you can translate your invoices into different languages by using WPML.

