How to Set Up Unsubscribe Link In WooCommerce: Two Easy Ways
Managing email communications effectively is essential for maintaining customer trust, enhancing your engagement rates, and complying with email marketing regulations like GDPR, PECR, and CAN-SPAM.
As a WooCommerce business owner, your priority should be to make using your webstore as easy as possible for your customers, whether that’s navigate your website, buy products from you, or unsubscribe from your service if they feel like it.
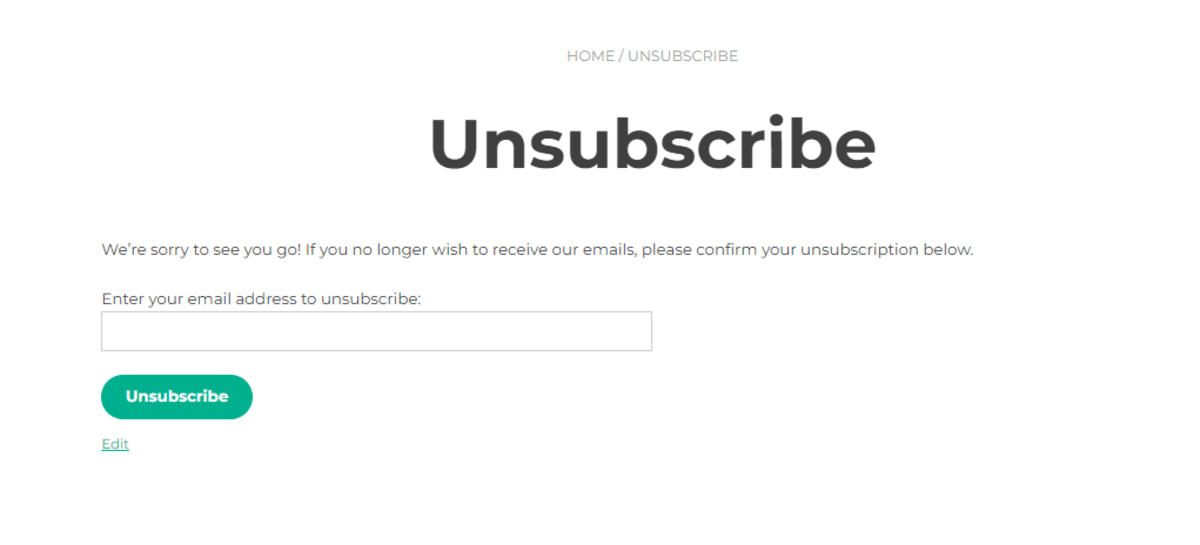
Providing a clear and functional unsubscribe link in your WooCommerce emails ensures that recipients can opt out of receiving unwanted messages, fostering transparency and improving your brand reputation.
In this guide, we’ll walk you through the easiest ways you can set up an unsubscribe link in your WooCommerce emails, whether you’re using the default email system, a custom landing page, or a dedicated third-party plugin.
So, let’s get right into it!
Method 1: Using a Dedicated WooCommerce Email Plugin
If you’re sending marketing or transactional emails directly through WooCommerce, a dedicated email plugin will streamline your entire email marketing process, and automate most of your tasks, including adding an automated unsubscribe link with every mail.
There are many known email plugins that can help you set up an Unsubscribe link in your WooCommerce mails.

Besides, these plugins are known to offer professional, customizable designs to make your promotional and transactional emails look more professional.
Here are our picks on the top WooCommerce email plugins that can allow you to set up an unsubscribe link in your WooCommerce mails for seconds.
| Name | Key Features | Starting Price |
|---|---|---|
| Mailchimp | Advanced email marketing automation, Built-in unsubscribe links, Audience segmentation, pre-designed templates | $13/month (Free Version Available) |
| weMail | Multiple email design templates, Analytics and reporting, Opt-in forms, Team collaboration features, Unsubscribe link management | $9/month (Free Version Available) |
| Omnisend | Email and SMS marketing integration, pre-built automation workflows, Advanced segmentation, Popups and signup forms, Unsubscribe link management | $11.20/month (Free Version Available) |
| AutomateWoo | Workflow automation for WooCommerce, Customizable email templates, Automatic unsubscribe link insertion | $13.25/month |
| MailPoet | Automated email campaigns, Built-in unsubscribe management, GDPR-compliant signup forms, Customizable email templates | $10/month (Free Version Available) |
For our guide today, we’re exploring one of the most widely known email marketing platforms across the globe, Mailchimp. Here’s how you can set up unsubscribe links in WooCommerce using MailChimp:
1. Install and Activate Mailchimp
- Navigate to Plugins > Add New from your WordPress dashboard.
- Search for “Mailchimp for WooCommerce” in the search bar.
- When the plugin appears, click to install and activate the plugin.

- Then navigate to Mailchimp from your WP side menu.
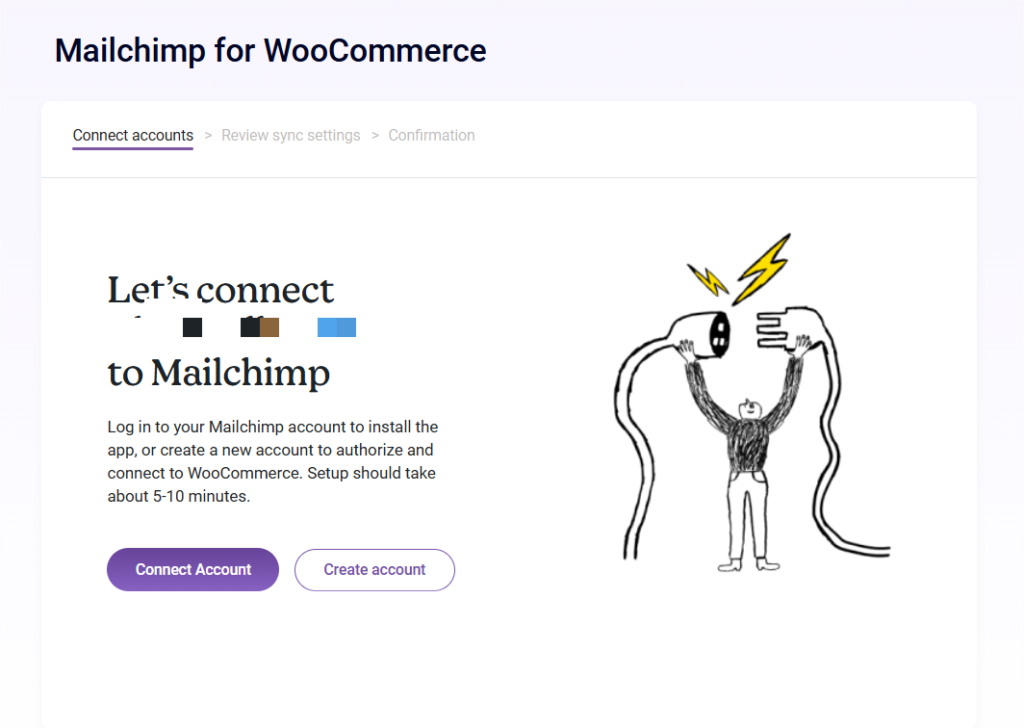
- You’ll see a new window to connect Mailchimp to your WooCommerce store. If you’re new at this, create a Mailchimp account first. If you already have one, you can simply integrate Mailchimp in just a few clicks.
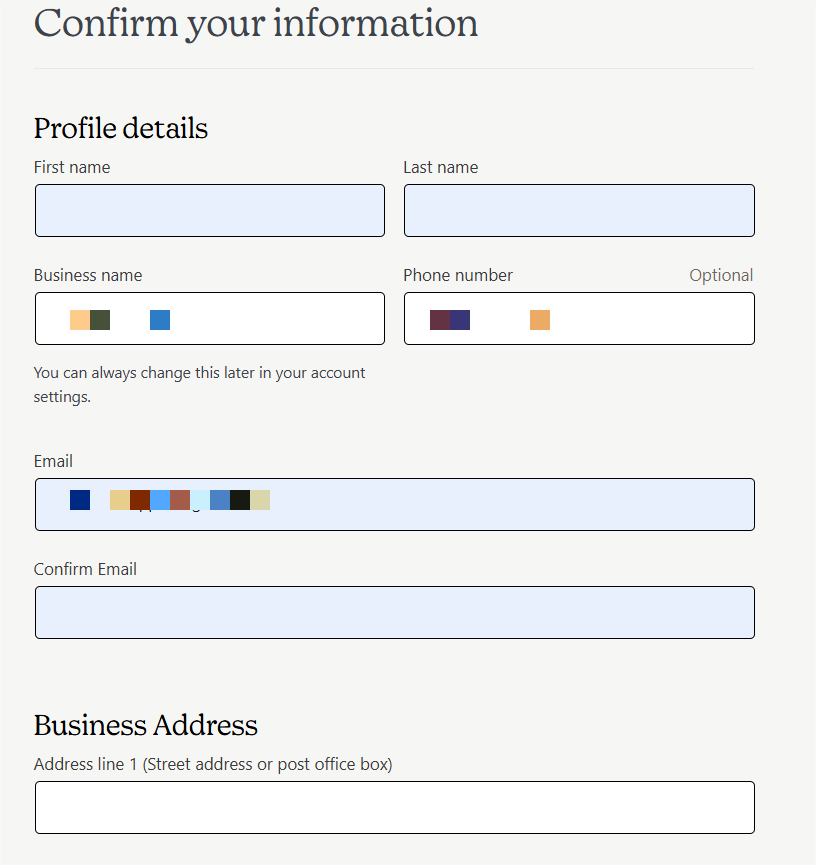
- For the new users, you’ll need to provide information on you and your business to move forward.
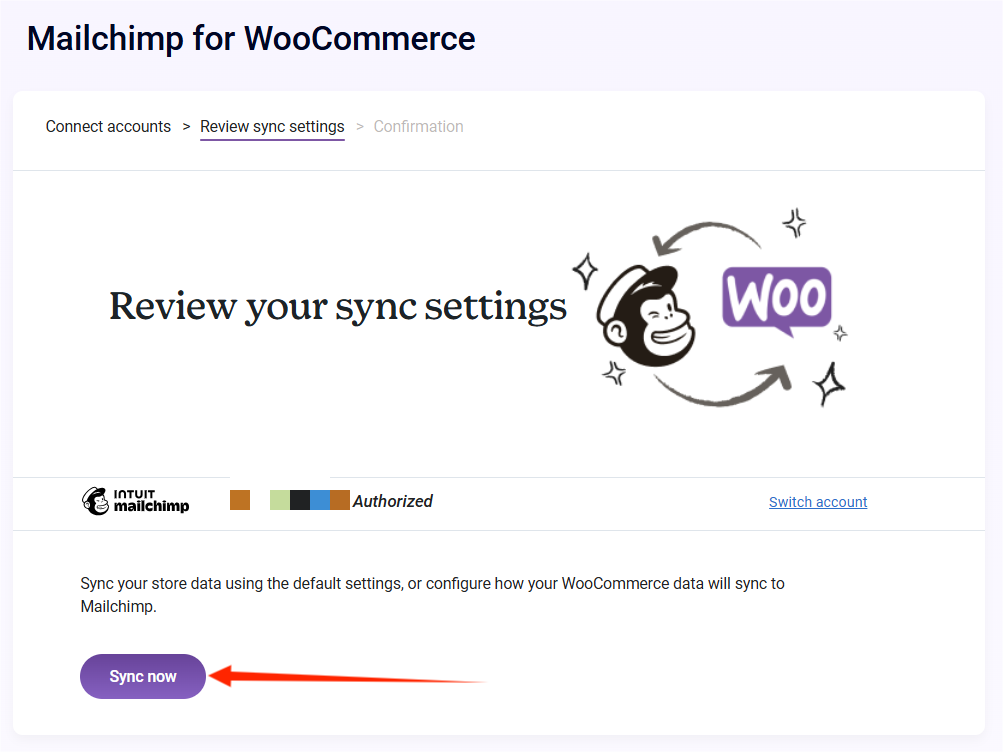
- Next, sync your WooCommerce store with Mailchimp by clicking the “Sync Now” Button.
2. Select and Edit an Email Template
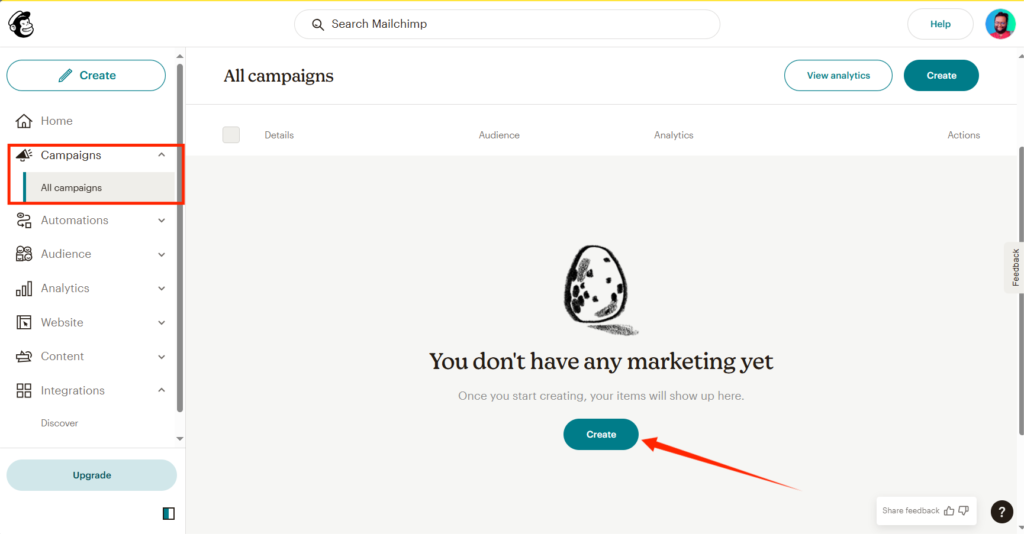
- From your Mailchimp dashboard, click on the campaign tab.
- Click on the create button to start a new campaign
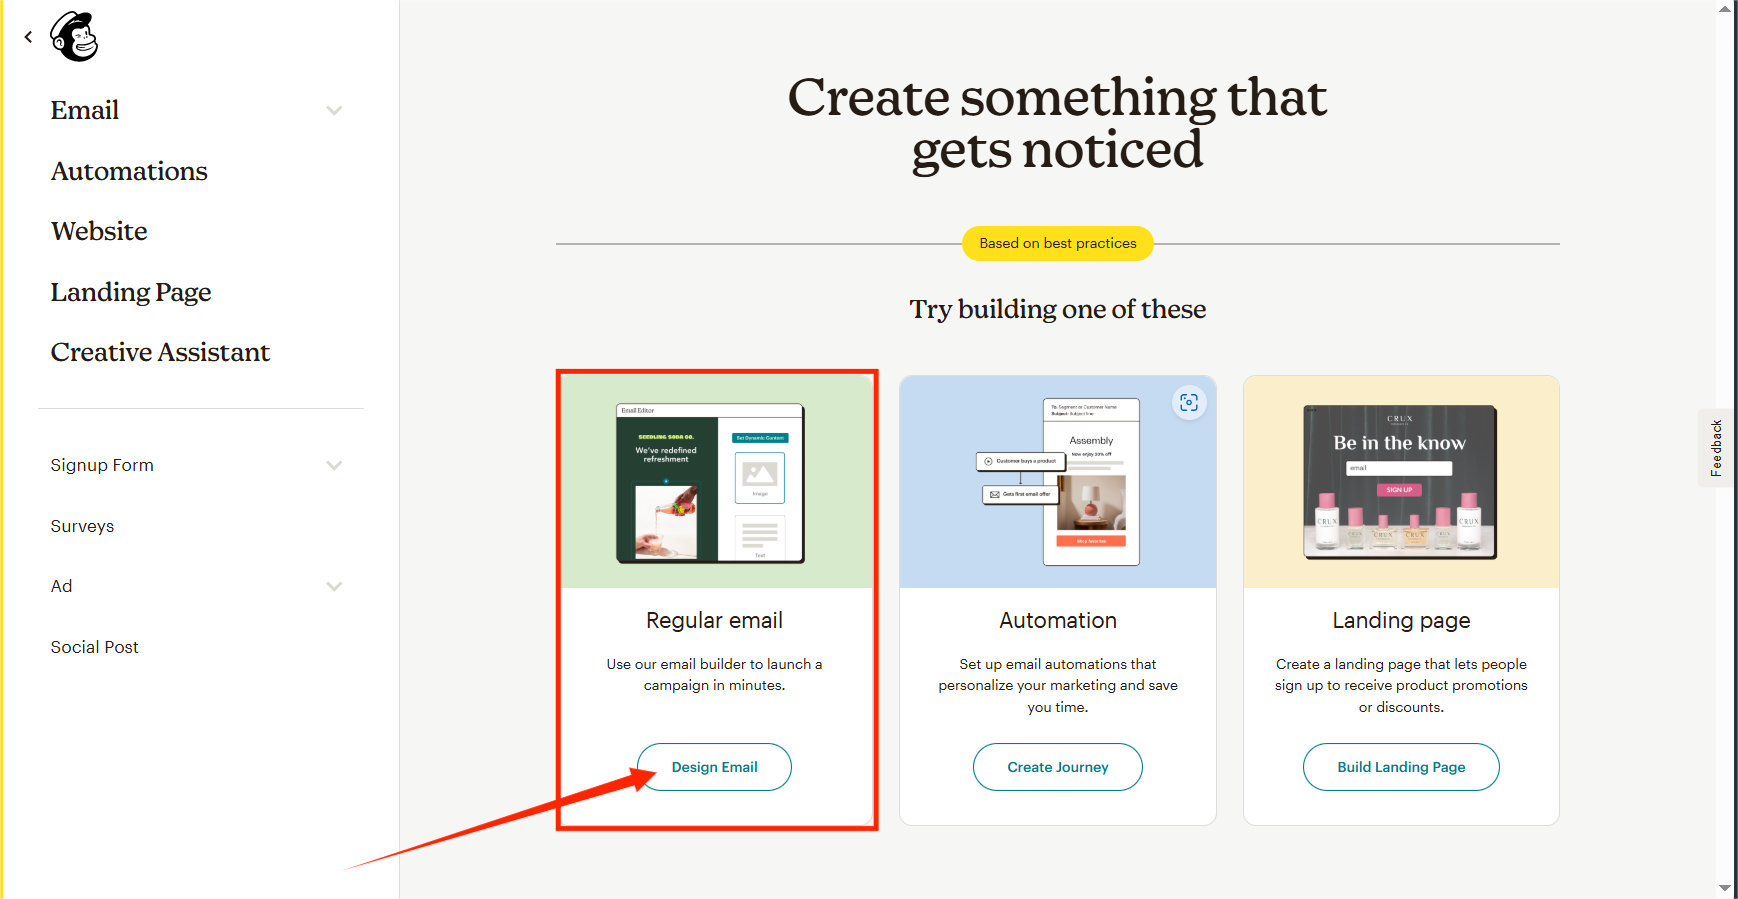
- You’ll get three options to choose from: Regular mail, Automation, and Landing page. Let’s select regular mail. Click on the “Design Email” to get started.
- Next, choose whether you want to create an email from scratch, use a basic layout, or a fully designed template. We’re selecting the basic layout.
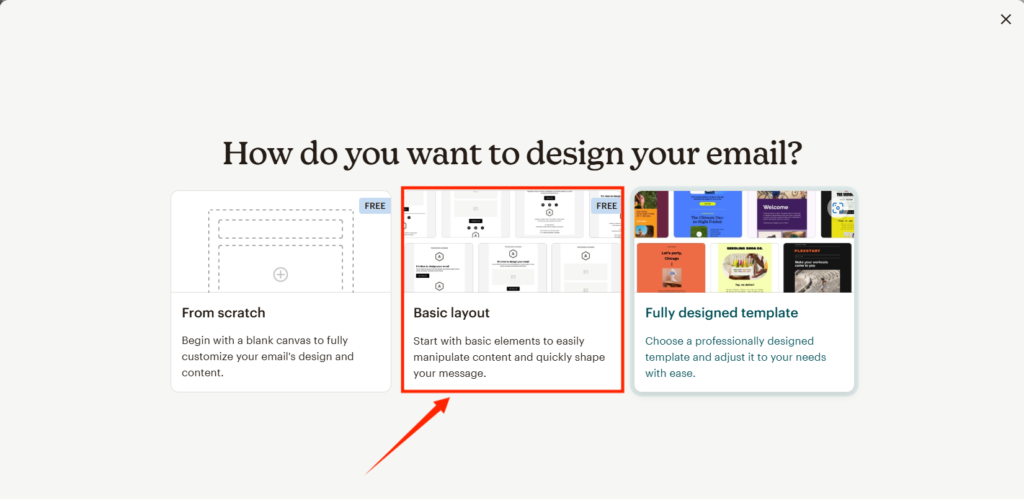
- Mailchimp will present a range of basic templates to choose from. Pick the one you like and start editing.
- The editor will open and you’ll be able to customize every element of your email.
3. Insert The Unsubscribe Link
- Mailchimp automatically adds an unsubscribe link in every email footer. Scroll down to locate the unsubscribe link.
- Click the link and you’ll see the link button above on the menu. Once you click the button, a dropdown will appear. Select “Web” from the dropdown menu and enter the link of your unsubscribe page in the box below. (Ex: https://yourstore.com/unsubscribe)
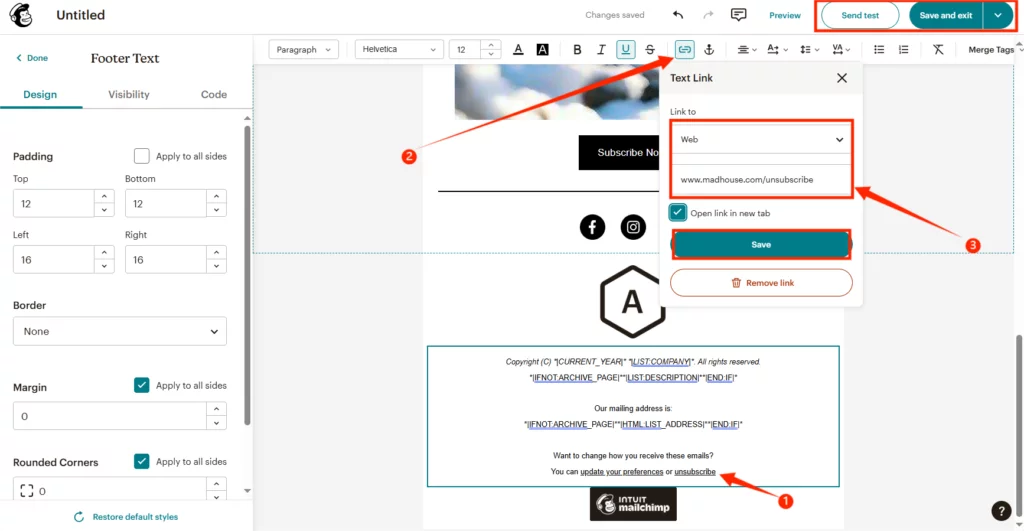
- Most platforms provide a prebuilt placeholder for unsubscribe links. You can also use Mailchimp’s merge tag *|UNSUB|* to add the unsubscribe link.
4. Save and Test the Email
- Lastly, click on the “Send test” button to check if the changes have been applied. If you’re happy with the test result, click on the “Save and Exit” button.
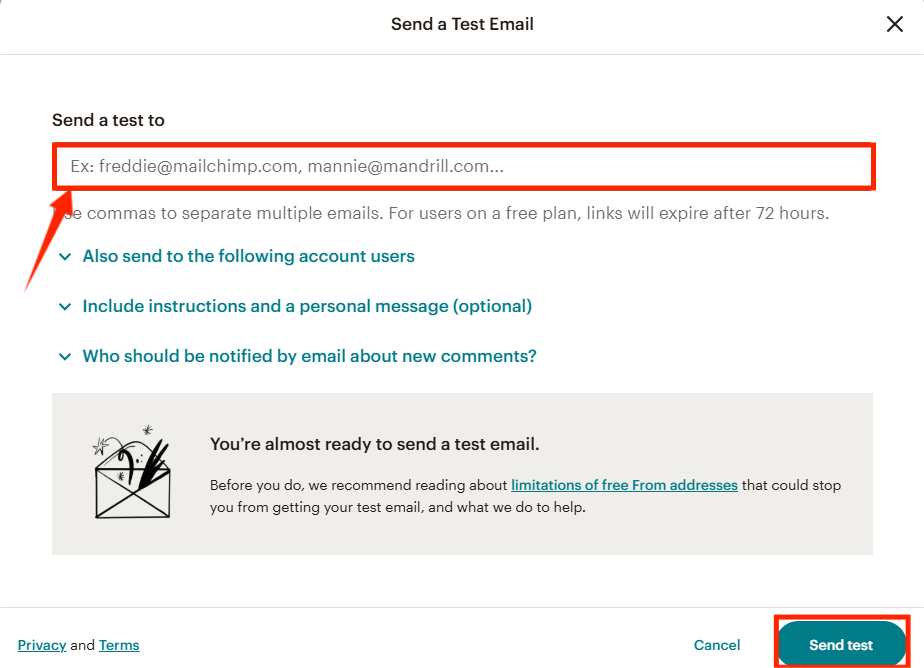
- You can send this email directly from Mailchimp dashboard, or even save it as a draft for future use.
Method 2: Using WooCommerce’s Built-in Email Features
Although WooCommerce doesn’t have built-in email marketing features, it sends transactional emails (like order confirmations).
If you need more control over the unsubscribe experience and want to add a simple unsubscribe option in these emails too, here’s how to do it:
- First, go to WooCommerce > Settings > Emails from your WordPress dashboard.
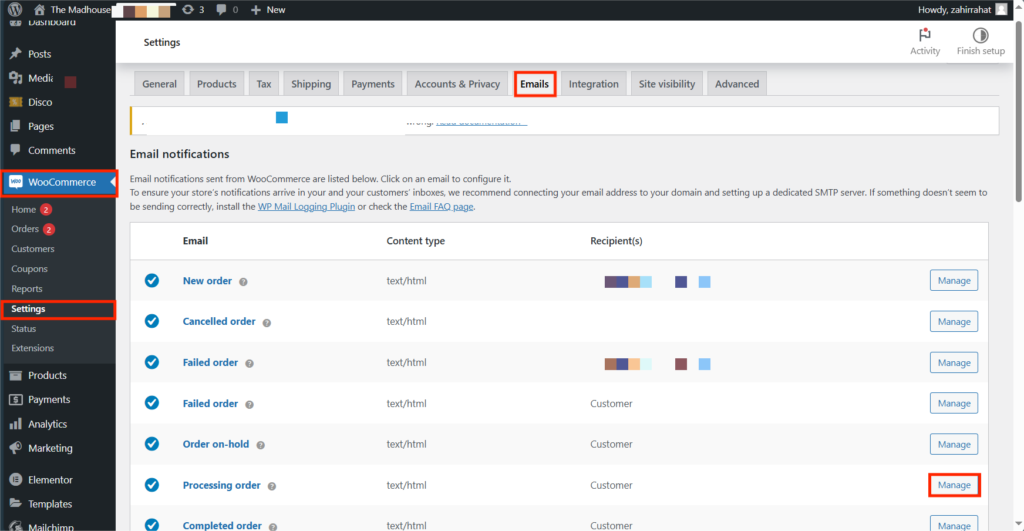
- Select the email you want to customize.
- Add a simple unsubscribe link at the bottom of your email template, like this:
<p>If you don’t want to receive emails from us, please click <a href="[unsubscribe_url]"> Here</a> to Unsubscribe </p>- Replace [unsubscribe_url] with the link to your unsubscribe page (e.g., https://yourstore.com/unsubscribe).
- Lastly, test the email before saving the settings.
Pro Tips for Effective Unsubscribe Management (H2)
Managing your unsubscribe process effectively is essential for maintaining a positive brand image, ensuring compliance with email regulations, and fostering customer trust.
While setting up an unsubscribe link is the first step, optimizing how you handle unsubscribes can significantly impact your long-term email marketing success. Here are some pro tips on how you can leverage unsubscribe links to create a positive user experience:
- Don’t try to hide the unsubscribe link in your emails. A hard-to-find unsubscribe link frustrates recipients and may result in them marking your emails as spam instead of opting out. Place the unsubscribe link in the footer or a prominent section of the email to avoid user frustration.
- Create a preference center where users can choose the types of emails they want to receive (e.g., newsletters, promotions, order updates) and set their desired frequency (e.g., weekly, monthly).
- Redirect users to a confirmation page with a message like:“You have successfully unsubscribed. We’re sorry to see you go! If this was a mistake, click here to resubscribe.”
- Users may unsubscribe temporarily but might want to rejoin your email list later. Make it easy for them to resubscribe by including a re-subscription option on your website or in transactional emails.
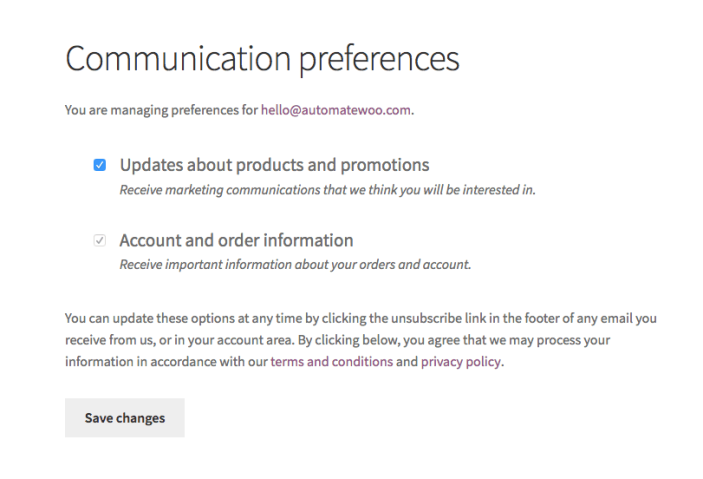
- Ensure your unsubscribe link adheres to GDPR, CAN-SPAM, or other relevant laws in your region. Do not send marketing emails to unsubscribed users unless they opt in again.
- Use your email marketing platform’s analytics dashboard to track unsubscribe rates per campaign. Also, if certain types of emails result in more unsubscribes, consider revising the content or frequency. Aim for an unsubscribe rate below 1%.
- Use the unsubscribe process as an opportunity to learn more about why users are opting out. You can add a brief survey asking users to select a reason for unsubscribing, land them on a custom unsubscribe page, and show them personalized texts to build a long term relationship.
Over to You
Adding an unsubscribe link to your WooCommerce emails is essential for easy legal compliance and maintaining a positive customer relationship.
Whether you use a customizer plugin, or create a custom mail in WooCommerce, the key is to make the process simple, transparent, and user-friendly.
However, it’s essential to remember that, even if a user unsubscribes from your marketing emails, they should still receive important transactional emails (e.g., order confirmations, shipping updates).

Ensure that your unsubscribe process only applies to marketing communications.
And that’s about it for today. Hope you guys find this post helpful and can use this guide to provide a seamless experience for your customers.
Need more WooCommerce tips to optimize your store? Explore our in-depth blogs for expert guides and actionable strategies!
We’re here to help you level up your WooCommerce business. For more queries or further assistance, contact us today. Here’s to your online success.
