
How to Set Shipping Cost on Google Merchant based on Weight
Shopping is essential to get the necessary things for our daily lives. There are lots of
people who love shopping as it also helps them feel good. Now, shopping is easier than
ever. Online shopping has changed the way we used to purchase goods for our day-to-
day needs.
More and more people are getting habituated with online shopping. The industry is
booming with new opportunities, and competition has also skyrocketed. This guide will
find how to set the shipping costs for your WooCommerce products promoted on
Google Merchant.
After completing this post, you will have a perfect grasp of how to set shipping costs on
Google Merchant. Most importantly, you will have the required knowledge to set
shipping costs on Google Merchant based on Weight.
As we live in an online shopping-dominated world, we are familiar with the shipping
cost. So, shipping costs should be nothing new to you. You are already shipping
products to your customers with additional costs.
Shipping costs are also known as shipping charges or delivery charges. Shipping costs
are additional charges added with the product’s price that are added with the product’s
price to make it available at your doorstep.
The shipping charge is not static as it will change based on various facts, including the
distance between customer and product location, a specific region of the location, the
weight or dimension of the product, and the nature of the product. You will also notice
that some products do not have any shipping costs. So, you can enjoy free delivery of
those products.

Google shopping is one of the leading marketplaces for WooCommerce store owners to
promote their products. It helps to gain a higher exposure for the products and also to
secure a higher revenue. With Google Shopping, you can reach thousands of customers
all around the world. So the shipping cost is also different.
Based on the weight of your WooCommerce products, you need to control the shipping
cost on Google Shopping too. You will be glad to know that setting shipping costs on
Google Merchant based on weight is very easy.

Customers Love Lower Shipping Costs
Google Shopping brings equal opportunities both for the customers and also for store
owners.
First of all, the customer gets the opportunity to access lots of similar options from
various stores.
Secondly, they can easily compare the available options and choose the best one for
them. On the contrary, store owners can also secure a better exposure for their
products. They could not have done this without the help of Google Shopping.
Your customers will move to other options if your products have a higher shipping cost.
Customers will always prefer the lowest shipping cost while they select a product to
purchase.
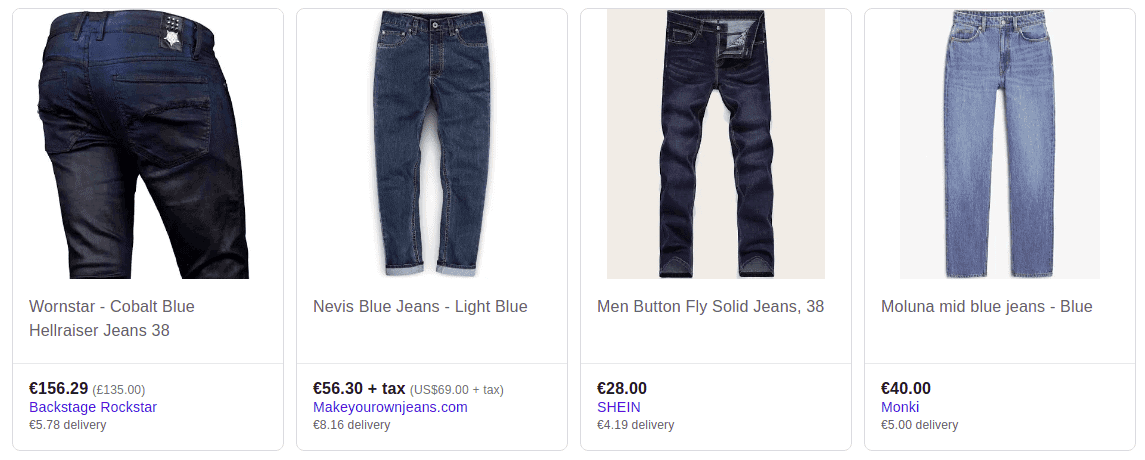
You must have noticed that in Google Shopping Ads, the price is displayed with the shipping cost.
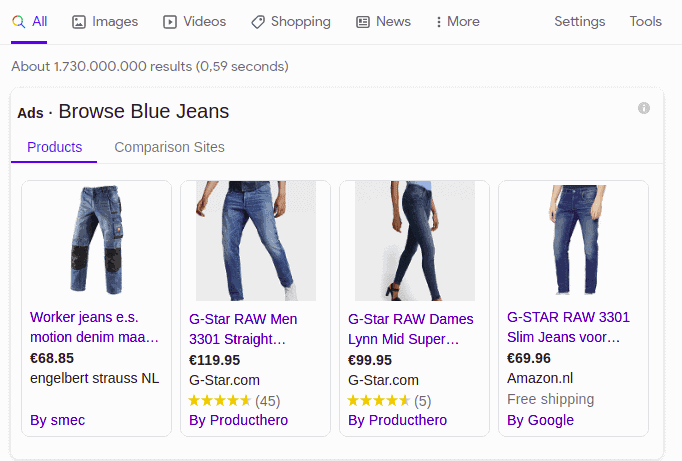
For earning the eligibility to enjoy the benefits of Google Shopping Ads, you need first to
submit your products to the Google Merchant Center. Products are submitted on
Google Merchant Center in the form of a product feed.
The product feed file contains the list of the products and their essential attributes. CTX
Feed is the leading product feed generation and management plugin for
WooCommerce. With CTX Feed, you can create and manage product feed for your
desired platforms with ease. Learn to create and submit product feed for Google
Shopping Ads.
To display the shipping cost with your promoted products on Google, you will need to
follow this guide that we will share below.

Setting Up Shipping Costs Via Google Merchant Center
Before you set up shipping costs on Google Merchant Center, make sure you are aware of the following important notes.
- First of all, make sure that the shipping cost that you enter on your Google Merchant Center account also matches with the cost on your WooCommerce website.
- Secondly, you can also overestimate the cost and put it in the Google Merchant Center. Try to keep the cost reasonable because customers prefer products with lower shipping costs.
- Thirdly, you can follow different methods to create the shipping service. You can either create the shipping service on Google Merchant Center to configure the shipping settings for all products. Additionally, you can apply it to a group of products that you can specify by a shipping_label.
- Moreover, if your shop has multiple shipping services for the same products, you can and should set the shipping cost, delivery time, and other information separately for each of them.
- Finally, you should note that if you have multiple shipping services for the same country, then Google Merchant Center will display the lowest price to your customers for those products.
Please make sure to follow the above notes so that you can stay safe by avoiding flags on Google Merchant Center. Learn more about the common flags on Google Merchant Center and how to fix them from this post. Let’s continue our journey by setting up the shipping costs on Google Merchant Center.
To begin with the process, you will have to log in to your Google Merchant Center account. Once you have logged in, click on the settings icon and select Shipping and returns from the TOOLS section.
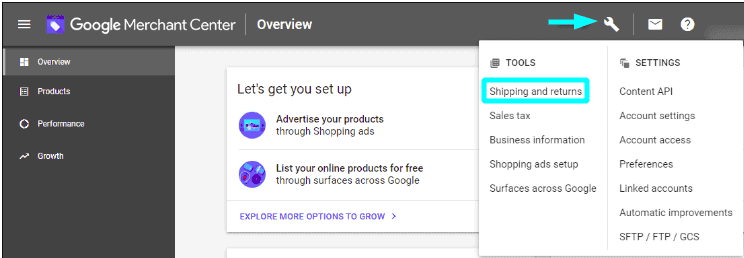
The Service Settings Section of Google Merchant
Clicking on the Shipping and returns option will take you to the main page from where you can control all the shipping services associated with your WooCommerce store.
You will find a + icon there. Clicking on the + icon will take you to the interface to add new shipping services for your products. You will have to deal with the service settings of your new shipping.

Let’s walk you through all the steps in this section.
Setting a service name
First comes the option to enter a service name. You need to enter a unique name here for the service. The name has to be unique, so you cannot use it again.
Setting a service area
Secondly, you will have to choose the service area. Here you will have to select the location from where the products are delivered. You can also select multiple counties if you have multi-country shipping.
Finally, you will have to set the currency here. Please make sure that all information matches with your product data feed that you have uploaded to Google Merchant Center.

Delivery Time in Google Merchant Center
You are done with the service settings section. Next, you will have to deal with the Delivery time.
Taking care of the order cutoff time
First of all, you will have to enter the cutoff time. The cutoff time helps to improve shipping management. If an order is placed after the cutoff time, it will be processed the next day. You will have to enter a time zone too.
Taking care of the order handling time
Secondly, you have to take care of the handling time. Here you need to enter the minimum and maximum time to process the order. If you can process an order on that same day if it is placed before the cutoff time, you can enter 0-0 as your handling time.
Additionally, you will have to enter the days or a range of the days when you process the orders.
Taking care of the transit time
Finally comes the transit time. Here you will have to add the estimated days to transit the products to your customers. If you enter something like 1-4, your customers can assume the delivery based on that date.
On top of that, you will also have to add the days when you ship your products. You can enter a range of days like Monday – Friday and so on.
With the combination of the three fields that we discussed above, the estimation delivery will be made. The good thing is, if there is any public holiday that falls between the estimated days, it will be considered. As a result, the estimation will also reflect the considered holiday.
Advanced Settings of Google Merchant Center
Next comes the advanced settings. This setting is optional, but we will still share this with you for insights.

Though optional, you can gain some additional control from here. First and foremost, you can set a minimum order value from here. This is the minimum cost spent by the customer so that they can become eligible for shipping services.
You can leave it blank, so there is no restriction. Additionally, you can set a holiday shipping cutoff from here.
Once you have taken care of the steps, you can move forward and set up the shipping rates.
Setting Up the Shipping Rates
From the Shipping rates section, you can set up the shipping rates table and labels to products. You can set different shipping rates for different product types like oversized, perishable, and fragile by assigning the shipping_label option.
You will find a + icon here, too, and clicking on the icon will take you to the interface where you can set the shipping rates.
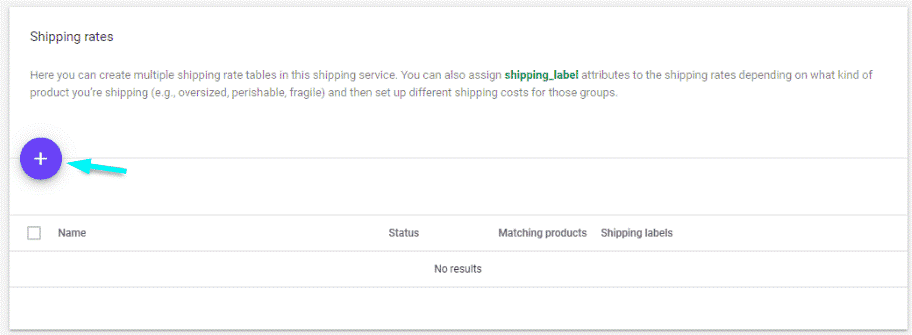
First of all, under the affected products tab, you will find that by default, All products are selected. So, the shipping rates that you set from here will apply to all of your products. If you already have a shipping rate table with a shipping label, you will find All other products in place of All products.
This is because some products already have a filter in them. By choosing, filter products by shipping label, you can set rates to specific products only. In addition to that, you can also enter a label that is not included in your product feed. Finally, you need to give your shipping rate table a unique name under the shipping rate name.
Up next, you will have to create the table.
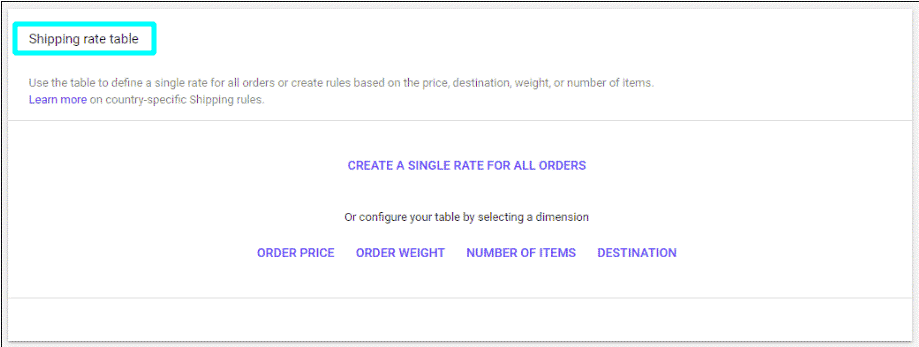
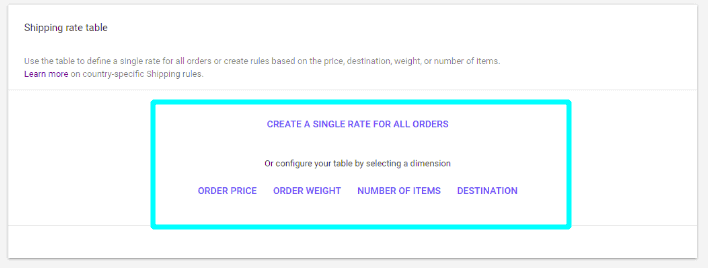
With this table, you can enjoy complete control over your shipping rates. You can either create a universal rule that is applicable for all products. Or you can also set a rule with different dimensions like the price, weight, number of items, and destination.
If you click on CREATE A SINGLE RATE FOR ALL ORDERS, it will take you to the interface to set your rule. You will find the option to configure the dimensions by clicking on the Dimension button.
Setting the shipping cost based on weight
Configuring the dimension is relatively easy. Let’s say you want to configure the weight in kilograms. First, you will have to set a weight range then add a shipping cost applicable for that weight. You will find that there will be multiple options to select from.
There are Fixed-rate, Percentage of order total, Carrier rate, Subtable, and No shipping. If you want to learn more about the options, here is an excellent resource compiled by Google. Please be careful to choose the appropriate one for you.
You can either set a fixed rate or a percentage for your shipping rates. To add different weight ranges, add more rows(with the + ROW button) in your shipping rates and add appropriate shipping rates. You can add more dimensions.
So click on the ADD DIMENSION button to add more dimension. Adding ranges with your second dimension is also easy. You will find the + COLUMN button to add ranges.
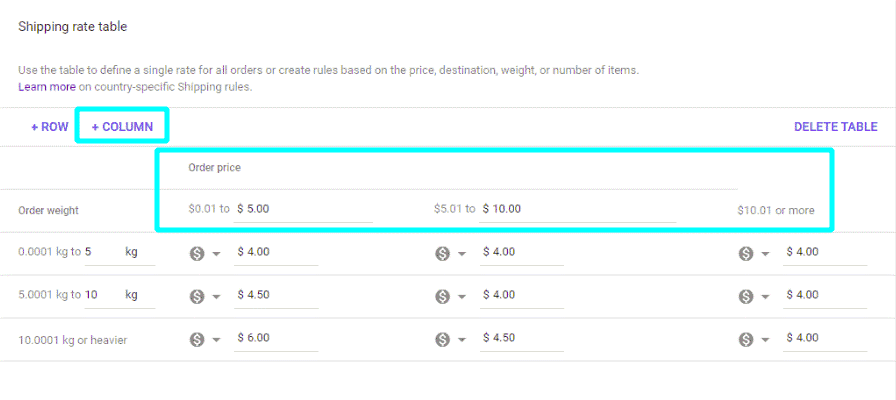
Once you have set everything, click on the Continue button to save your table. You have successfully created a shipping rate table for all orders.
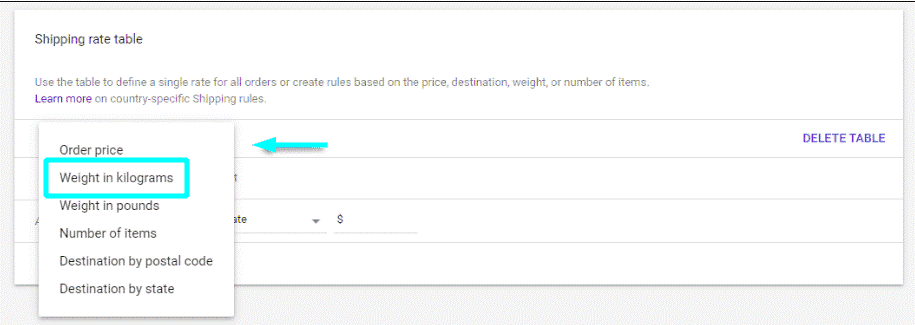
It is also possible to set up the shipping rate table for specific dimensions individually. You will find the option to create shipping rates for different dimensions like ORDER PRICE, ORDER WEIGHT, NUMBER OF ITEMS, and DESTINATION.
Suppose you want to set specific rates for the WEIGHT dimension click on it. Once you have selected weight, set the range and charge as we discussed setting up the shipping rates above.
This is how easy it is to set shipping costs on Google Merchant Center based on weight. Hopefully, you have also found the steps very easy. If you have any confusion or query, you can let us know in the comment section.
Forget the worries associated with your WooCommerce product feed generation for WooCommerce. Get CTX Feed and enjoy its brilliance.

