
How to Add a 20% Discount in WooCommerce
The easiest way to add a 20% discount in WooCommerce is using the Disco – WooCommerce Dynamic Discount Plugin. Quick setup process guide: Install & Activate Disco plugin>> Go to Disco Menu >> Create a Discount >> Name the Discount Campaign & Select Discount Intent (Product) >> Choose Products >> Set Discount Type to Percentage and input value “20” >> Save & Exit.
You will be shocked to know that 91% of Americans check for discounts before making a purchase online, and discounts can boost purchase rates by up to 73%. Sounds exciting, right?
So, offering a 20% discount on WooCommerce can be an effective way to attract new buyers, encourage bulk purchases, and foster customer loyalty.
In this guide, we will walk you through each step to create a 20% Discount in WooCommerce easily and quickly. Let’s Go!
Step 1: Getting Started with Disco Plugin
As we said, the easiest way to add 20% or any other discounts is to use the Disco Plugin. With this plugin, you can set up all major types of discounts, fully customize the discount campaigns, and set different conditions easily & Quickly.

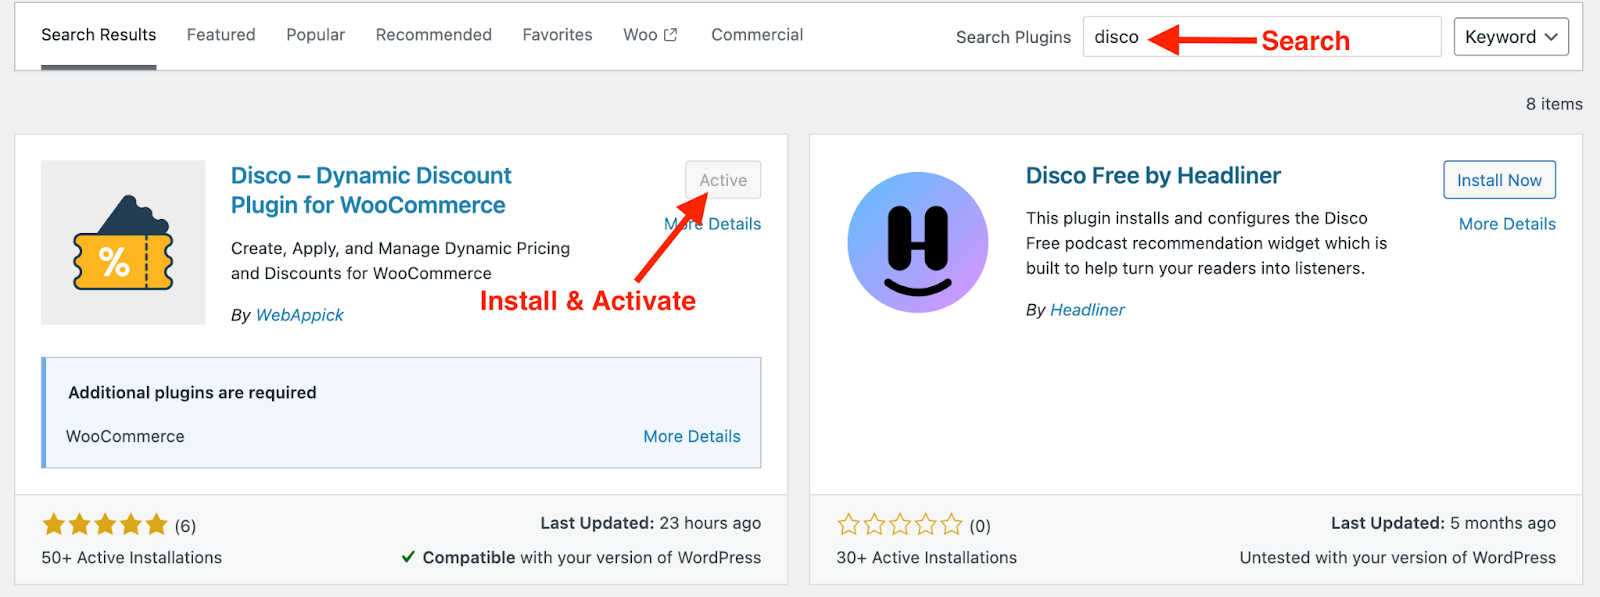
To get started, you need to install and activate this WooCommerce discount plugin. So, from the left side of your WordPress dashboard, go to Plugins >> Add New Plugin.

Search for the “Disco” plugin. Then install and activate it.
Now, let’s set up a 20% Discount for all the products in our WooCommerce store.
Step 2: Select Discount Campaign Name and Choose Discount Intention
To get started with the Disco plugin, navigate to the Disco menu on the left side of your WordPress dashboard.
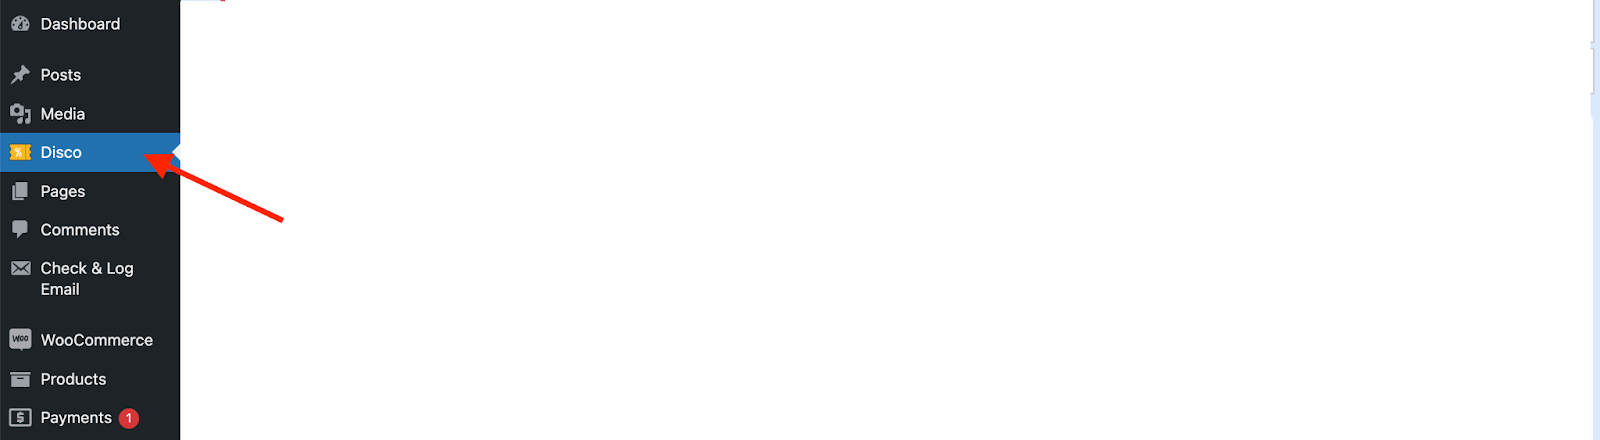
From there, select Create a Discount to set up your new discount campaign.

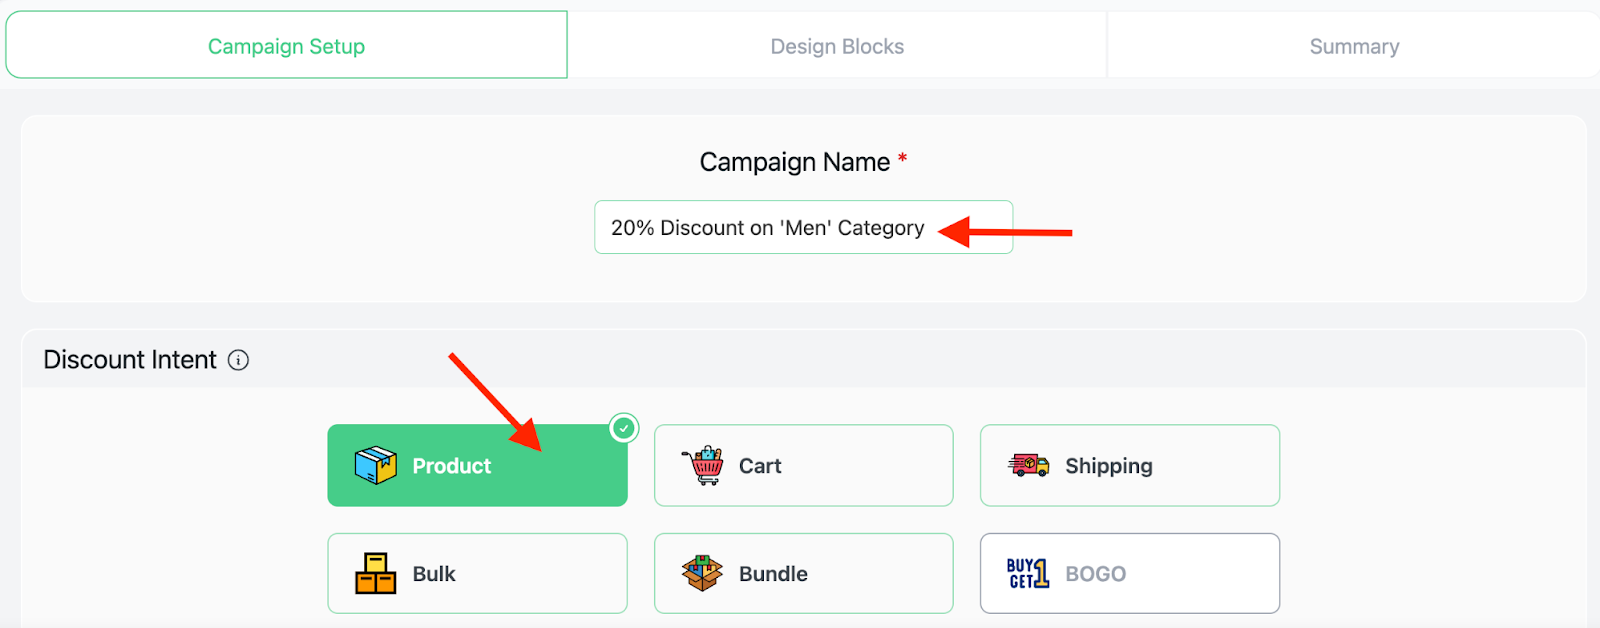
It will take you to a new fresh window. In there, give your discount campaign a name and select the discount type as “Product”.

Step 3: Setting Discount Rules
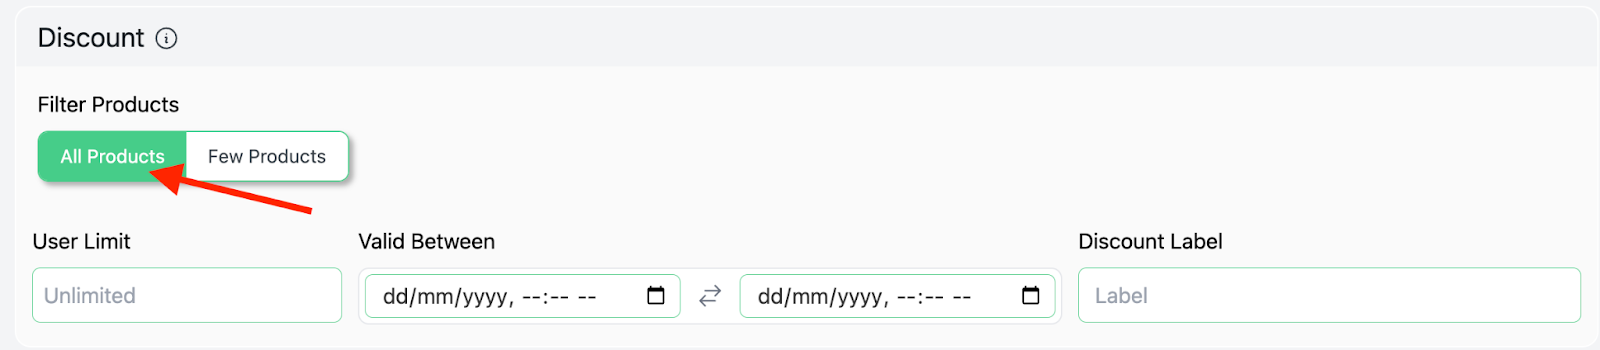
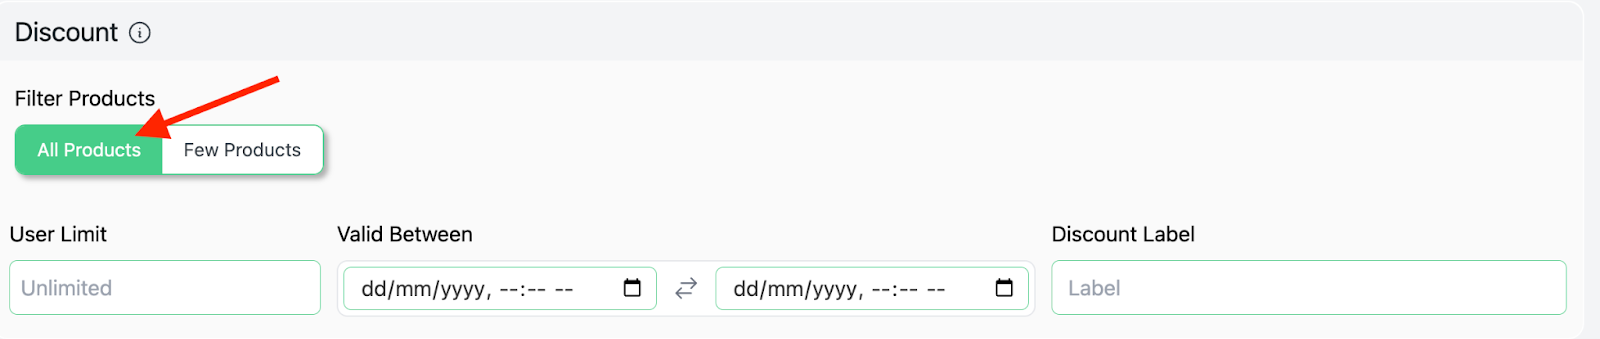
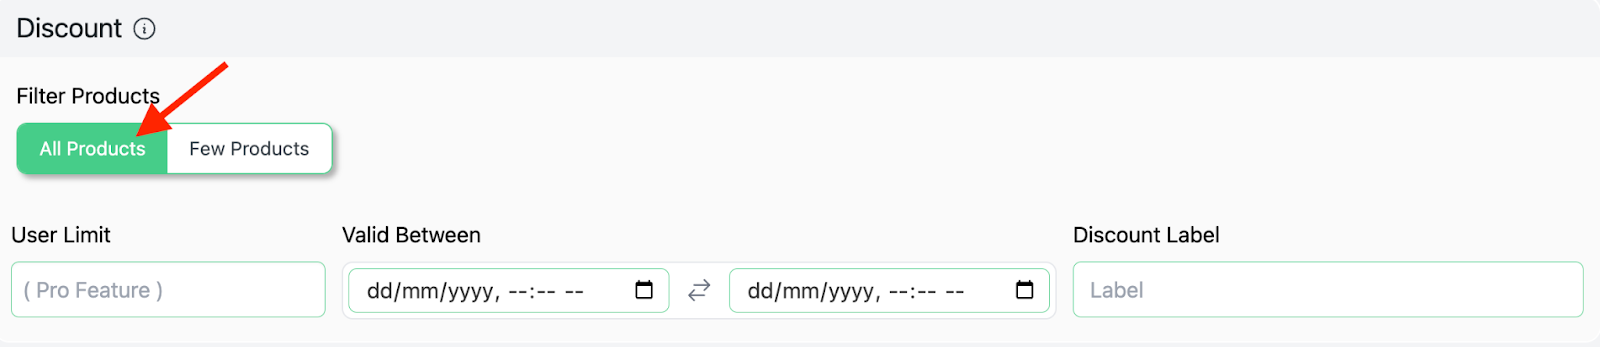
In the next step, you will find the “Discount” section where you can choose your products. Here, choose “All Products”.
Step 4: Setting up Discount Type and Value
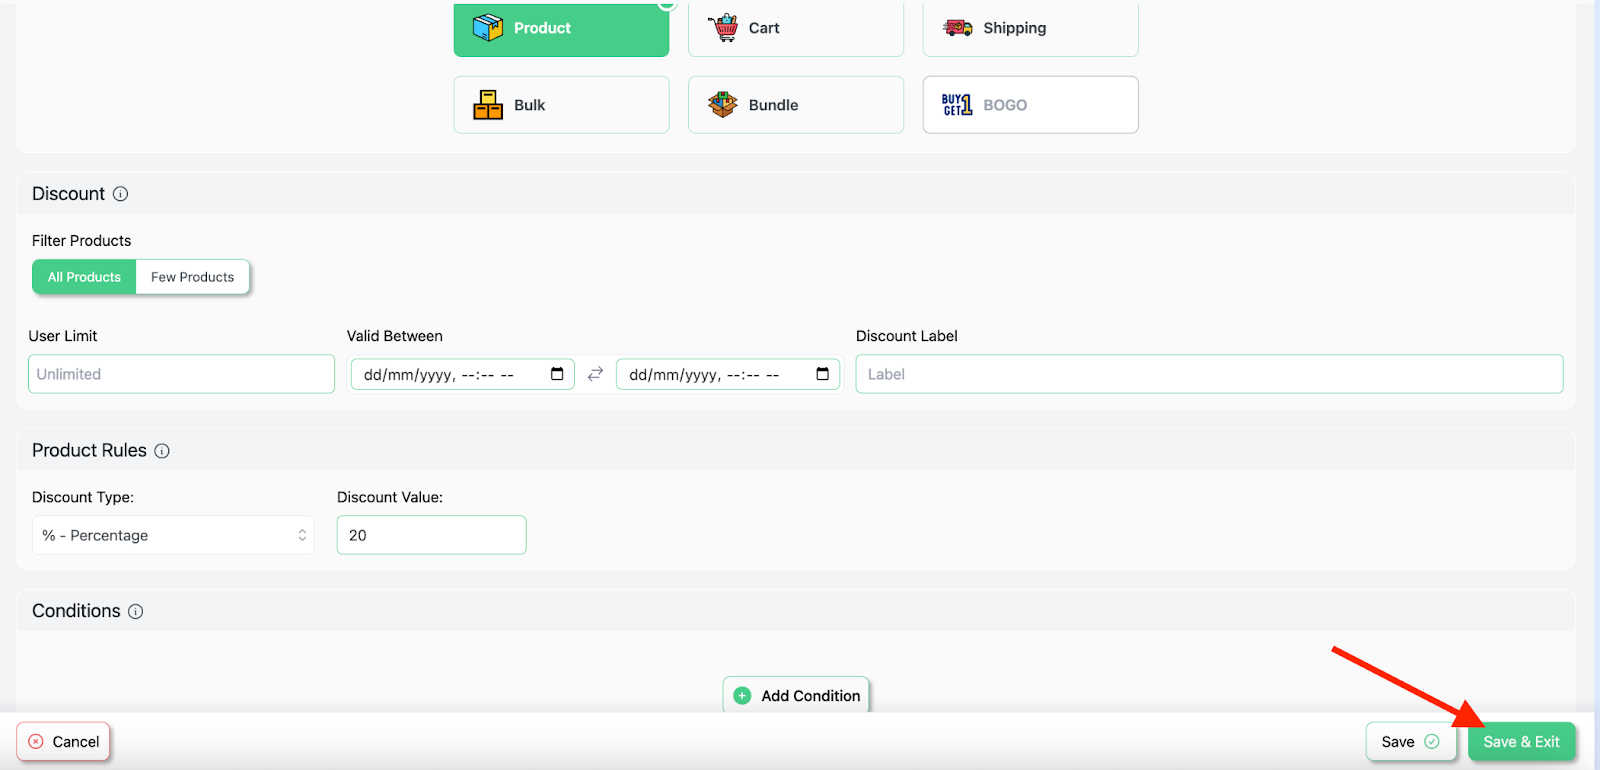
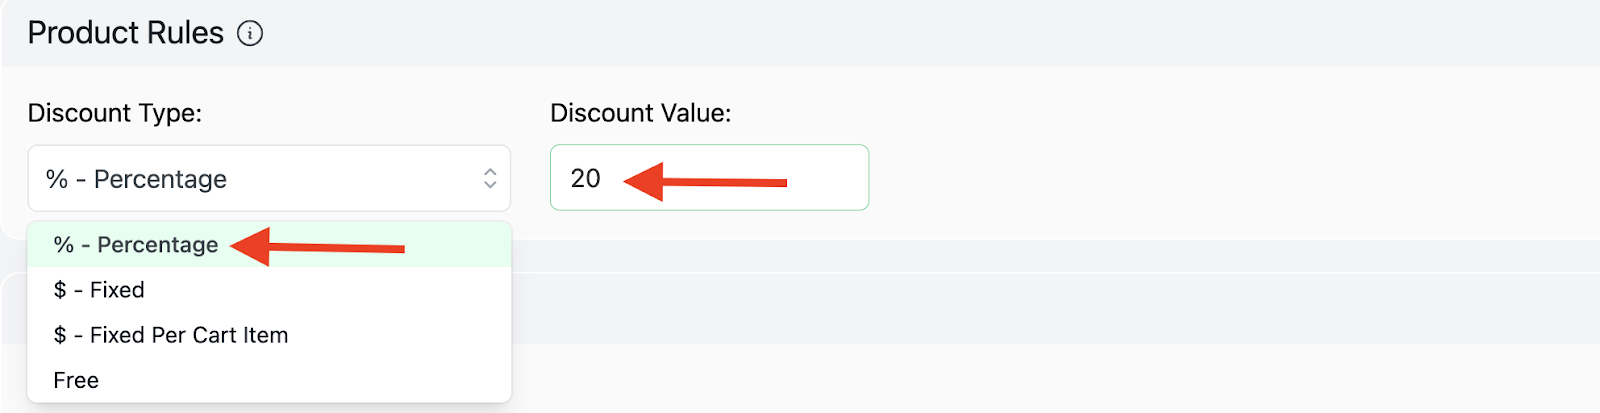
Under the “Product Rules” section, select the discount type as “Percentage” and input the discount value as “20”.

Step 5: Click on “Save & Exit”
When you are done with all the information, click on “Save & Exit”.
It will launch and run your campaign.

Now, let’s check it out from the front end. You will find out that a flat 20% discount has been correctly applied to all your products.
Hopefully, you will be able to set up WooCommerce 20% off sale very easily in this way and increase your sales.
If you want to know more about other percentage-based discounts, check out our in-depth guide on How to set up WooCommerce Percentage Discount.
How Do I Add a 20% Discount on a Specific Product in WooCommerce for a Promotional Period?
Under this scenario, we will be setting up a WooCommerce 20% discount for specific products, but it’s only going to be for a fixed amount of time. It’s almost similar to the previous one, just with some minor changes.
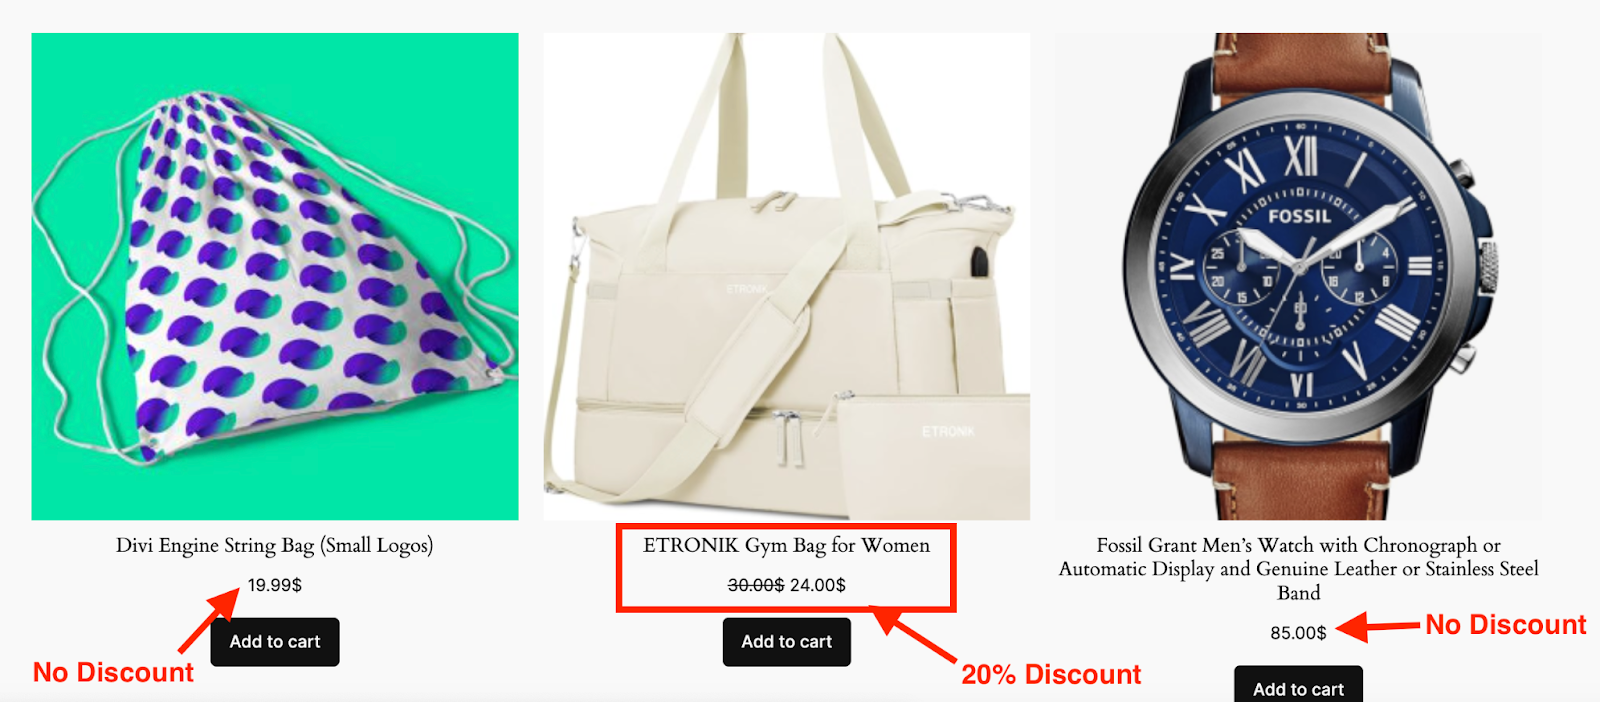
For Example, Let’s set up a 20% discount on “ETRONIK Gym Bag for Women” during the Halloween Days.
Just like the previous one, go to Disco Menu>>Create a Discount. Then give your discount campaign a name and select the discount intention as “Product”.

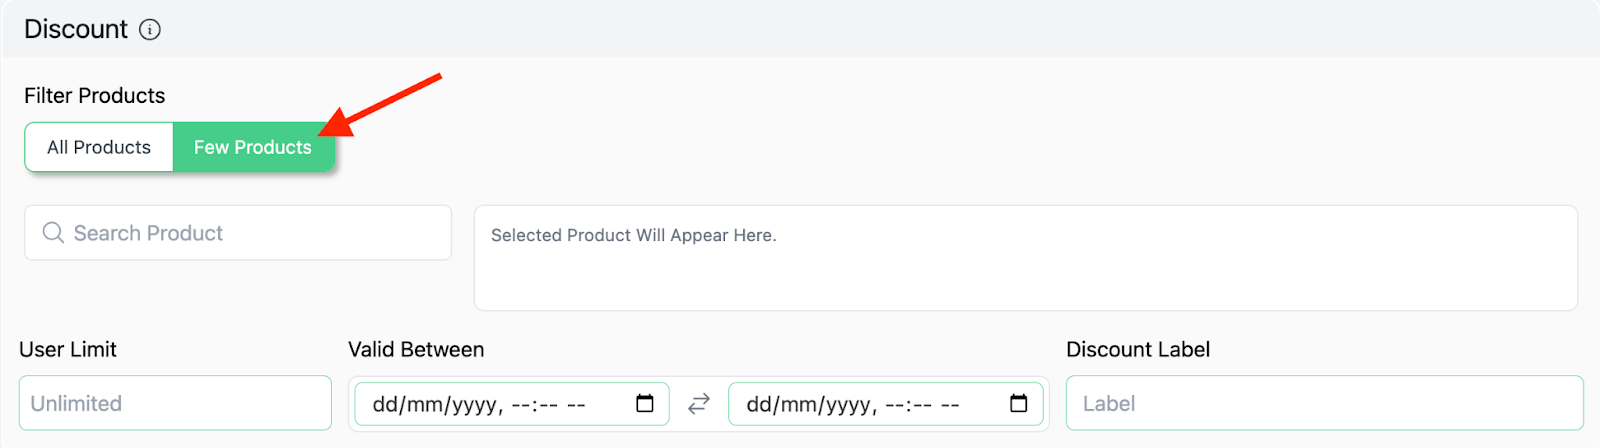
Scroll down below and choose “Few Products” from the “Discount Section”.
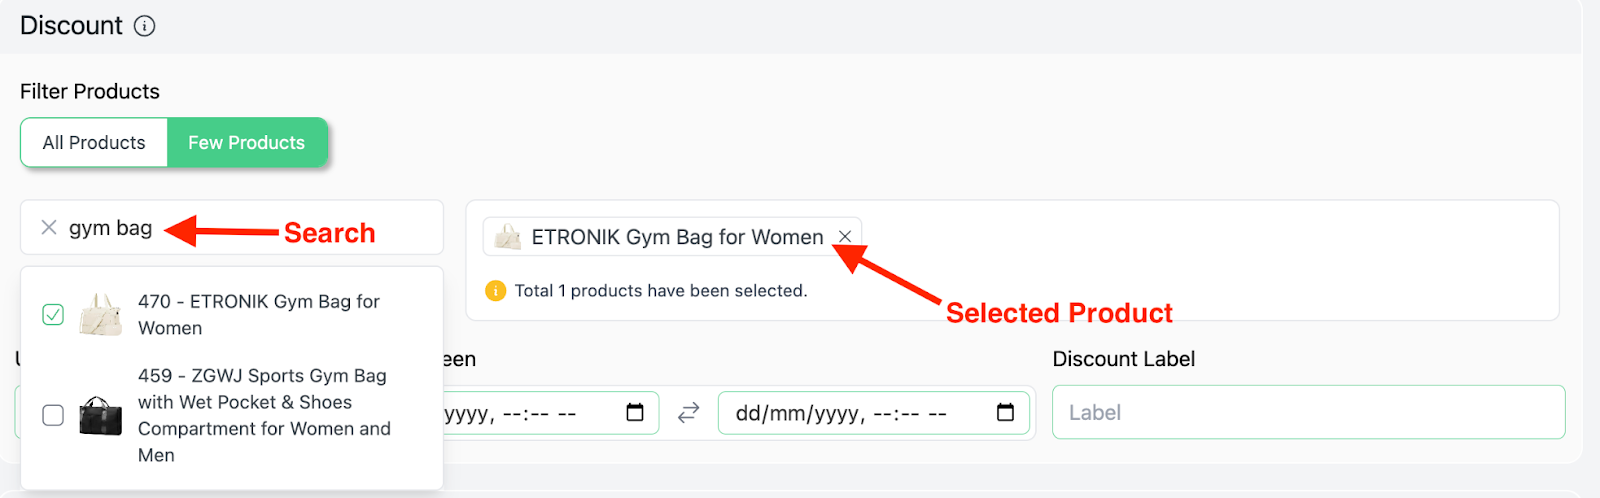
Now, you should search and select your specific product.
Let’s set up the promotional period. How do you set a discount in WooCommerce for a Limited time?
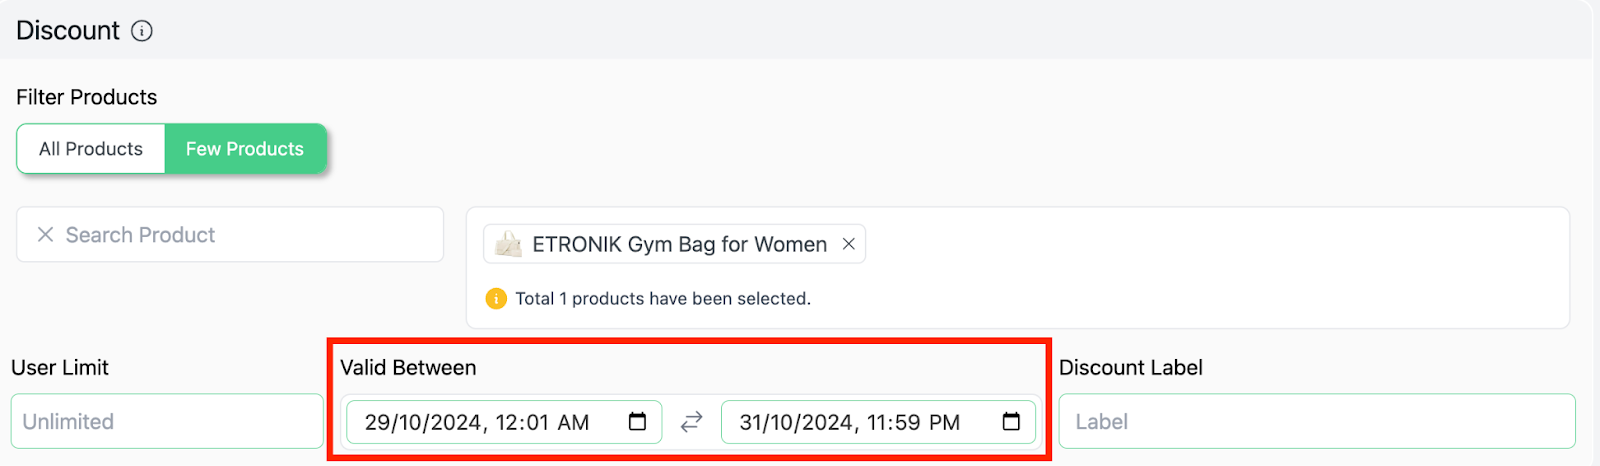
Well, you can use the Disco Plugin’s “Valid Between” field to add a discount in WooCommerce for a Limited time. Just input the starting and ending dates.
As you can see, we have targeted the Halloween days and our starting date is 29th October 2024 and our ending date is 31st October 2024.
After you are done with the specific product and date validity, select the discount type as “Percentage” and input the amount “20”.
Click on the “Save & Exit” button to run your campaign.

Now, if a customer comes and visits our store, he or she will get a 20% discount only on the product “ETRONIK Gym Bag for Women”. But they will not get any kind of discounts on the other products.
In this way, you can add up the WooCommerce product discount of 20% without any trouble.
How to Set a 20% Discount on a Specific Category in WooCommerce?
In this case, we will be setting up a 20% discount only on a specific category of products.
For example, let’s set up a 20% discount on all the products in the “Men” Category.
To do this, from your WordPress Dashboard, click on the “Disco Menu” and then go to “Create a Discount”. After that, in the new discount campaign window, give your campaign a name and choose the discount intention as “Product”.
Then, from the discount section, choose “All Products”. We will be selecting the categories later in the Conditions section.
Select the discount type as ‘Percentage’ and input the discount value as 20.

Here comes the main part! To add the specific category, click on “Add Condition” from the Conditions section.

There, all you have to do is from the filtering option, select the “Categories” filter.
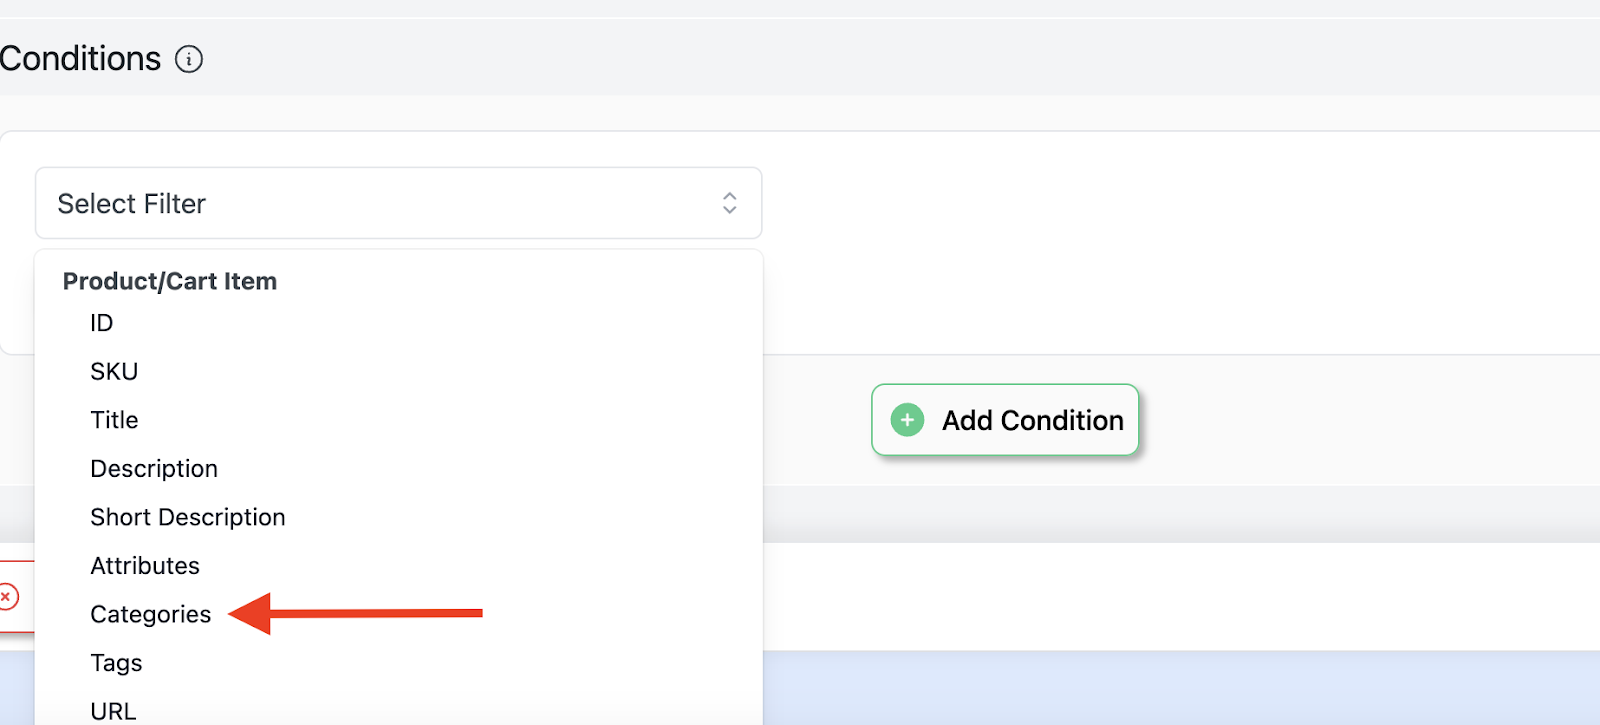
Now, select the ‘In List’ option, and let’s choose the specific category ‘Men’.

Key Note: “In List” refers to the category you want to include in the discount. For example, if you select the “Men” category, only products within that category will be eligible for the discount. Again, “Not In List” excludes a category from the discount. So, if you add the category “Kitchen Accessories” under “Not In List,” the discount will apply to all products in your store except those from the category “Kitchen Accessories”.
That’s it! Just click on the “Save & Exit” button and a WooCommerce category discount of 20% will be applied to the ‘Men’ Category.
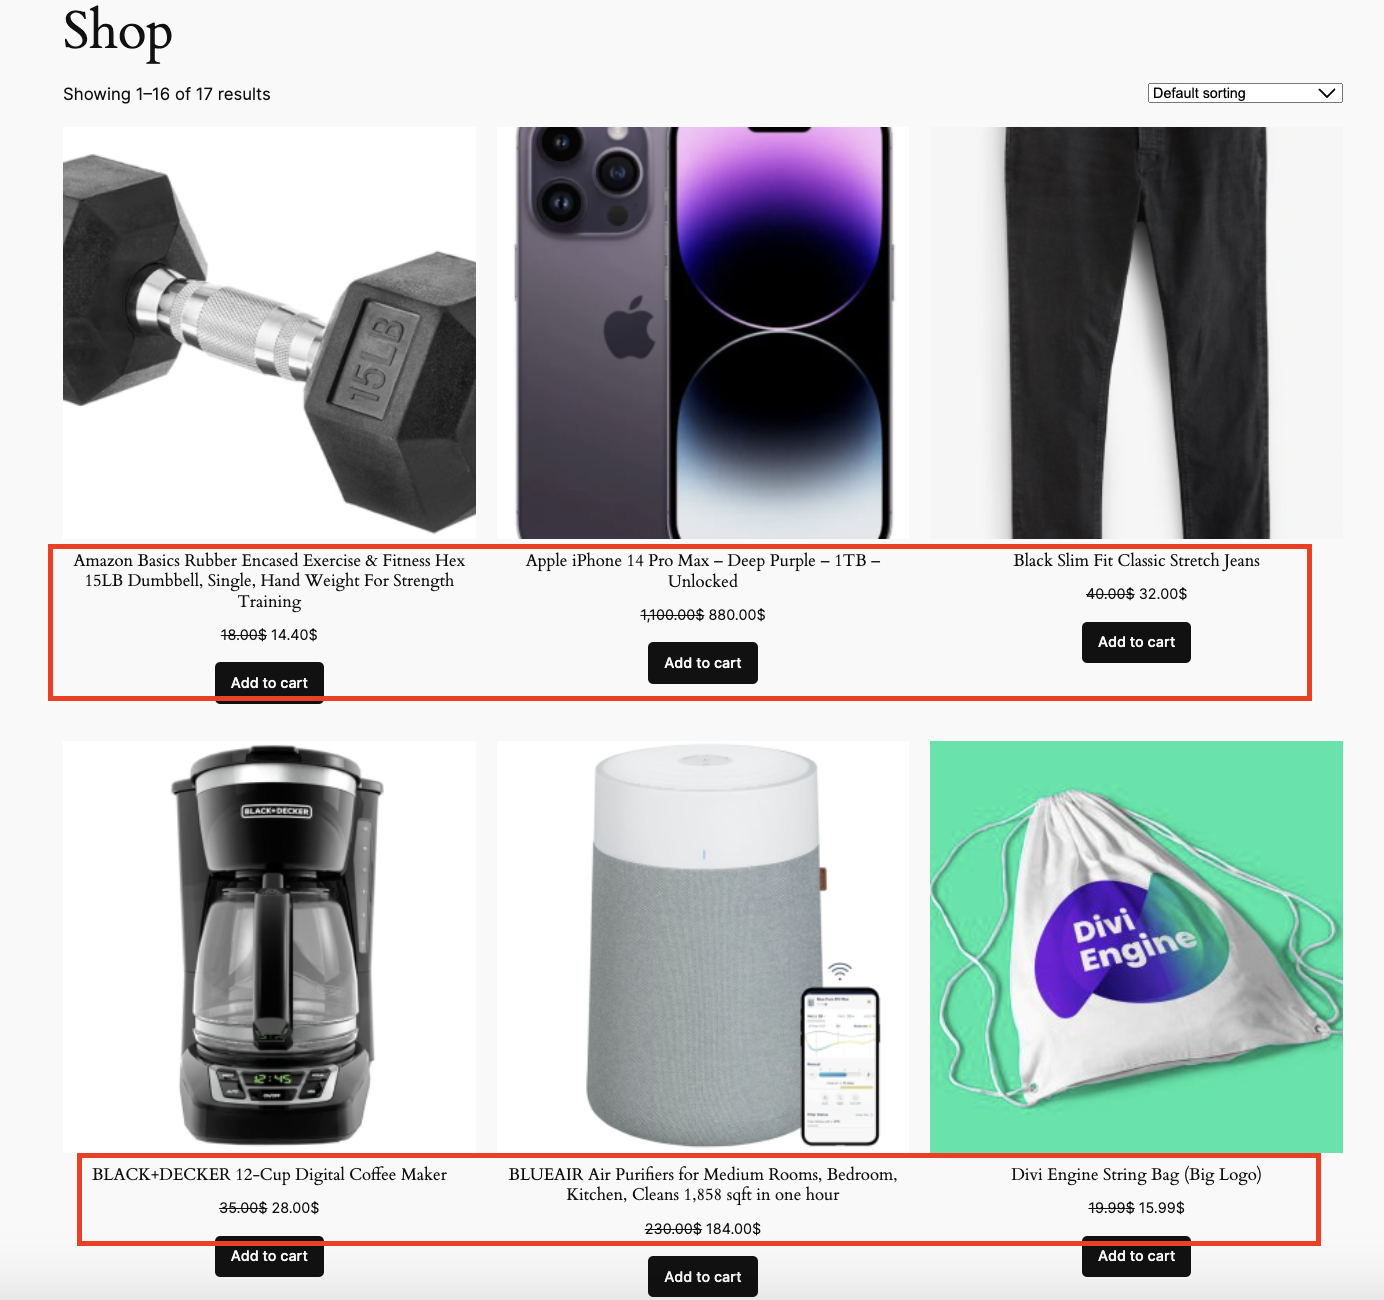
Let’s have a look at a product in the ‘Men’ category.
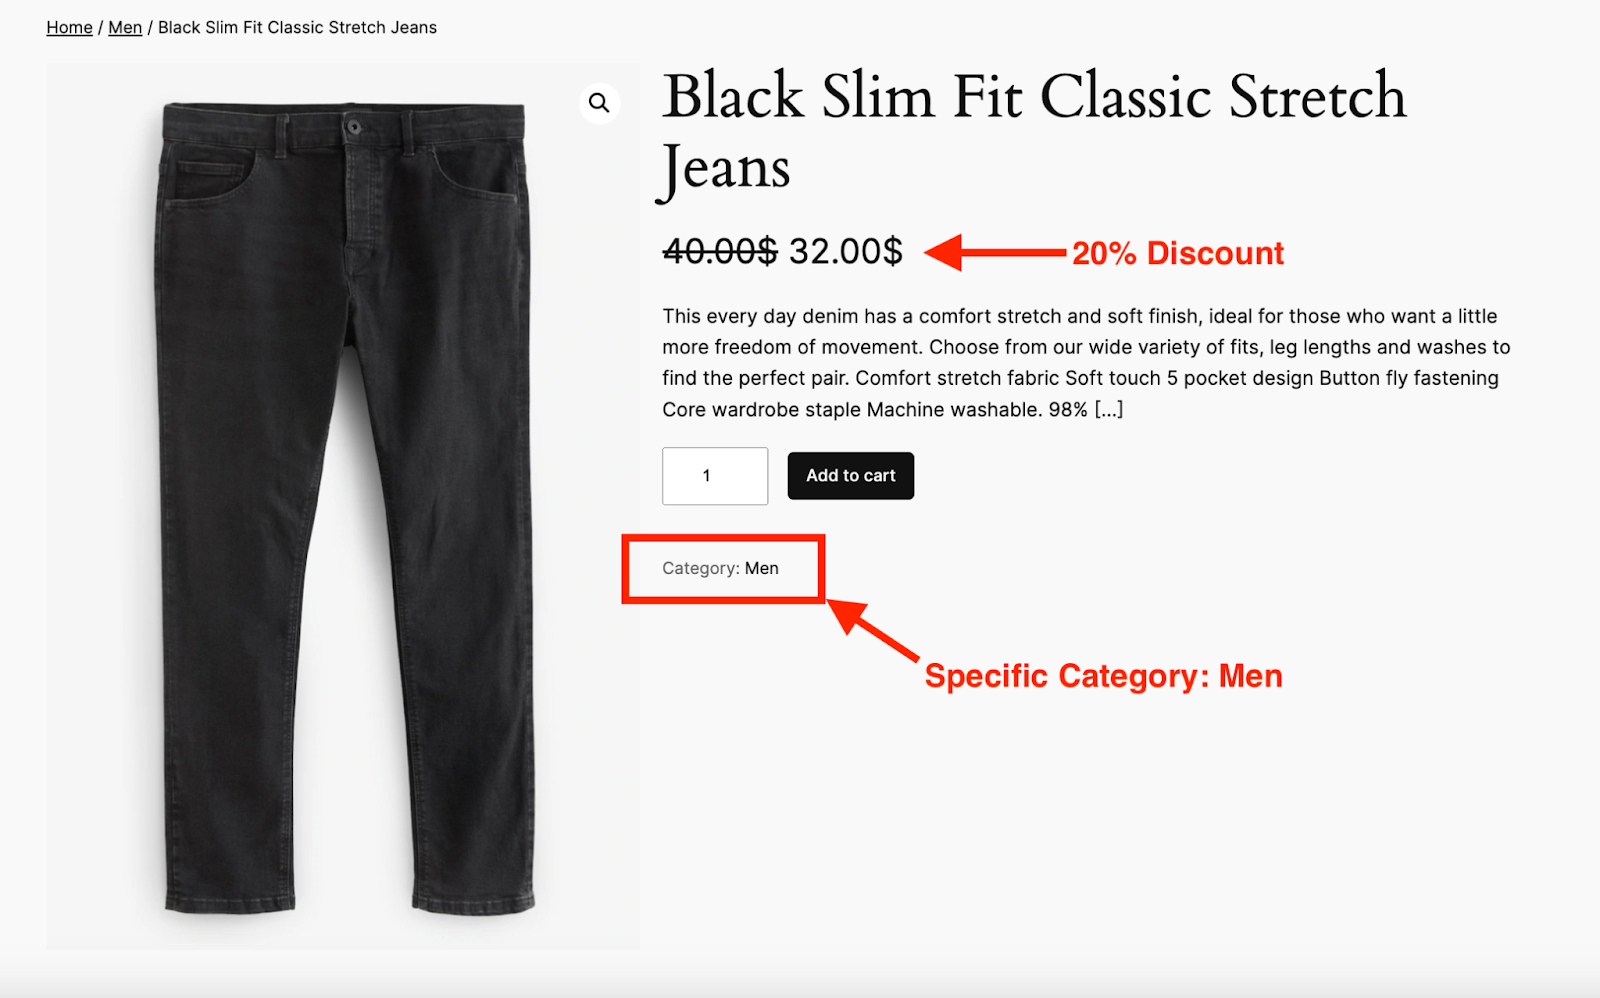
In the above picture, you can see that our product “Black Slim Fit Classic Stretch Jeans” belongs to the ‘Men’ category. And there is the WooCommerce category discount of 20% available there.
If you want to know more, have a read on: WooCommerce Category Discount.
Set a 20% discount if the Customers order a minimum amount of $1000
Under this scenario, customers will get 20% off only if they order at least $1000 worth of products.
Let’s set it up.
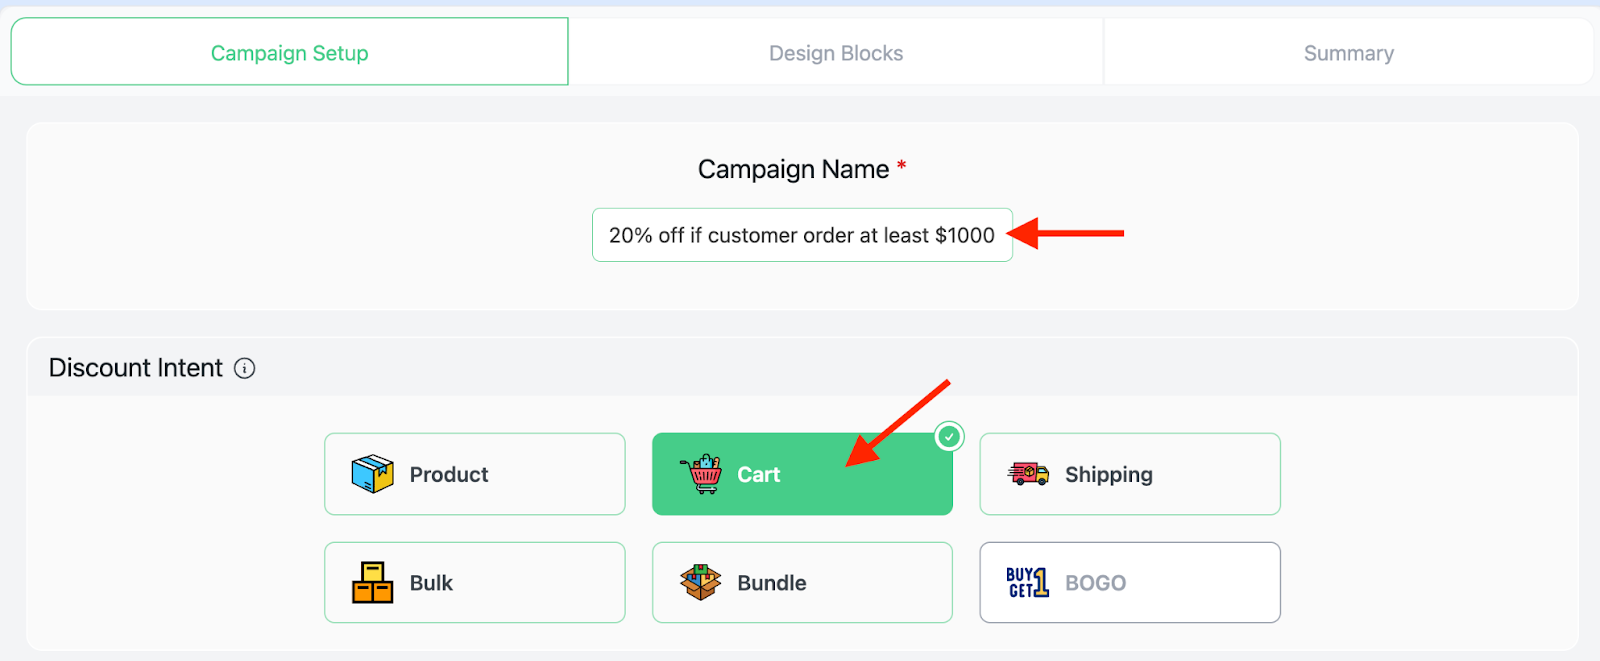
Get to the Disco Menu>>Create a Discount in the usual manner. Then provide the discount campaign a name and this time select the discount type as ‘Cart’ since the discount will only be provided if the total cart value is at least $1000.
Then, choose “All Products” from the Discount section.
Now, go down to the “Cart Rules” section. All you have to do here is select the discount type as “Percentage” and input the discount value “20”.

What about the total order amount?
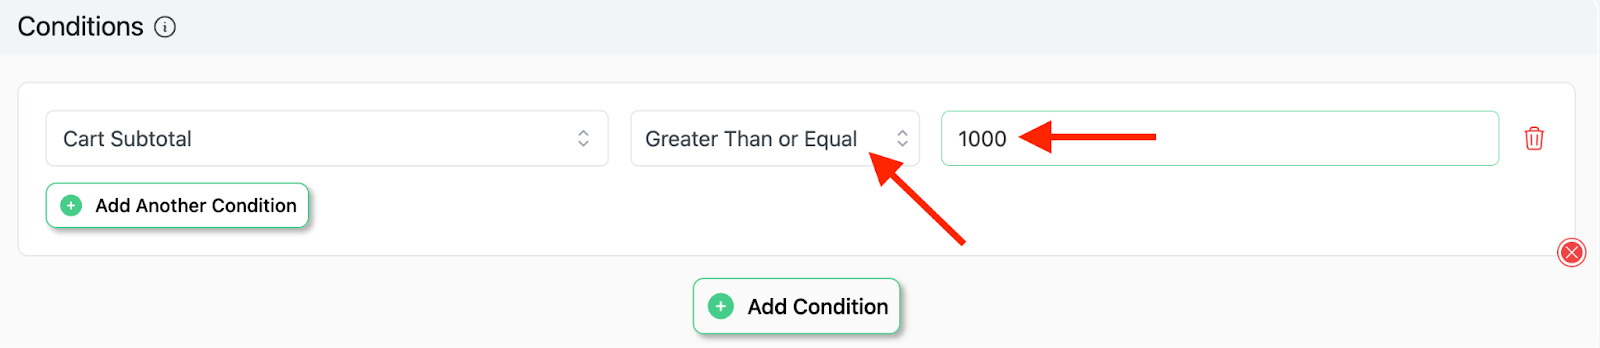
Well, we will set it up in the Conditions section. Click on “Add Condition”.

Now, from the filtering options, click on “Cart Subtotal”.

We’re almost done here! Select the “Greater Than or Equal” option and then input the value 1000.
That’s all! Click on the “Save & Exit” button to launch and run your campaign.

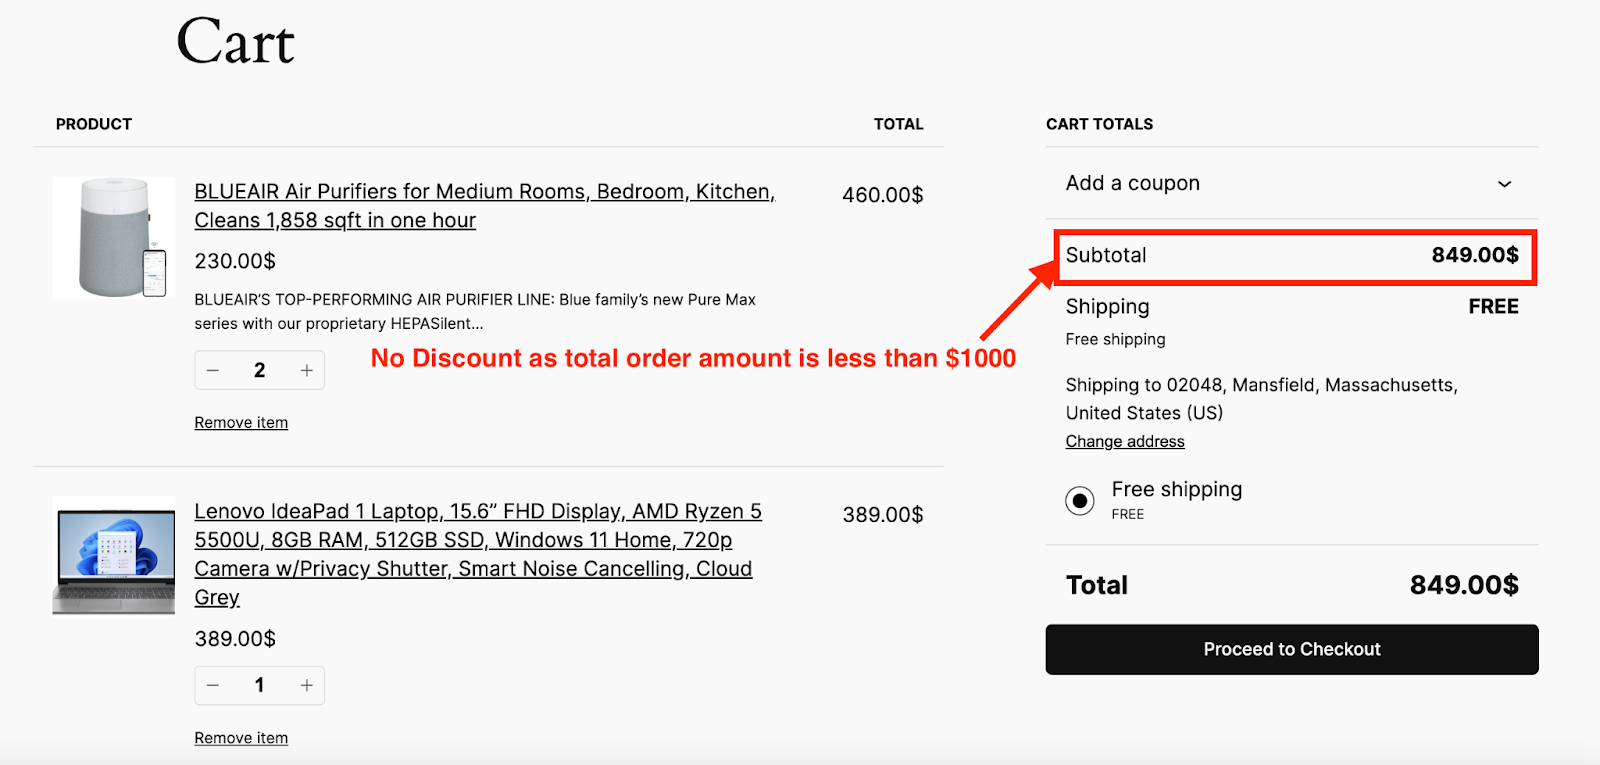
Now, whenever customers order anything less than $1000, they won’t get the 20% discount.
But, whenever customers order more than $1000, they are going to get a 20% discount on it.
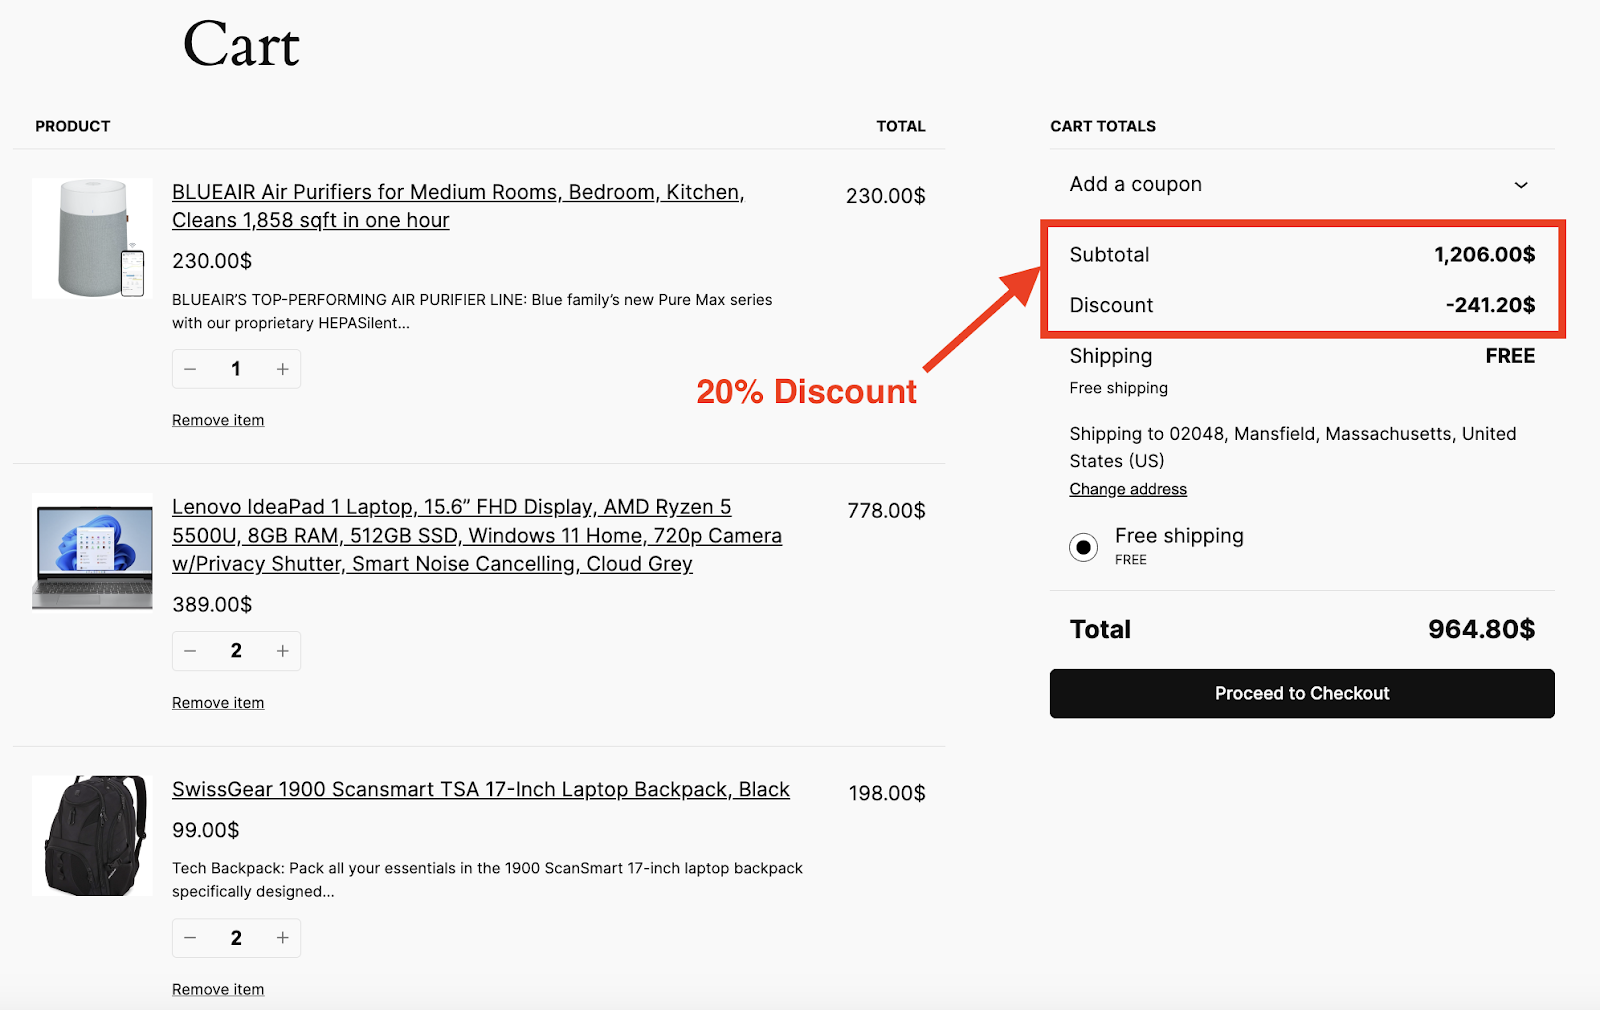
The above picture shows that as the total value exceeds $1000, the customer got a 20% discount on it. So, the total price came down to only $964.80 from $1206.
Existing Content Relevance:
How to Setup WooCommerce Fixed Product Discount
Set up a WooCommerce Volume Discount
How to Set Up WooCommerce Discounts for Multiple Items
How to Promote the 20% Discount in WooCommerce
Promoting your WooCommerce 20% discount effectively can make all the difference in boosting sales and customer engagement. Here are some proven ways to make sure your discount reaches the right audience and drives conversions:
1. Highlight on Homepage Banners: Use an eye-catching banner on your homepage to showcase the 20% discount, making it one of the first things customers see.
2. Email Campaigns: Send targeted emails to your subscriber list announcing the discount with a clear call to action, encouraging immediate purchases. Have a look at our in-depth article on WooCommerce Email Marketing Guide.
3. Social Media Posts and Stories: Announce the discount across social platforms, using engaging visuals and linking directly to your store.
4. Popup Notifications: Create a popup on your website that highlights the discount when visitors land on the site or prepare to exit.
5. Add Countdown Timers: Use a countdown timer to add urgency, motivating customers to buy before the offer ends.
6. Product Page Badges: Add a badge or label displaying “20% Off,” so customers instantly know about the deal.
7. Collaborate with Influencers or Affiliates: Partner with influencers or affiliates who can share the discount with their followers, expanding your reach and credibility. A well-timed post by a relevant influencer can bring new traffic and boost your discount’s effectiveness.
By using these strategies, you can maximize visibility and drive more traffic to your discounted products, encouraging higher conversions.
Frequently Asked Questions
1. How can I track the performance of my 20% discount in WooCommerce?
You can use WooCommerce’s built-in analytics tools. It lets you monitor metrics like sales volume, order count, and revenue, helping you see if the discount boosts engagement.
Also, Disco will soon introduce an “Advanced Reporting System” feature that will let you get detailed reports and track the performance of your discount campaigns easily.
2. What are the best practices for setting up a 20% discount in WooCommerce?
When setting up a 20% discount, consider these best practices:
Define Your Audience: Target specific products or customer segments, like first-time buyers or loyal customers.
Set a Time Limit: Create urgency by limiting the discount duration.
Use Clear Messaging: Display the discount prominently on your site and use proper labels to grab the customer’s attention.
Monitor and Adjust: Track performance regularly, adjusting the discount if needed to maximize sales and engagement.
Promote Across Channels: Announce the discount via email, social media, and on-site banners to reach a wider audience.
3. How do I apply a 20% discount without affecting other discounts in WooCommerce?
One of the best parts about the Disco Plugin is that you can manage all the discount campaigns easily. You can run them simultaneously at the same time and you can also disable a discount campaign just with one click as well.
Bottom Line
Adding up a 20% discount in WooCommerce can be a game-changer for boosting sales, attracting new customers, and building loyalty. We believe by using the Disco Plugin, you will be able to add a 20% discount in WooCommerce very easily and simply.
Try to use the date validity and proper labels to make the best use of your discounts. Also, don’t forget to promote them properly.
That’s all for today. Set up your discount and see how it boosts your WooCommerce store’s sales and customer engagement!
