How to Customize Your WooCommerce Single Product Page (The Easy Way)
Are you planning to create an online store? No doubt WooCommerce is the best option, but it might be challenging to find an easy WooCommerce single product page builder.
On top of that, creating your product page visually to keep a single style throughout the online shop is paramount.
Well, You are lucky that you can explore Elementor WooCommerce Builder for a seamless experience in designing your product page layout.
To ensure your online store thrives, you need to do this. This means buyers will stay on your product page longer than they would if you didn’t use Elementor Widgets in your design.
In this blog, we’re going to share some tips on how you can customize your WooCommerce Product Page without any coding.
Seems appealing? Just go ahead.

Why Do We Need to Customize the WooCommerce Single Product Page?
Are you still confused about why customizing the WooCommerce single product pages is influential and essential?
Let’s see 4 why’s at a glance:
- To increase sales and product awareness.
- To give a solid product overview for introducing your brand to new customers with full details.
- To ensure better customer clarity by providing essential details such as name and description for products, since customers will not be visiting the store in person due to the online nature of the business.
- To independently use the images, price, and many more to make the customer buy with confidence.
According to reports, 80% of online stores fail to survive because they don’t understand the importance of the product page.
One of the most significant benefits of customizing WooCommerce’s single product page is to highlight your product features and display WooCommerce products on custom pages to drive sales with valuable action through using appealing call-to-action buttons.
Now, you understand its importance and what to add to the WooCommerce shop page. This article will show you how to customize WooCommerce’s Single product page.
How to Customize WooCommerce Product Page (Step by step)
The possibilities for altering and refining a standard product page are limitless, with specific adjustments depending on the product.
Our guide will take you step-by-step through the key customizations you can make to your WooCommerce product pages so that you can increase sales.
Let’s get started.
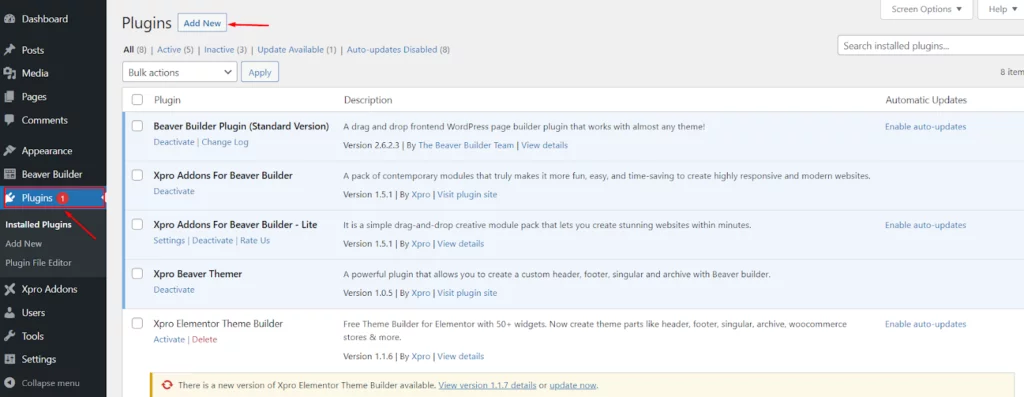
Step 1: Install Plugins & Set Up Your Page
To begin purchasing from your WooCommerce page, all the necessary steps must be completed. Make sure you have all the tools you need to install and activate.
You can install WooCommerce, Elementor, and WordPress. If you already have installed and activated plugins, make sure to enable all the required widgets to work with them.
Step 2: Create A Template for a Single Product Page
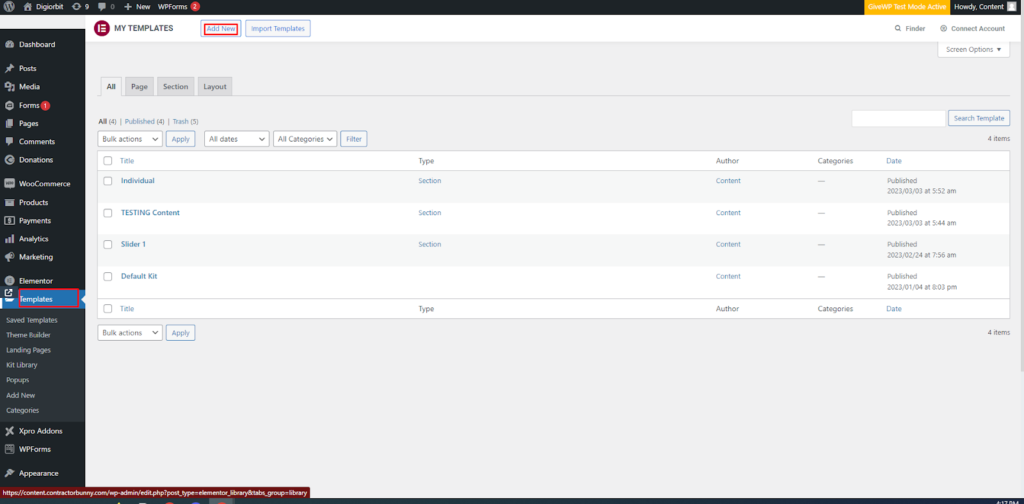
Once you are done with installation and activation, you can move on to create your layouts with different product elements. Follow this navigation to your WordPress dashboard.
Select Templates> Add New.
Select the template from the WordPress dashboard, click Add new, and create a single-page template.
Select the name of your template and type of template by clicking on Add New. Finally, hit “Create Template.”
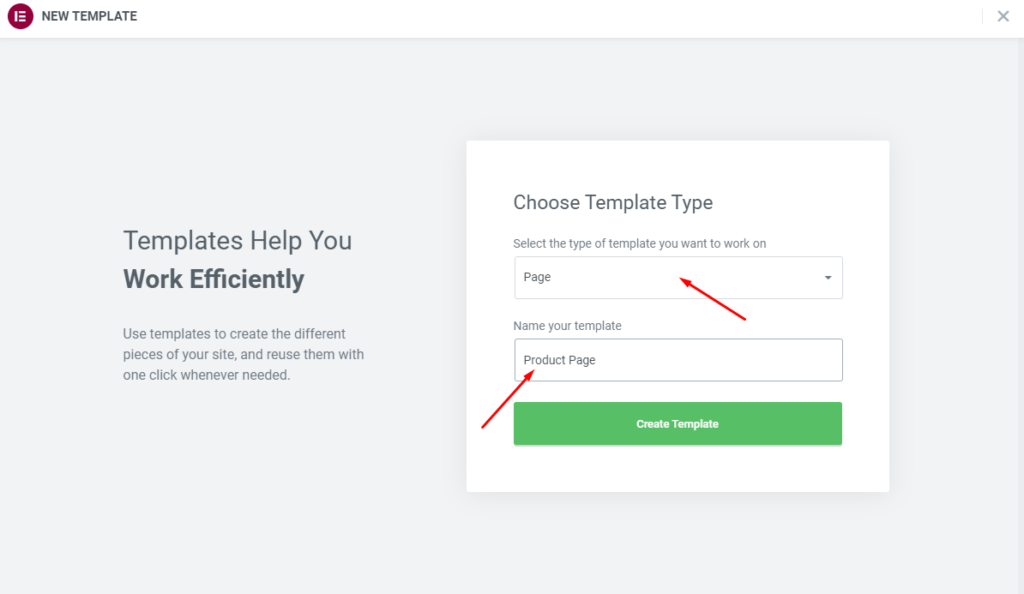
Templates have a lot of potentials, but we will focus on the product page right now. After creating your templates, there are different styles of product pages to choose from. Before you start adding your product elements on the template page, make sure to switch to a full-width template.
Step 3: Add Essential Elements of Products
Now, it’s time to add essential elements of products that will help you to make up your product page. For the full list of product widgets, use elementor page builder to add some key features.
Follow the necessary steps to ensure your product page contains the necessary information to satisfy your customers’ needs. You have complete freedom to choose widgets to design your woo-commerce product page layout.
You can add custom fields in WooCommerce single product pages using the dynamic content features.
Further, you can add a custom button to the WooCommerce product page, call-to-action widgets, featured images, and many more to make your WooCommerce product page more dynamic.
Let’s see how you can add essential elements of the product to create a shop page.
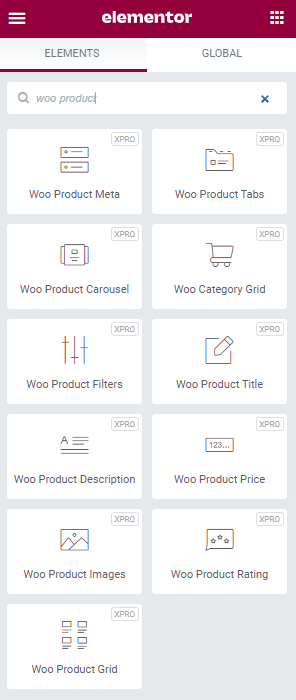
Here are the product widgets you can add to this page:
Menu Cart: The menu cart widget is used to display your cart on any page. It helps to open the cart in a new window.
Woo Product Title: This Woo widget sets the product title and gives you full control to set your product title style and layout.
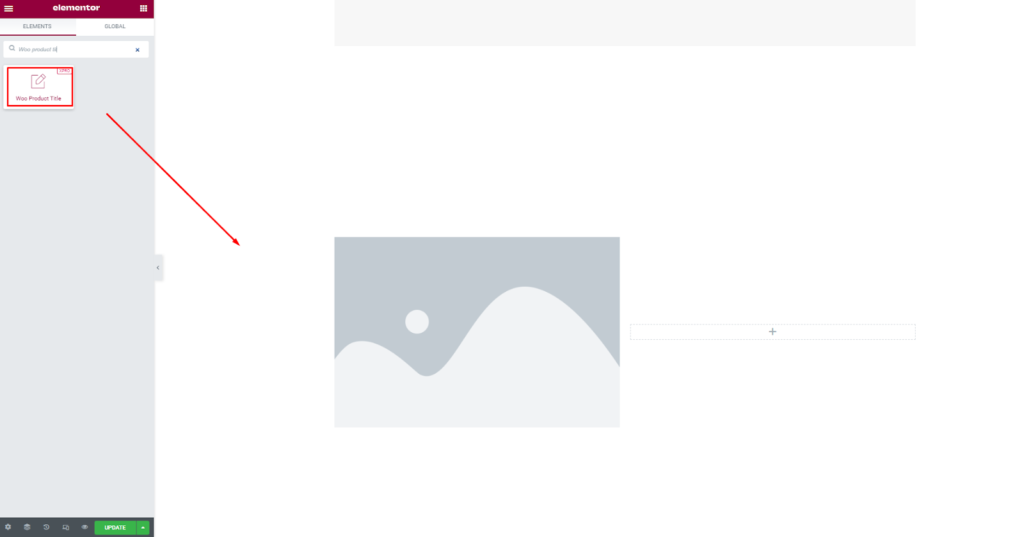
You can customize the product title block in several ways, such as by
- Changing the HTML tag (from H1 to H6),
- Set the alignment (right, left or center),
- Set color, and all typographic settings.
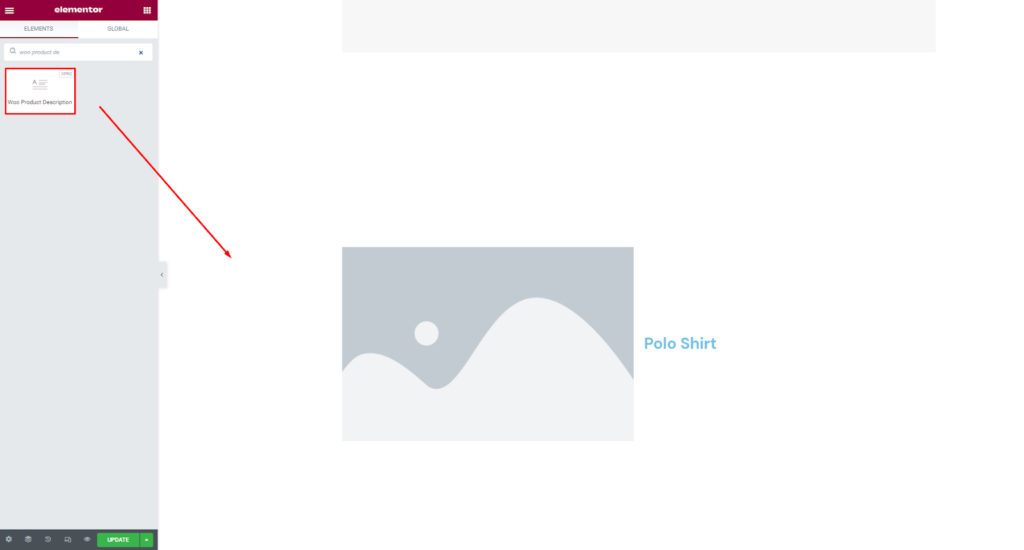
Woo Product Description: In the Woo Product Description, the short description widget controls how the short description is displayed and styled. Creating a new product allows you to enter a short description. It is recommended that this widget be displayed near the top of the single product page.
Woo Product Price: You can set the product price position and style with this widget.
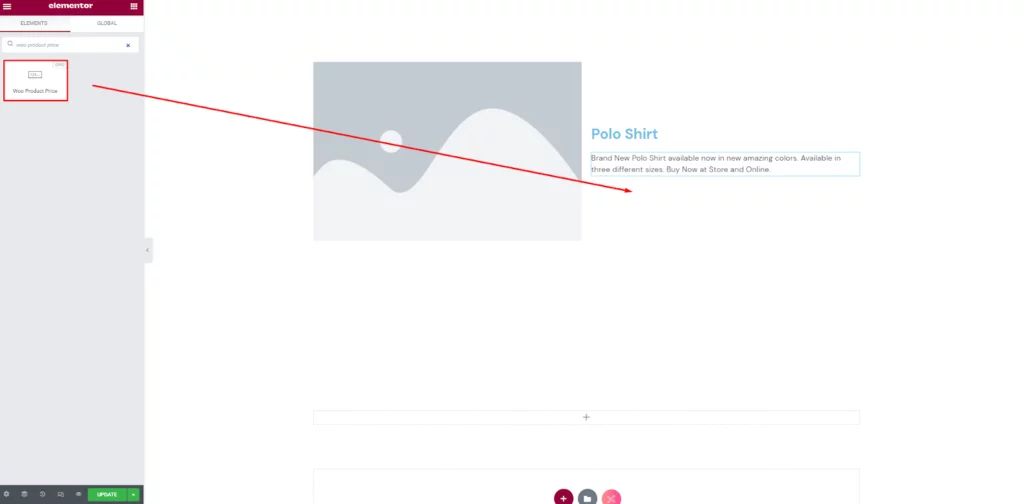
This widget will enable you to adjust the product price alignment to the left, center, or right, as well as customize the colors, font type, size and weight, decoration, line height, letter spacing, and other typography-related settings.
You can even choose your favorite color using the color picker option for the product tag.
Add To Cart: Adding objects to the cart is controlled by the Add to Cart widget. Calls to action are one of the most important elements of any product page. By adding products to the cart, users can later proceed to the checkout process.
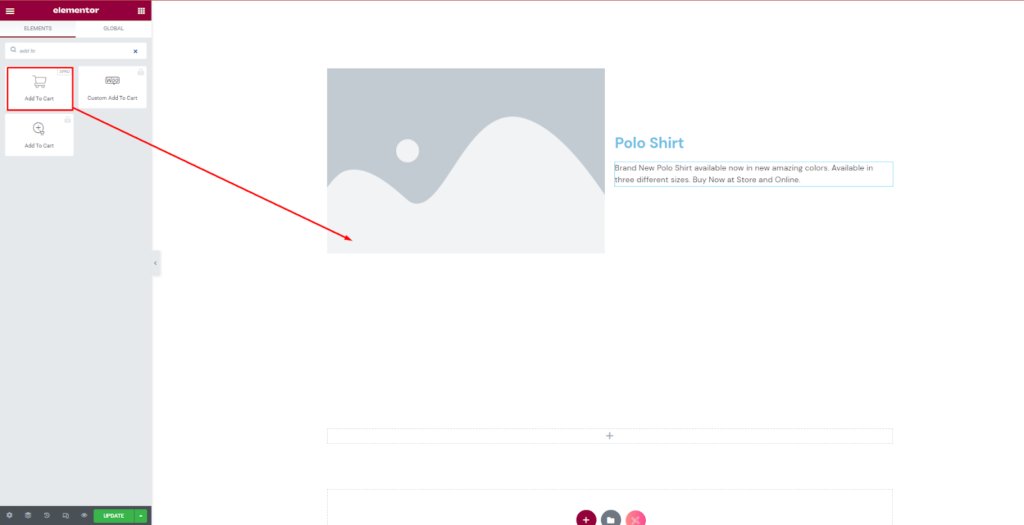
Woo Product Image: This woo widget lets you add product images for better clarification about the product look. This helps the user to identify your product more.
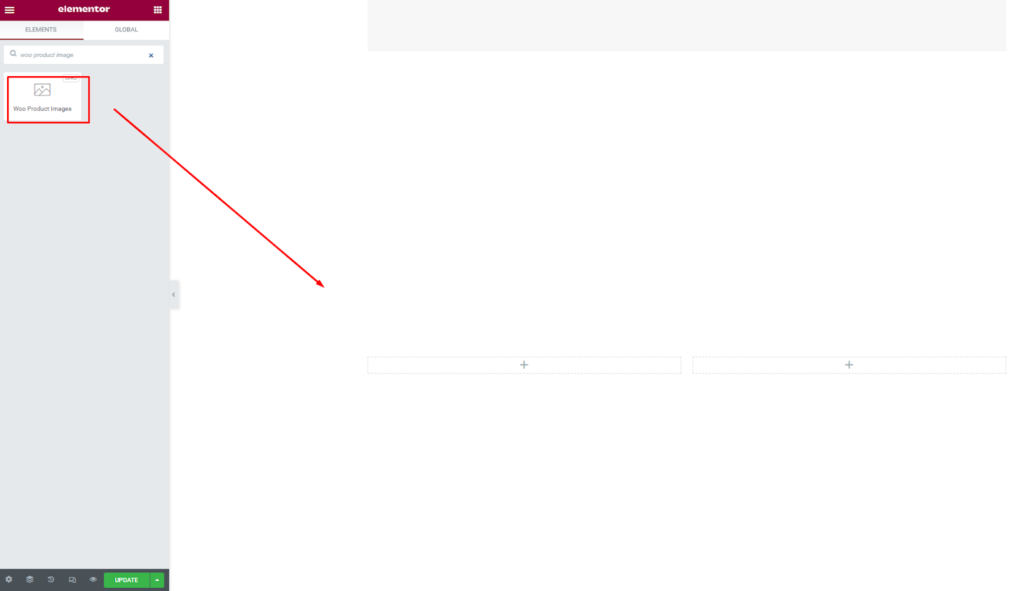
Woo Product Rating: This widget encourages the customer to buy your product. It enables displaying the product rating. You can make the following changes to the product review section:
- Alter the hue and style of the product review title,
- Adjust the parameters of the single review border,
- Set the size of the author, the color and font of the author name
- modify the comment form, and
- pick the font size and font family of your choice.
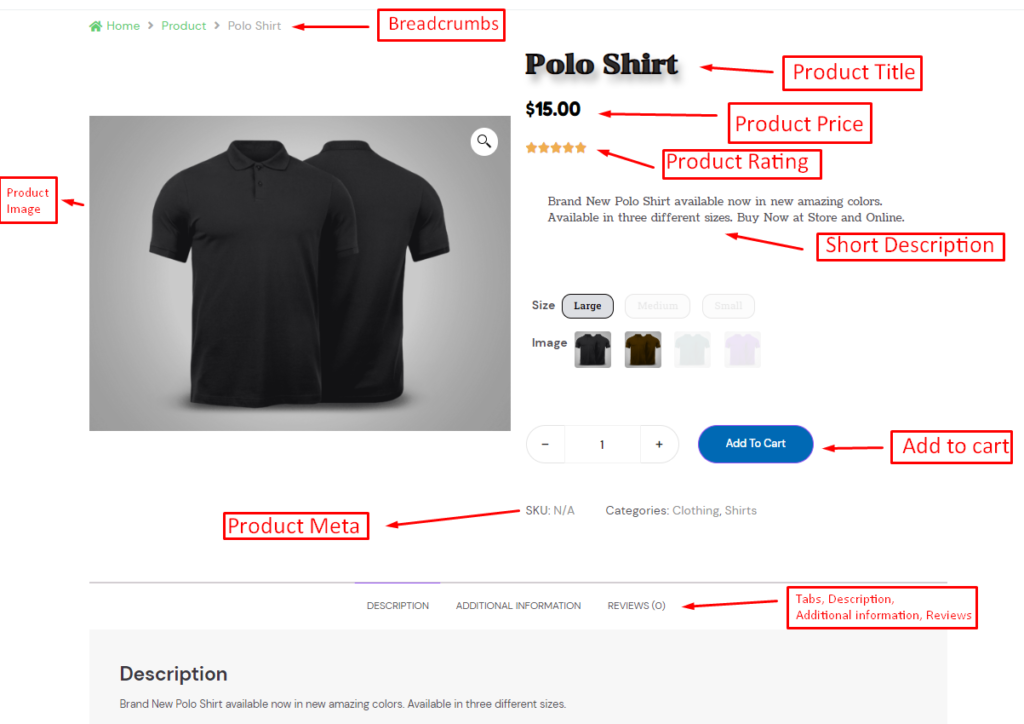
To make your product page template effective, it is advised to preview your page several times. Click on the preview button (shape in the eye in the corner) to view your product page. Now, apply and see how your product page looks.
Step 4: Set the Template Conditions & Publish
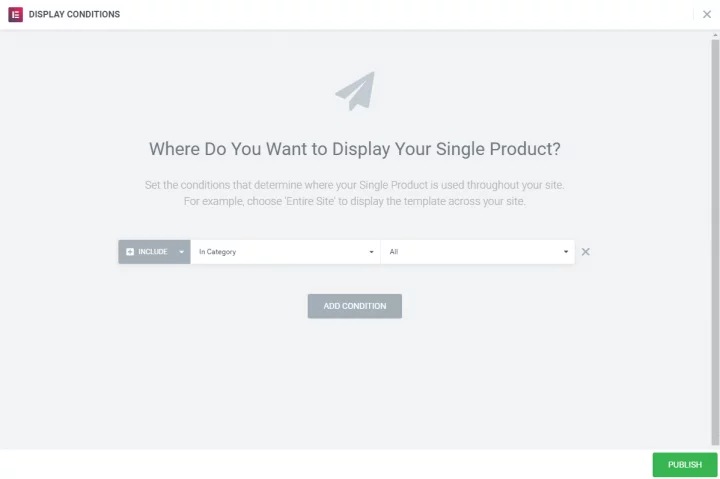
Once you’re done with editing and satisfied with your WooCommerce product page look, then, this is the right time to set your condition for your template. It is a required step to determine where your product template will appear.
By default, templates will appear on all product pages on your websites. You can select your specific category of products where it will show.
After selecting your category, click on the publish button. Now your single product page is live.
How to Generate WooCommerce Product Feed Using CTX Feed?
Once you build your WooCommerce product page with the help of Elementor woo commerce builder or elementor addons widgets, your Product page needs visibility to reach more potential customers, and this can be boosted by a product feed plugin.
In addition, promoting your Woocommerce product page on multiple social platforms will make it easy to share your products. This maximizes your business growth if you successfully promote your product page on these platforms.
Woocommerce product feed will let your product be seen by more and more people, which ultimately increases product sales. With the help of the product feed plugin, you can achieve potential users easily.
Let’s see What product feed means before jumping onto the How-to section.
What is WooCommerce Product Feed?
WooCommerce product feed is an important tool for online retailers who want to advertise their products across multiple channels such as Google Shopping, Facebook, Instagram, and other comparison shopping engines. By providing a product feed, retailers can easily improve their product visibility, attract more potential customers to their stores and increase their sales.
There are offers several plugins and extensions that can help you generate and optimize your product feed, ensuring that it is compatible with different marketing channels and marketplaces. Using these tools, it is possible to simplify the task of generating and organizing product data, reducing the amount of time and energy needed.

How to Generate WooCommerce Product Feed Using CTX Feed Plugin?
Adding a product feed to your e-commerce platform is one of the easiest ways to boost your sales. And with the help of the WordPress CTX feed plugin, you can do the job pretty quickly and easily.
CTX feed plugin used to generate WooCommerce product feed that helps your e-commerce website over 100 marketing channels.
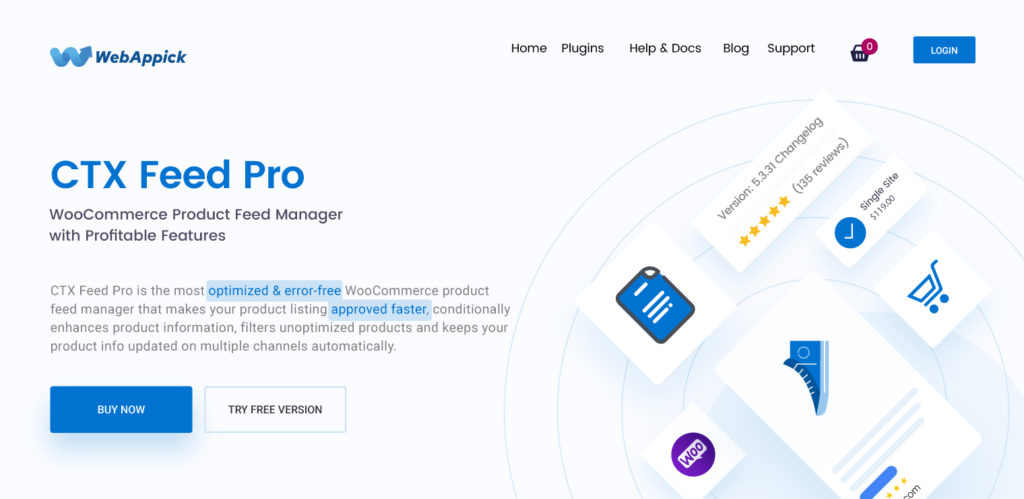
You can add unlimited products to create feeds for each category. You can achieve a lot with the free version of this plugin, but with the premium version, you can generate an advanced feed that can take your feed creation process to the next level.
Let’s see how you can build a WooCommerce product feed using the CTX Feed plugin.
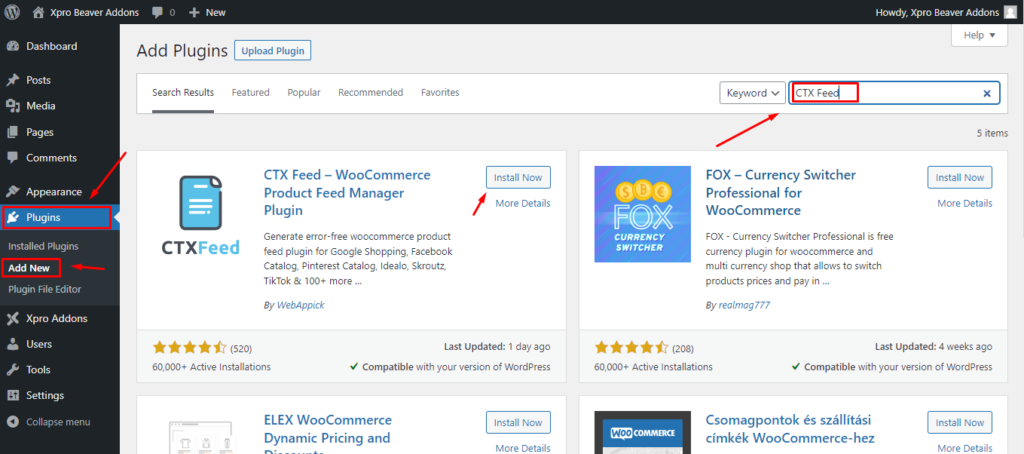
Step 1: Install a CTX Feed In WordPress
- Open the WordPress dashboard, and to install the plugin, click on the plugin and select the “Add New” button.
- Now search for the CTX feed in the search box.
- After finding the CTX Feed plugin in the search result, click on the install now button and activate the plugin before use.
Step 2: Create a CTX Feed
- Go to the plugin setting page by clicking on the CTX feed in the WordPress dashboard menu.
- Click on the Make Feed option from the dashboard menu. A new page will appear from where you can select a template or customize your own.
- Use a template to create a CTX Feed. From the popular templates, you can choose the required template to move further.
- Now enter a file type and name to set your feed’s necessary setting requirement. Fill all the rows with accurate information. For example, select your country; it’s very important to list the correct one.
- After selecting all fields correctly, you are ready to proceed further to configure your feed. Click on the “Feed Config”.
Step 3: Configure the Feed
- Add or delete any attribute in your shopping feed.
- Use the filters and advanced filters tab to make your product feed more specific.
- To successfully configure the feed, go to the CTX Feed setting page.
- After selecting all key information correctly, click on the “ Update and Generate Feed” button, and you’re done.
Step 4: Manage The Feed
After you’re done creating the product feed, you can easily manage the created feed from the manage feed page.
Uploading the product feed to the appropriate channel is the next thing you have to do.

4 Ways To Improve Product Page Conversions Rate
One of the challenging tasks for any website is to optimize the page that drives sales instantly. It is key to increase the conversion rates that help you to generate revenue.
If you have an e-commerce store or a business website and are looking for a way to improve its optimization then read till the end to evaluate what are you missing to achieve the goal of your online store.
Let’s see the most common ways to improve web page optimization to increase conversion rates.
Maintain Your E-commerce Store Hierarchy
Maintaining a clear hierarchy for an e-commerce store is crucial for providing a seamless and enjoyable user experience. Here are some tips for maintaining an effective hierarchy:
- Use clear and concise category names: Use clear and concise category names that accurately describe the products contained within. Navigation can become confusing if you use too many categories.
- Use a breadcrumb trail: A breadcrumb trail shows users where they are in the hierarchy and allows them to easily backtrack. This is especially useful for users who have entered the site from a search engine or other external link.
- Provide search functionality: Provide a search box that allows users to find the product or category they are looking for quickly. This is especially useful for users who are not sure where to find a product within your hierarchy.
By following these tips, you can create and maintain an effective hierarchy for your e-commerce store that will help users quickly find the products they are looking for and improve their overall experience.
Avoid Duplicate Content
Duplicate content can harm your e-commerce store’s conversion rates. Duplicate content can also confuse customers who may find it difficult to determine which page they should visit or trust. This confusion can lead to a poor user experience and a decreased likelihood of making a purchase.
Further, suppose search engines view your e-commerce store as having a significant amount of duplicate content. In that case, they may penalize your site by lowering your rankings or even removing your site from search results altogether.
To avoid these negative effects on your conversion rates, it’s important to regularly check your e-commerce store for duplicate content and take steps to remove it.
Use Stellar Product Description
Stellar product descriptions are an essential component of any successful e-commerce store.
By taking the time to craft well-written, informative, and persuasive product descriptions, you can increase sales, improve the customer experience, boost your search engine rankings, and build a strong brand identity. It could gain several reasons to increase conversion rates.
- A well-crafted product description can help increase sales by providing potential customers with all the information they need to make an informed purchase decision.
- This can help reduce the likelihood of returns and complaints, as customers are less likely to be disappointed with a product if they know exactly what they are getting.
- By including relevant keywords and phrases in your product description, you can increase the likelihood that your product will appear in search engine results when customers search for a particular product.
- By crafting product descriptions consistent with your brand voice and style, you can reinforce your brand’s identity and build a loyal customer base.
Mention Price
Displaying product prices is an essential component of any e-commerce store. It helps generate revenue, allows for comparison shopping, provides transparency, makes the purchasing process more convenient, and can be used as a marketing tool.
Final Thoughts
This is all about customizing your WooCommerce product page, generating a product feed, and increasing its conversion rates.
Frequently Asked Questions (FAQs):
It is very simple to display a sidebar on the WooCommerce product page; you need to create a new area button and animate it to the sidebar by dragging and dropping any widget. Or, you need to customize your theme to add sidebar functionality.
Open your page with elementor page builder, and you easily add any widget to your WooCommerce product page by drag-drop.
You May Also Read
- How Can CTX Feed Increase Your Revenue and get ahead of the Competition?
- How to Generate Heureka Product Feed in WooCommerce
- Guide To Generate Custom Product Feed on WooCommerce (The Easy Way)
- How to Use Multichannel Management for WooCommerce Store Growth
- How to Generate a Kelkoo Product Feed for WooCommerce


If you’re looking for a way to enhance your WooCommerce single product page, this article is a must-read. With step-by-step instructions and tips, you’ll be able to customize your page to match your brand and attract more customers. Give it a try and see the difference it makes!
Hi John,
Glad to know that it helped.
Thank You!