How to Add VAT Number to WooCommerce Invoice? Step-by-Step Guide
Adding a VAT number to WooCommerce invoices requires configuring WooCommerce’s built-in tax settings, such as store location, VAT rates, tax display attributes, and customer VAT fields—and then extending invoice data using an invoicing plugin like Challan – WooCommerce invoice generator plugin.
While WooCommerce can manage VAT rates, country-specific rules, and tax-inclusive pricing, it cannot natively output VAT IDs on invoices.
With Challan, you can append structured VAT attributes (e.g., VAT ID, SSN, VAT-inclusive totals) directly to the invoice schema, ensuring full tax compliance and clear, EU-ready documentation for both merchants and customers.
In this step-by-step guide, we’ll walk you through the process of setting up VAT in WooCommerce and show you how WooCommerce adds a VAT number to the invoice.
If you simply want to know how to add a WooCommerce VAT number on invoices, simply skip to that section.
Let’s dive in.
What is VAT?
VAT, or Value Added Tax, is a type of tax applied to goods and services at different stages of production and distribution. When a product is made, or a service is provided, each step that adds value to it also adds VAT.
Who pays this tax?
The consumer ultimately pays this tax when they purchase the final product.
What do you do with this collected VAT?
Businesses like yours collect VAT on behalf of the government and pay it forward. VAT is an indirect tax because consumers don’t pay it directly to the government but through businesses like you that include it in the price of their products or services.
Important note – There’s no VAT in the USA, and they charge sales tax instead. VAT is widely practiced in the EU.
Learn how to setup sales tax in WooCommerce from here.
What is VAT for an eCommerce/WooCommerce Store?
For an online store, like those using WooCommerce, VAT is a key part of doing business, especially if you’re selling to customers in countries where VAT is required. When you sell products or services online, VAT is added to the price your customers see on your website.
You then collect this VAT and pass it on to the government. It’s important to know the VAT rules in the countries where you sell because these rules can vary.
In a WooCommerce store, you need to set up VAT correctly to make sure you’re charging the right amount of tax. This setup helps you stay compliant with the law and avoids any penalties for not charging VAT where it’s needed.
It also ensures that your customers know exactly how much tax they’re paying, which can help build trust in your business.
Why Do Store Owners Need to Set Up VAT?
Setting up VAT in your WooCommerce store is essential for several reasons.
First, it keeps your business legal. Countries that have VAT requirements expect businesses to charge and collect this tax. Failing to do so can lead to fines or other penalties.
Second, properly managing VAT can help you avoid issues with customers. Shoppers expect to see taxes included in their purchase total. If VAT is missing or unclear, it can lead to confusion and frustration, possibly even losing your sales.
Finally, setting up VAT can have benefits beyond just compliance. For example, businesses that are registered for VAT can often reclaim the VAT they’ve paid on business expenses, which reduces their overall tax burden.
In short, VAT is a necessary part of running an eCommerce store. Setting it up correctly in WooCommerce helps keep your business compliant, builds customer trust, and can even save you money.
How to Add VAT in WooCommerce
Setting up VAT in your WooCommerce store is essential for compliance. Here’s a simple guide to help you configure everything.
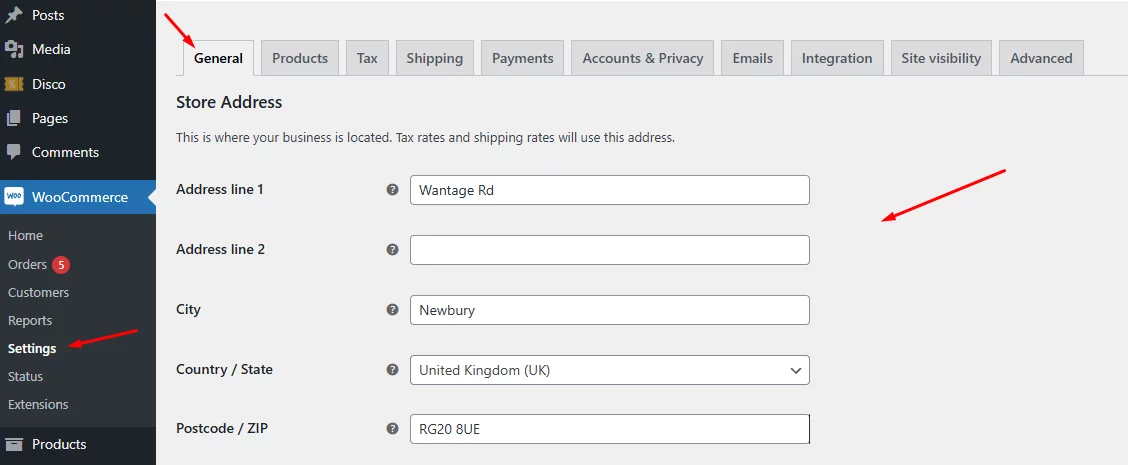
Configuring Your Store’s Location and Currency
Start by setting your store’s location and currency. Go to WooCommerce >> Settings >> General tab. Here, you’ll set your store’s country state and postcode as well as your store’s currency.
Enabling Tax Calculations and Display Settings
Next, you’ll need to enable tax calculations. Check mark the following box to enable tax in WooCommerce.
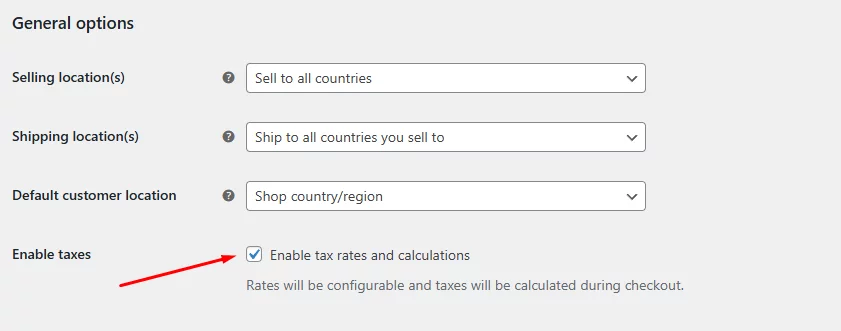
You can also choose whether to display prices with or without tax and customize how tax appears on invoices and emails from the General Options section.
Adding VAT Rates in WooCommerce
To add VAT to your store, you’ll need to create VAT rates for your products or services. This involves setting up standard VAT rates, adding reduced VAT rates for specific products, and setting different VAT rates for various countries.
- Creating Standard VAT Rates: Go to the Tax tab and click on Standard Rates. Here, you can add new rates and set the percentage for each.
- Adding Reduced VAT Rates: If certain products qualify for reduced VAT rates, like children’s clothing, you can add them under the Reduced Rates section. Simply specify which products or categories they apply to.
- Setting VAT Rates for Different Countries: If you sell in different countries, you may need separate VAT rates. Go to the Tax tab and click on the Country tab. Add new tax rates for each country and specify the applicable products or categories.
Displaying VAT Information on Your Store
Once your VAT rates are set up, you’ll want to display VAT information clearly in your store. This includes showing prices with and without VAT, customizing the VAT display on product pages, and adding VAT details to invoices and emails.
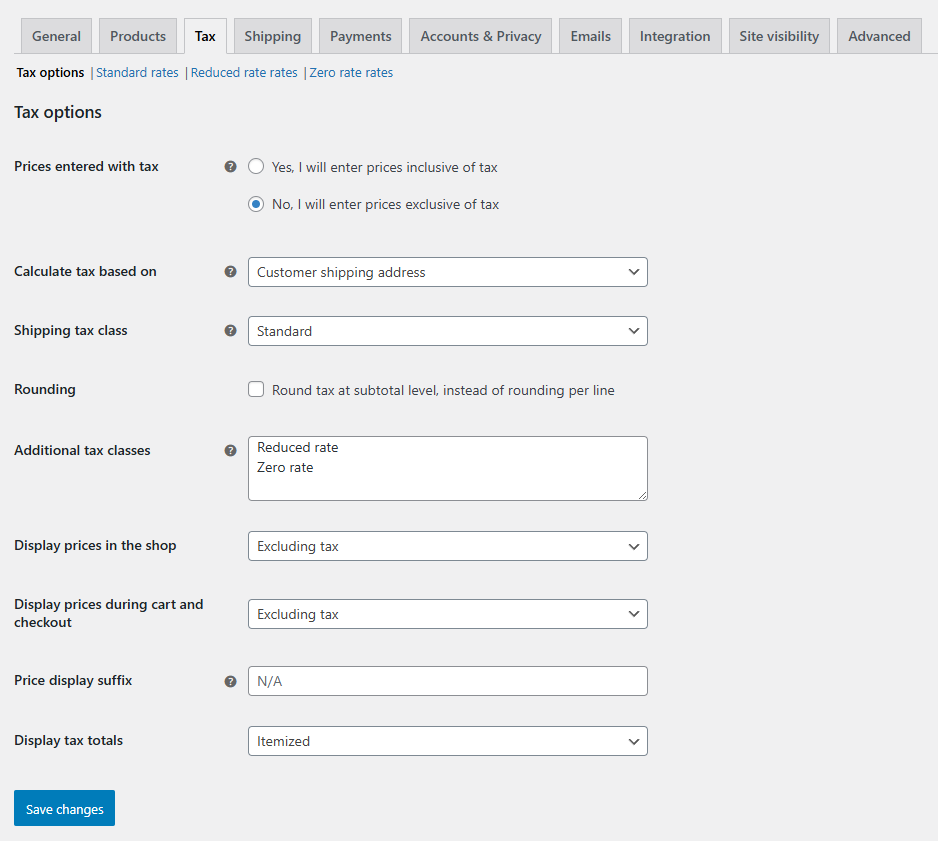
- Showing VAT-Inclusive and Exclusive Prices: To show VAT-inclusive prices, go to WooCommerce >> Settings >> Tax >> Tax Options. Here, you can choose to display prices with VAT included. If you want to show both inclusive and exclusive prices, you can use a plugin for dual pricing.
- Customizing VAT Display on Product Pages: Customize how VAT appears on product pages by adding custom fields for VAT information. These fields can show the VAT rate, the amount of VAT applied, and the total price, including VAT.
- Adding VAT Information to Invoices and Emails: Finally, display VAT number on WooCommerce invoice and emails by customizing the order confirmation email template. Include details like the total VAT applied and the VAT rate.
Managing VAT Exemptions and Refunds
You may also need to manage VAT exemptions and process VAT refunds for returns or cancellations.
- Setting Up VAT Exemptions: If some customers are eligible for VAT exemptions, such as charities, you can set up exemptions in the WooCommerce settings under the Tax tab.
- Processing VAT Refunds: For returns or cancellations, issue a credit note in WooCommerce and manually refund the VAT portion of the sale.
By following these steps, you can set up VAT in your WooCommerce store, ensuring compliance and making it easy for customers to see VAT information when shopping.
Additional Considerations
- VAT Number Validation: Consider using a plugin to validate customer-provided VAT numbers.
- EU VAT Rules: If you’re selling within the EU, be aware of specific VAT regulations, such as distance selling thresholds and reverse charge mechanisms.
- Tax Exemptions: Set up tax exemptions for eligible customers or products.
- Test Thoroughly: Test your VAT setup with different scenarios to ensure correct tax calculations.
Example: Setting Up VAT for a UK-Based Store
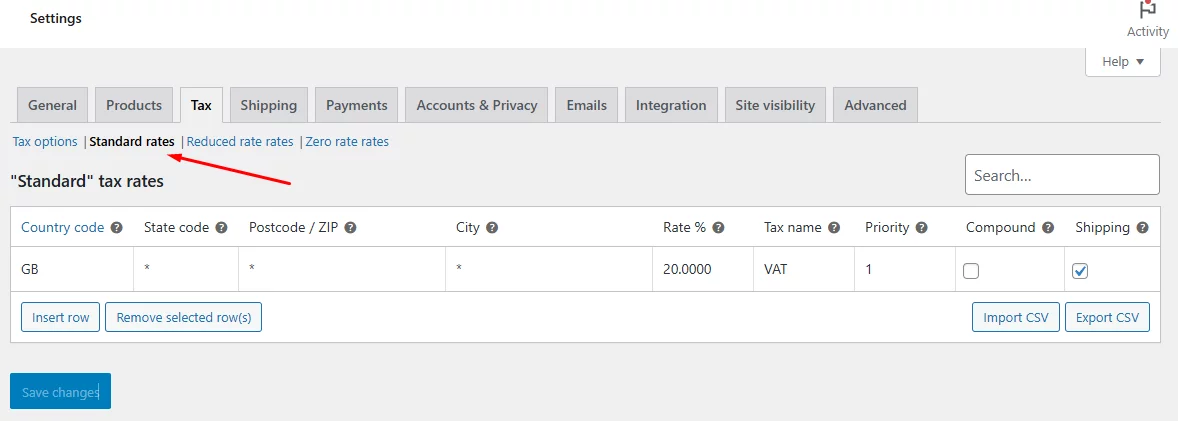
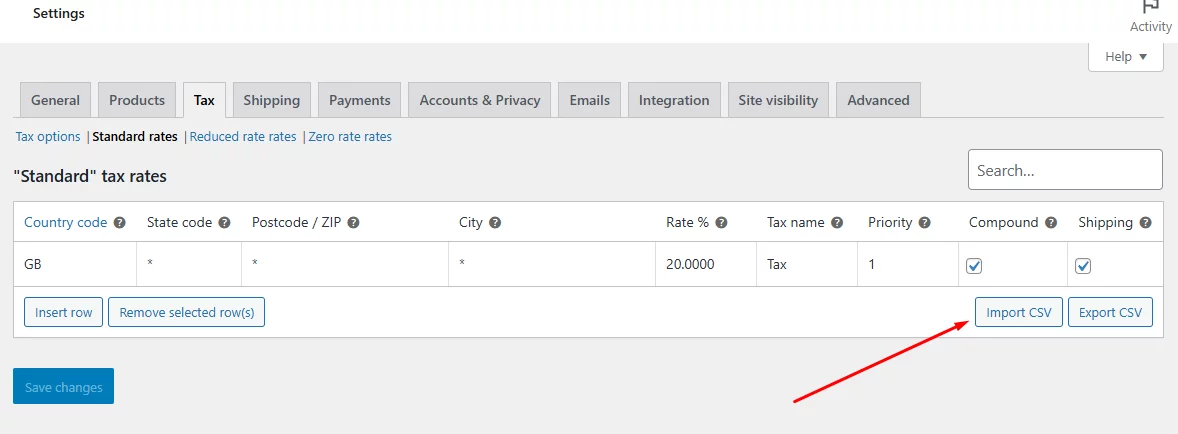
Let’s create a VAT rate in WooCommerce for the UK. Go to the Tax tab and click on the Standard Rates.
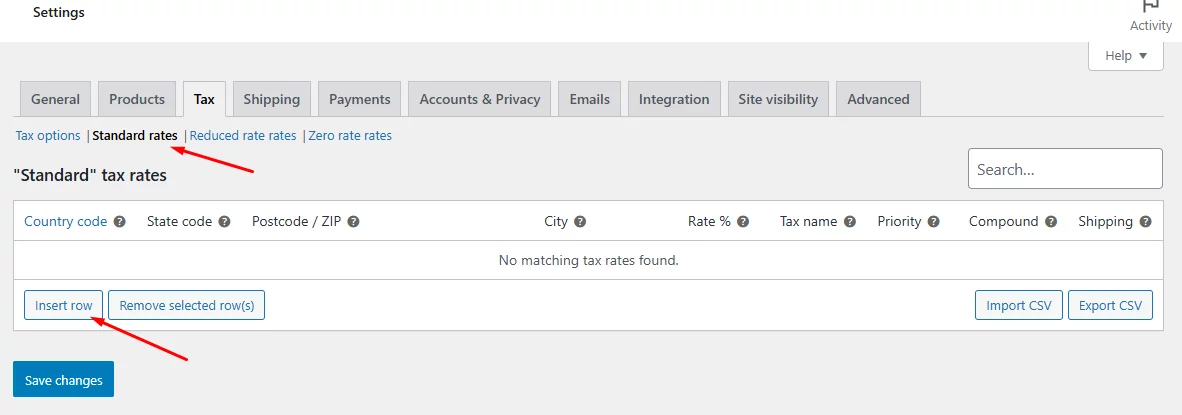
Hit the Insert Row button and enter details. The country code for the UK is GB, and the standard eCommerce VAT is 20%.
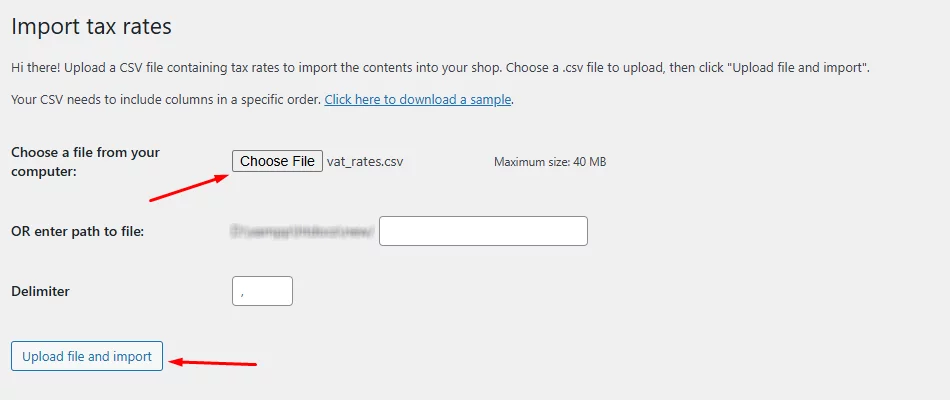
If you want to upload all WooCommerce EU VAT number or rates, you can upload them in a CSV file. Click on the Import CSV button.
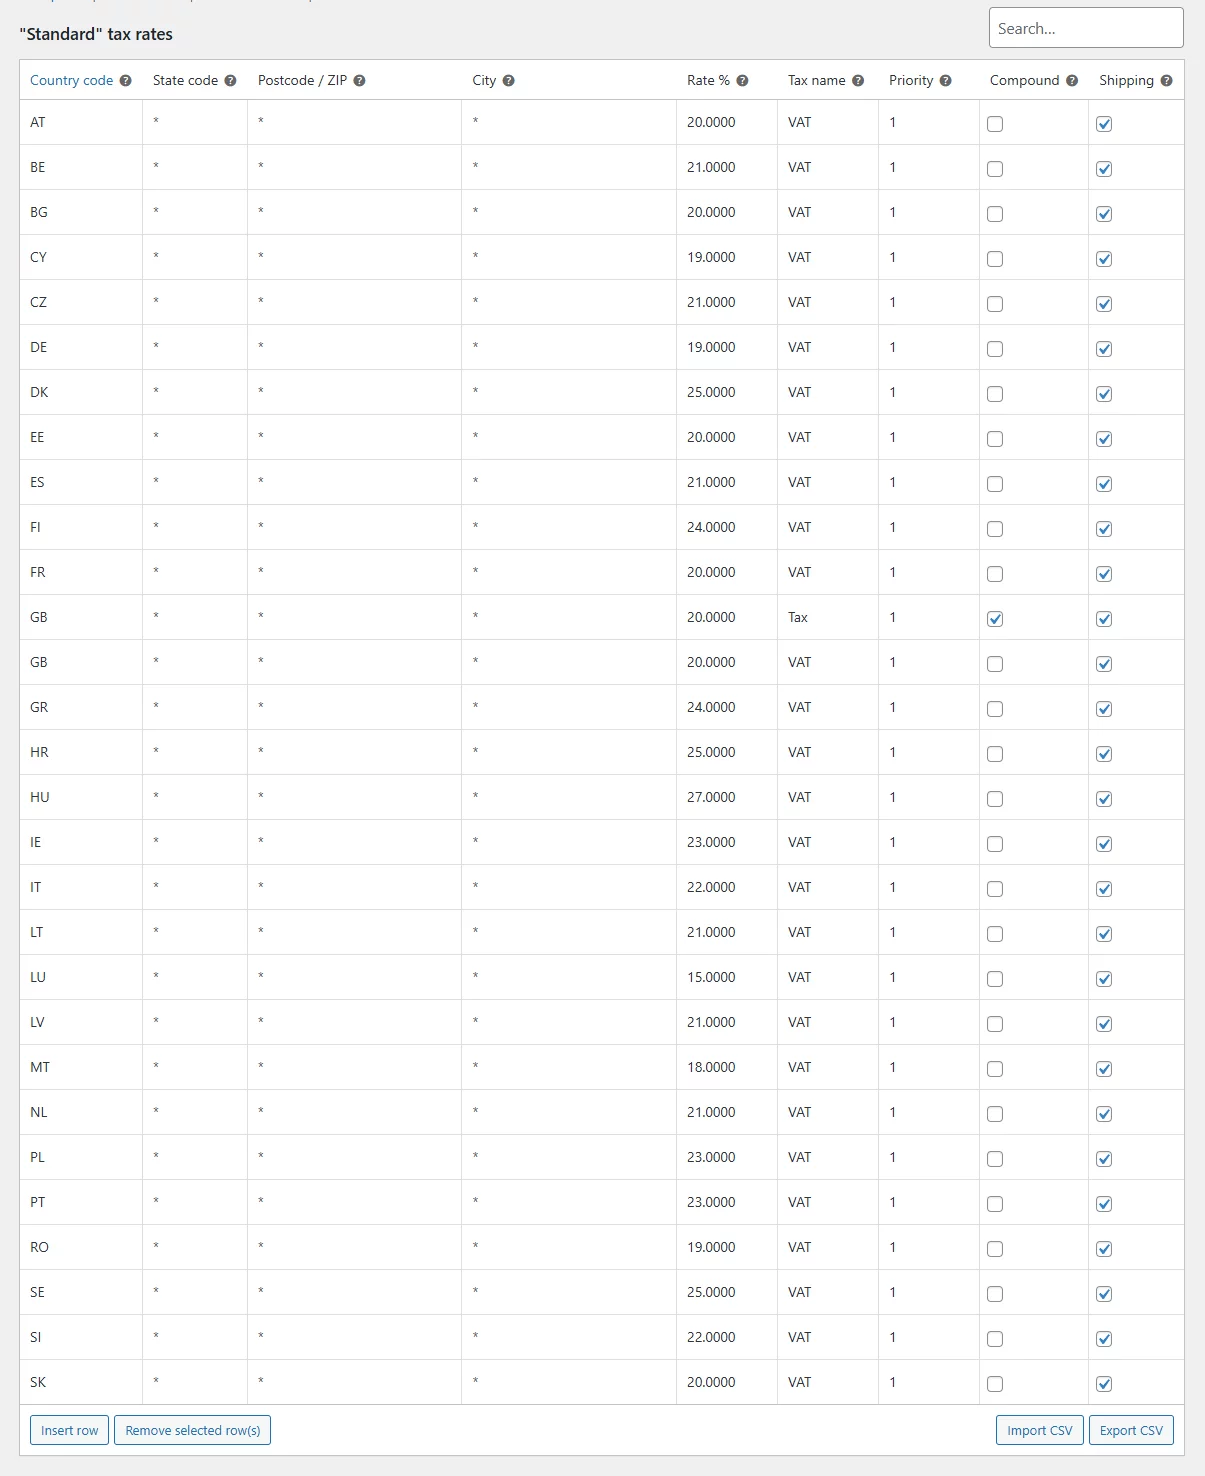
Select or link your file and upload it.
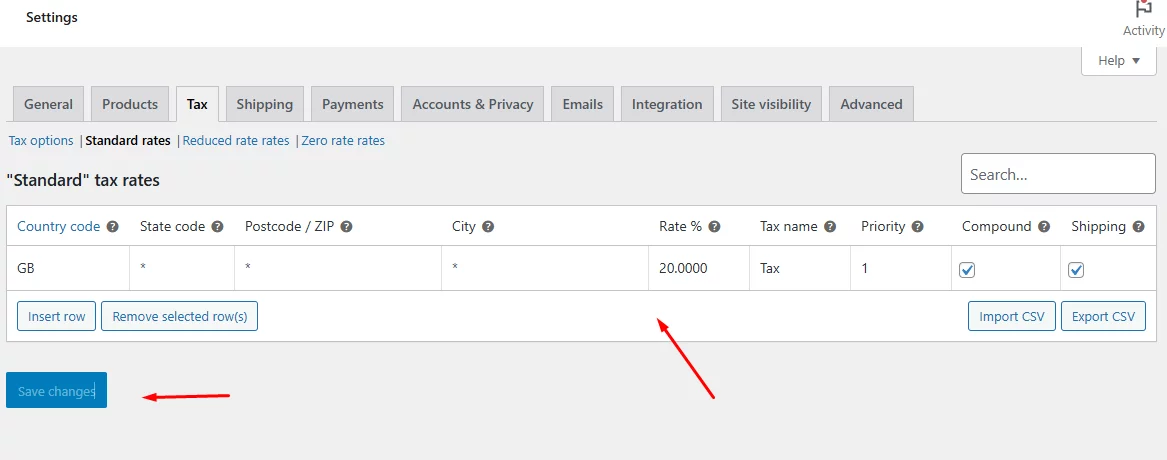
Here’s how it may look after uploading.
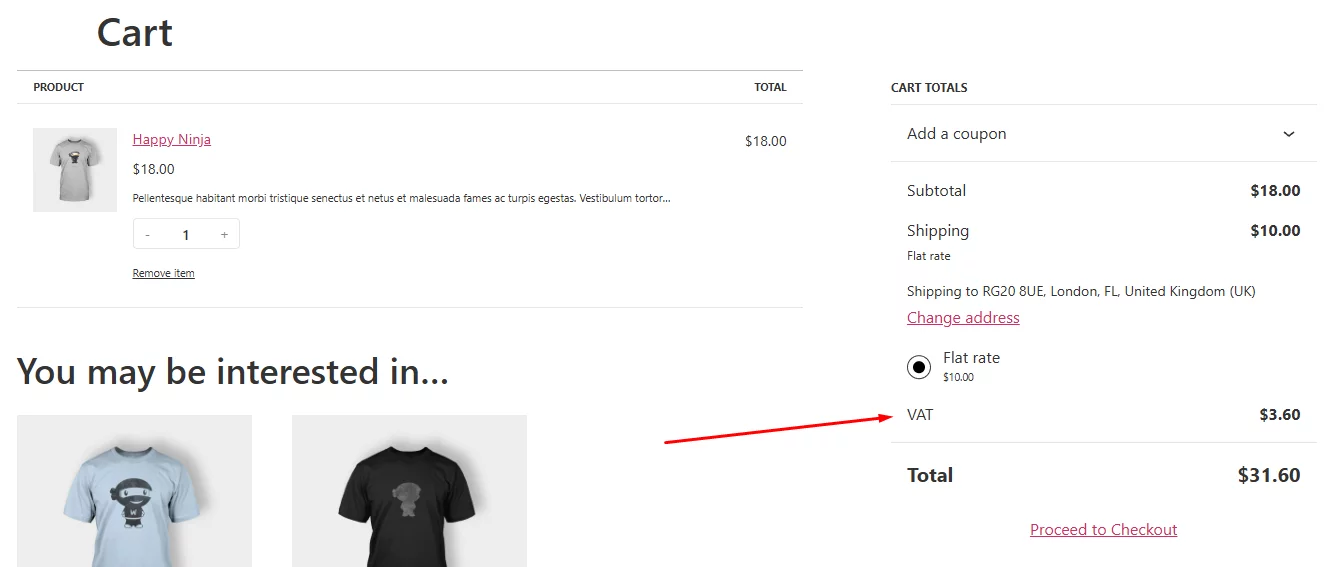
Here’s how the Cart page may perform WooCommerce VAT number validation and display the VAT rate.
Remember: VAT regulations can be complex and vary by country. It’s essential to stay updated on the latest tax laws and consider consulting with a tax professional if needed.
WooCommerce Add Vat Number to Invoice
Now let’s set up WooCommerce display vat number on invoice. Unfortunately, WooCommerce doesn’t pack tools to create invoices.
You need to install an invoice or WooCommerce vat number plugin to WooCommerce add vat number to invoice. The best in the market we found is called Challan.
This plugin generates professional invoices and attaches to the order confirmation emails automatically. You can also extensively personalize your invoices as per your brand palette.
The pro version of Challan is a monster when it comes to advanced features and designing invoices and packing slips. Challan Pro allows you to customize your invoices just the way you need.
Most importantly, it allows you WooCommerce add vat number to invoice. Without further ado, let’s learn how to WooCommerce add vat number in invoices using Challan Pro.
How to Display WooCommerce VAT Number Field on Invoices
After you install the plugin, go to Challan >> Settings.
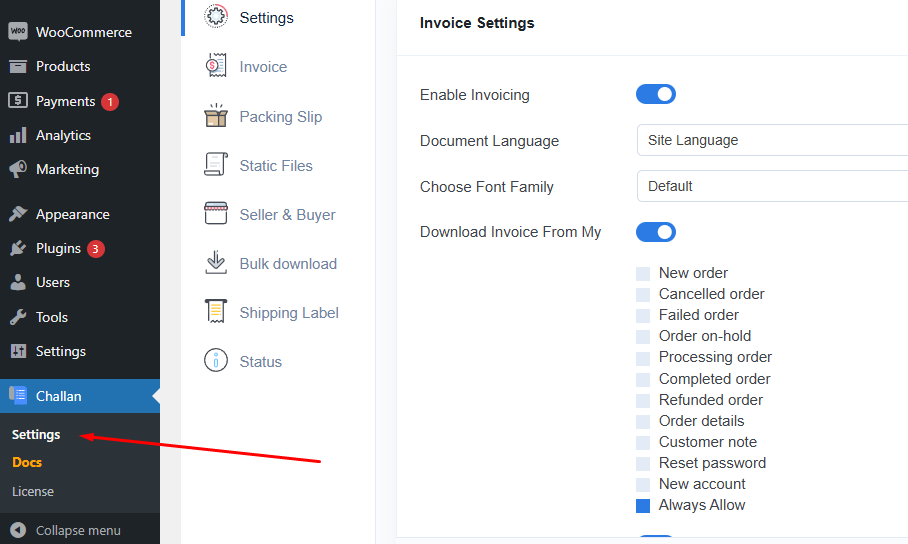
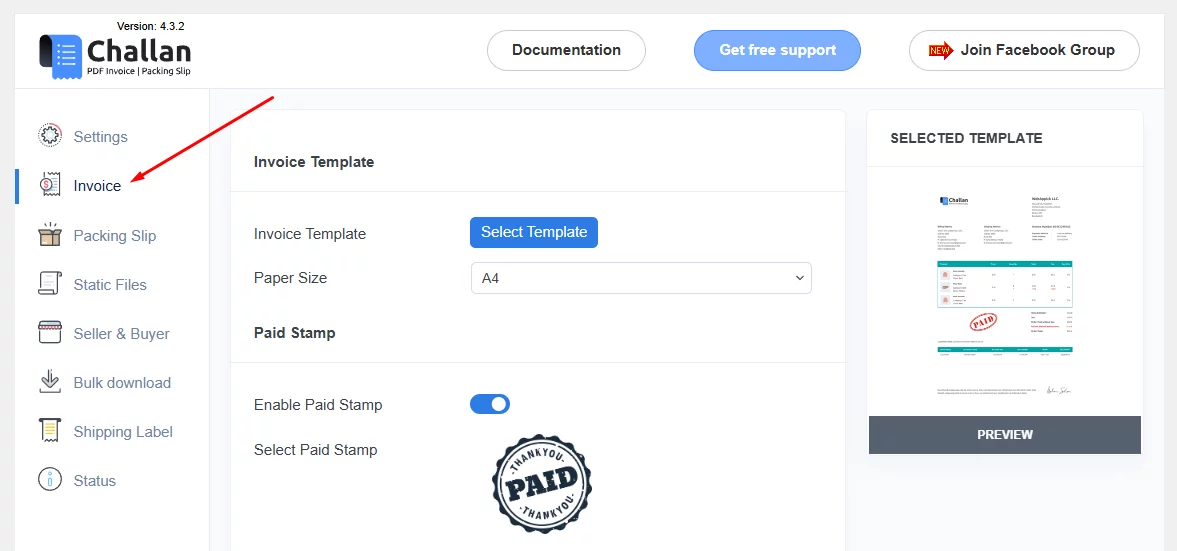
Next, click on the Invoice tab.
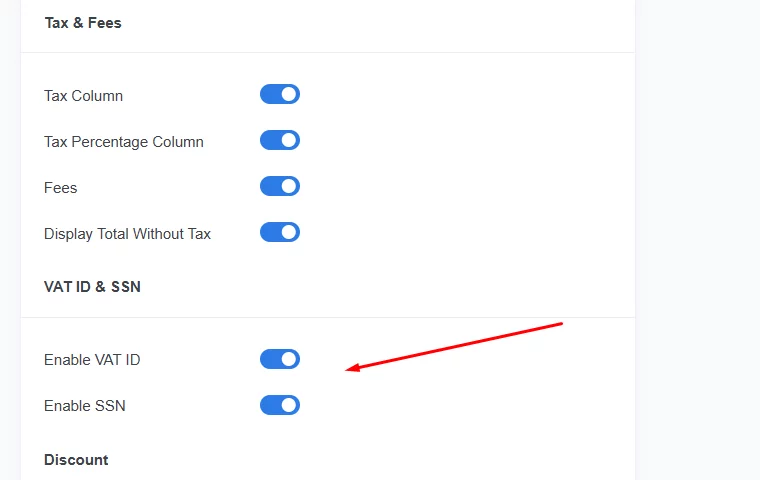
Scroll down to the VAT ID & SSN section and enable them. Save your changes.
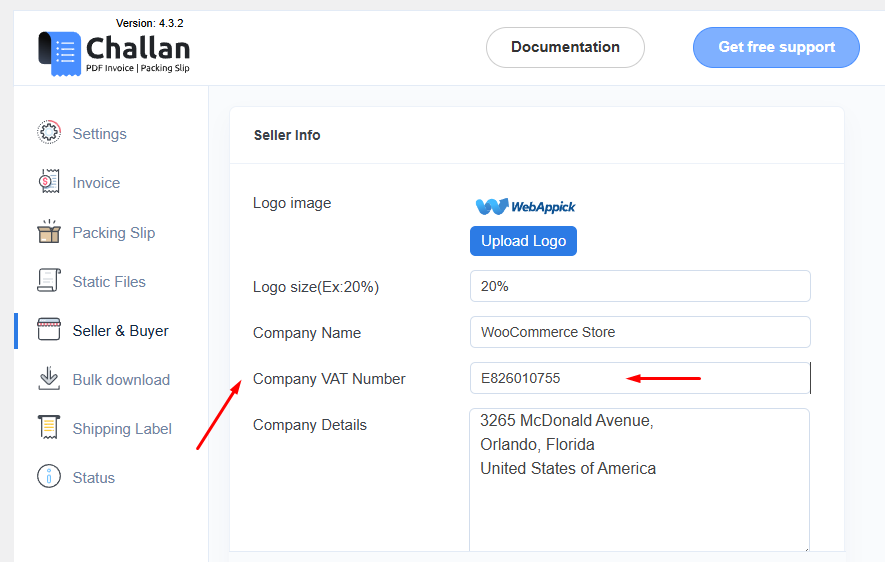
Your next task is to go to the Buyer & Seller tab.
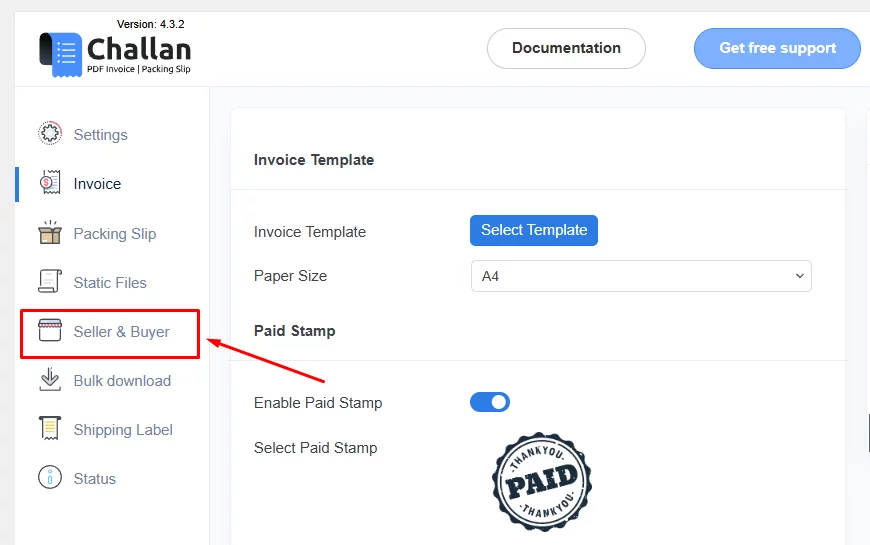
In this tab, you will now find a dedicated box to enter your WooCommerce invoice VAT number.
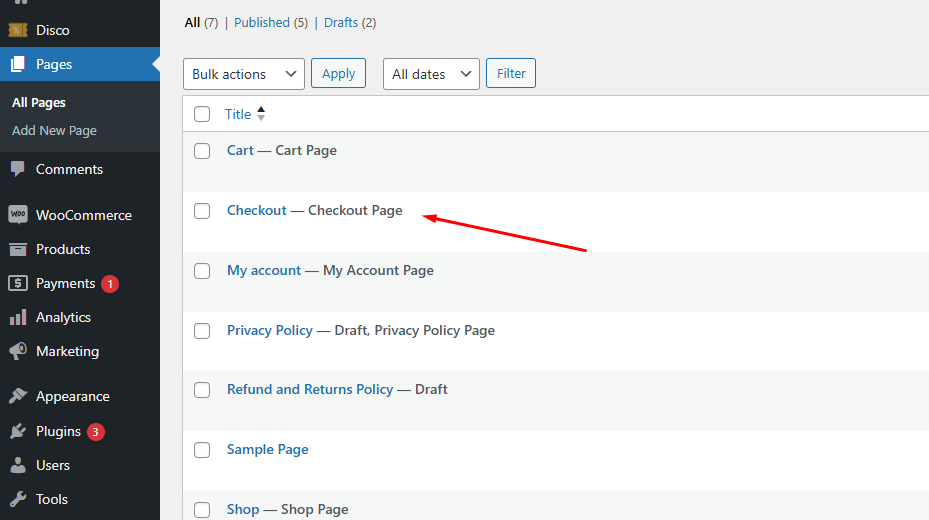
If you want to collect WooCommerce customer VAT number, go to Pages >> All Pages and click to edit the Checkout page.
You can remove the existing elements and insert the following WooCommerce VAT number checkout shortcode anywhere on the page.
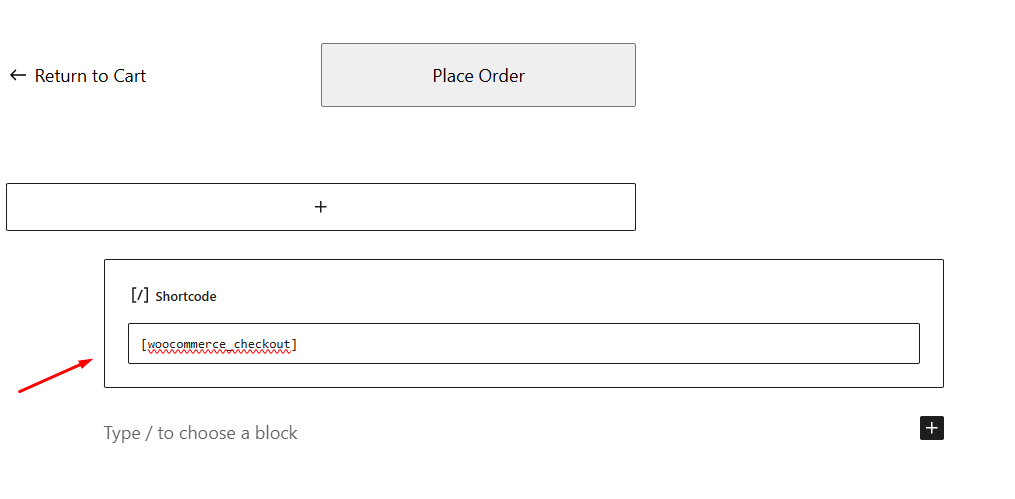
Or you can simply create a new page called Checkout and insert that shortcode.
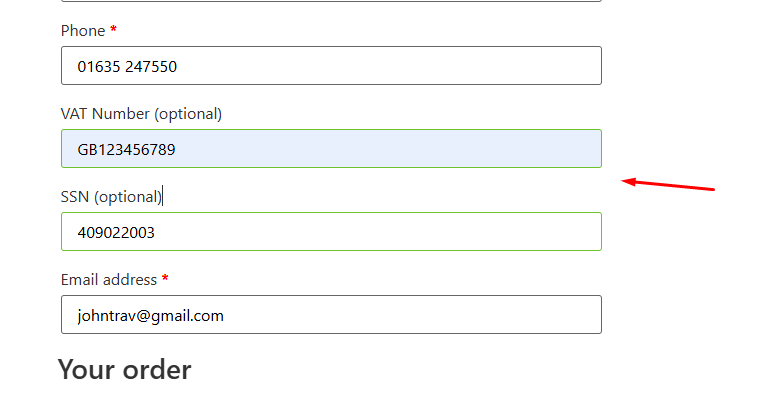
This will add VAT and SSN fields on the Checkout page.
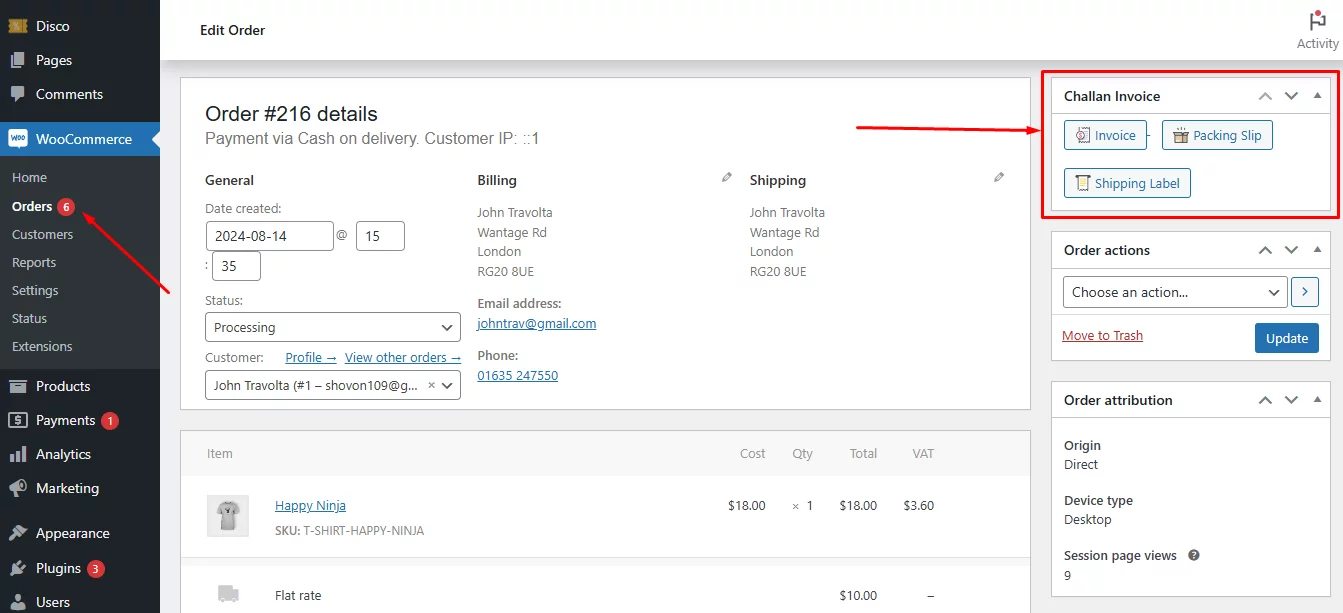
Now, let’s go to an order and download an invoice. Challan places a dedicated panel on every order page for downloading the documents.
Go to WooCommerce >> Orders and click on any individual order. Click to download the invoice.
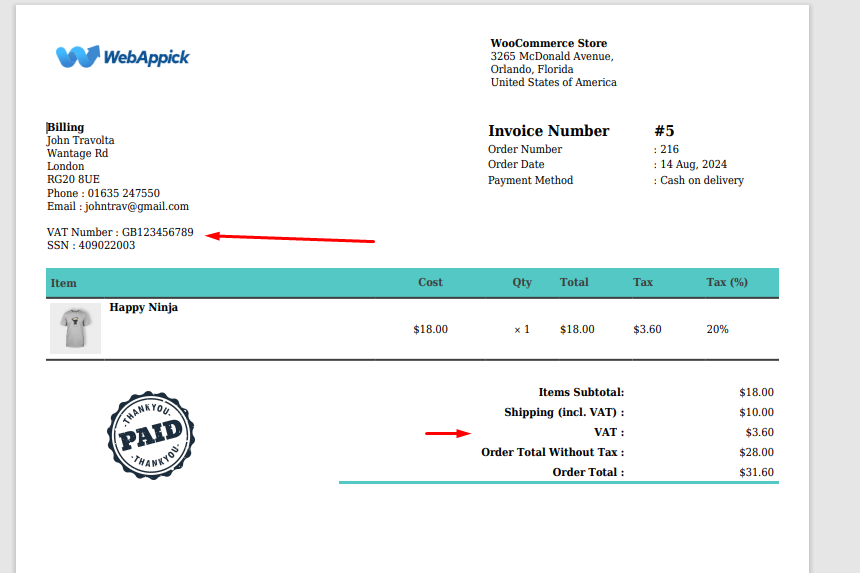
Here’s how WooCommerce add vat number to invoice with the help of the plugin.
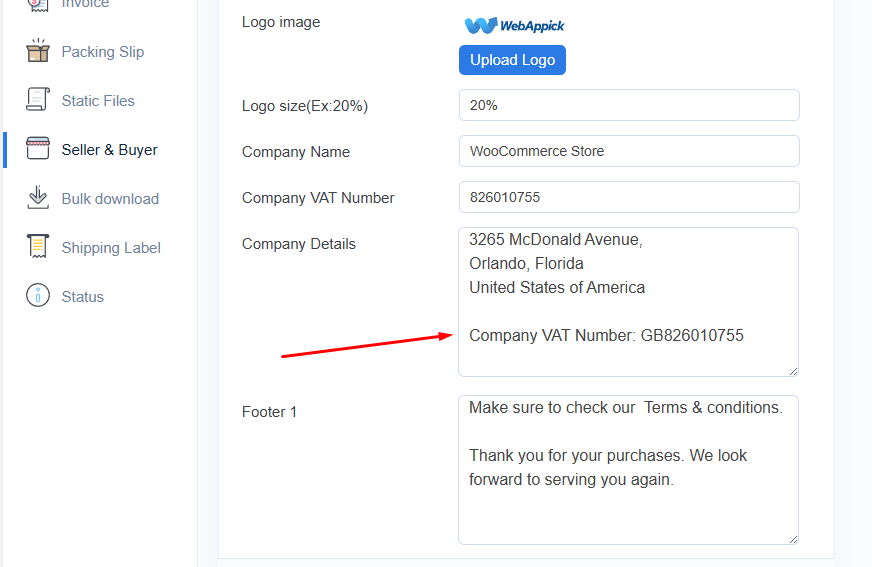
Not showing your company VAT ID?
Simply input it under the company information in the Buyer & Seller section.
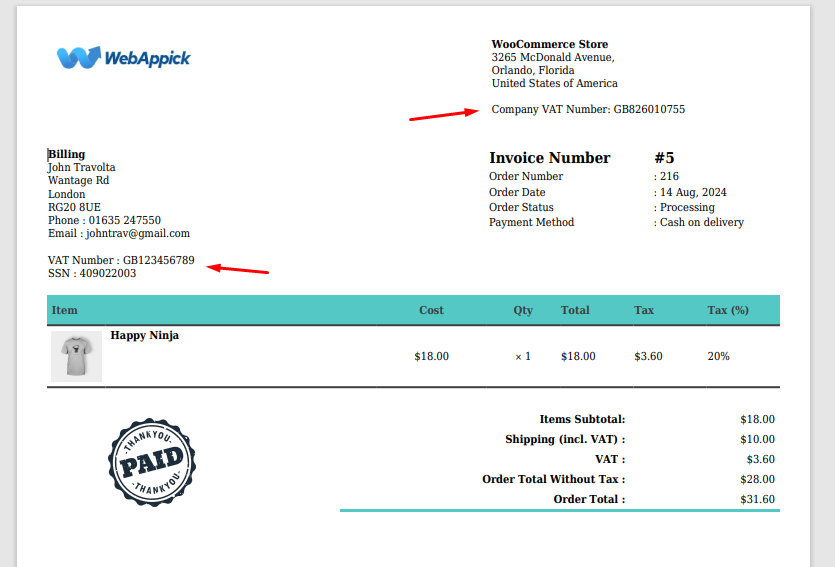
Here you go. Your invoices will now display both your and your customer’s VAT IDs.
Why Do You Need WooCommerce Add Vat Number to Invoice?
The inclusion of a VAT number on WooCommerce invoices is a critical aspect of business operations for several compelling reasons:
Legal Compliance and Tax Adherence
- Tax Regulations: Most countries impose stringent regulations on VAT invoicing. Failing to include a customer’s VAT number on an invoice often constitutes a serious legal offense, which may incur substantial fines and penalties.
- Tax Deductibility: Businesses with valid VAT numbers can typically reclaim the VAT they’ve paid. Providing the VAT number on the invoice streamlines this process for customers, fostering goodwill.
Accurate Business Operations and Financial Management
- Tax Exemption and Reverse Charge:
- Tax Exemption: In B2B transactions, businesses holding valid VAT numbers are frequently exempt from VAT. Including the customer’s VAT number allows you to verify their eligibility for exemption and adjust the invoice accordingly.
- Reverse Charge: Some jurisdictions implement a reverse charge mechanism for specific goods or services. In these cases, the customer bears responsibility for VAT payment, and the VAT number is essential for identifying the taxable party.
- Financial Record-Keeping: Detailed financial records are crucial for business success. Including the VAT number on invoices simplifies the process of VAT returns and audits, ensuring accurate financial reporting.
- Dispute Resolution: In the event of disputes or inquiries related to VAT, having the customer’s VAT number readily available on the invoice provides valuable information for efficient resolution.
Enhanced Customer Relationships and Trust
- Transparency: Displaying the VAT number on invoices fosters transparency and builds trust with customers, demonstrating your commitment to clear and honest business practices.
- Customer Satisfaction: Providing accurate VAT information simplifies the customer’s VAT recovery process, contributing to overall customer satisfaction and loyalty.
Risk Mitigation
- Fraud Prevention: Including the VAT number on invoices helps prevent fraudulent activities by verifying the authenticity of the customer’s business.
- Audit Preparedness: Maintaining invoices with accurate VAT information ensures your business is well-prepared for potential tax audits, minimizing the risk of penalties and disruptions.
Wrap up
In essence, adding a VAT number to WooCommerce invoices is not merely a formality but a fundamental aspect of responsible business operation.
It safeguards your business from legal repercussions, optimizes financial management, strengthens customer relationships, and mitigates potential risks. By prioritizing the inclusion of VAT numbers on invoices, you demonstrate your commitment to compliance, efficiency, and customer satisfaction.
Hope this guide on WooCommerce add vat number to invoice will help you setup and display VAT on your invoices.
