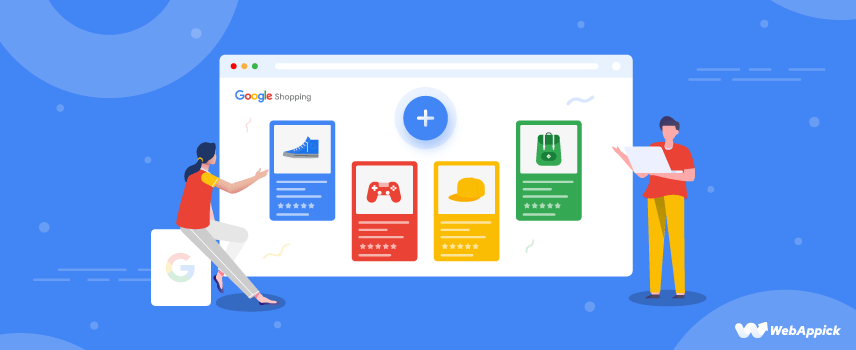
How to Add Products to Google Shopping: A Step-by-Step Guide
Have you ever felt like your products are lost online? Well, Google Shopping is here to help your products stand out!
Getting your products in front of potential customers is one of the major keys to online success.
And trust me, Google Shopping can be a game-changer for boosting visibility and sales for the products. You’ll be shocked to know that around 49% of shoppers use Google to find a product or item.
So in this guide, I’ll break down the process of how to add products to Google Shopping in five easy steps.
You will also get to know about the key benefits and best practices of Google Shopping. Whether you’re a pro or just starting, you’ll benefit.
Let’s do some shopping!
Why Should You Add Products to Google Shopping?
Google Shopping has lots of benefits for eCommerce users. Here we have listed a few of those.
- Free product listings on Google Shopping
- Drives quality traffic to your website
- Generates better ROAS
- Ads automation facility
- Costs lower CPC than other ads
- Remarketing is easier
- Improves the overall SEO performance, etc.
How to Add Products to Google Shopping: 5 Easy Steps
Here, I’ll be broadly discussing how to list products on Google Shopping. The steps are easy and beginner-friendly.
So I believe you’ll be able to pull it off. Have a quick look,
5 steps on how to add products to the Google Shop page:
- Setting up a Google Merchant Center Account
- Optimizing the product images and videos
- Uploading product data on GMC
- Link Google Ads with GMC (Bonus Step)
- Create a Google Shopping campaign (Bonus Step)
Now let’s get into the main business. Take your time and go through each of the steps carefully.
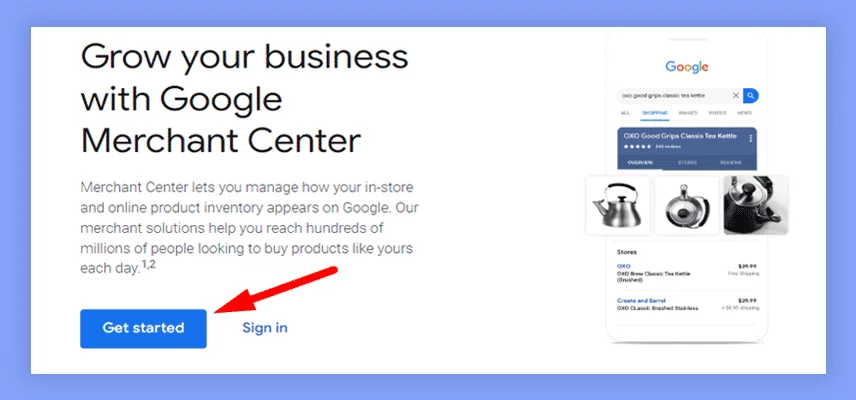
Step-1: Setting up a Google Merchant Center account
Firstly, you need to set up a Google merchant center account to add your products to Google Shopping.
Now go to the Google Merchant Center formerly known as Merchant Center Next homepage. Yes, Merchant Center Next stands as the redesigned edition of Google Merchant Center.
This streamlined version offers users a more straightforward interface and introduces fresh features for an enhanced user experience.
Now, hit the ‘Get Started’ button if you’re new, or sign in if you’re an existing user.
Do you see something on the following page?
Yes, share this information with Google-
- Enter your legal business name.
- Specify your business country.
- Choose your local time zone.
- Provide details about your eCommerce tools.
I hope you have shared this information correctly. Once that’s done, agree to Google Merchant Center’s Terms of Service. The “Create account” button will light up. Click it, and your account is ready to roll!
See? It was easy.
However, it’s not over. After activation, the next step is to verify your website’s ownership.
This involves two simple steps:
- Verify the ownership of your website.
- Claim your website on Google Merchant Center
The verification steps can sound critical, but it’s not.
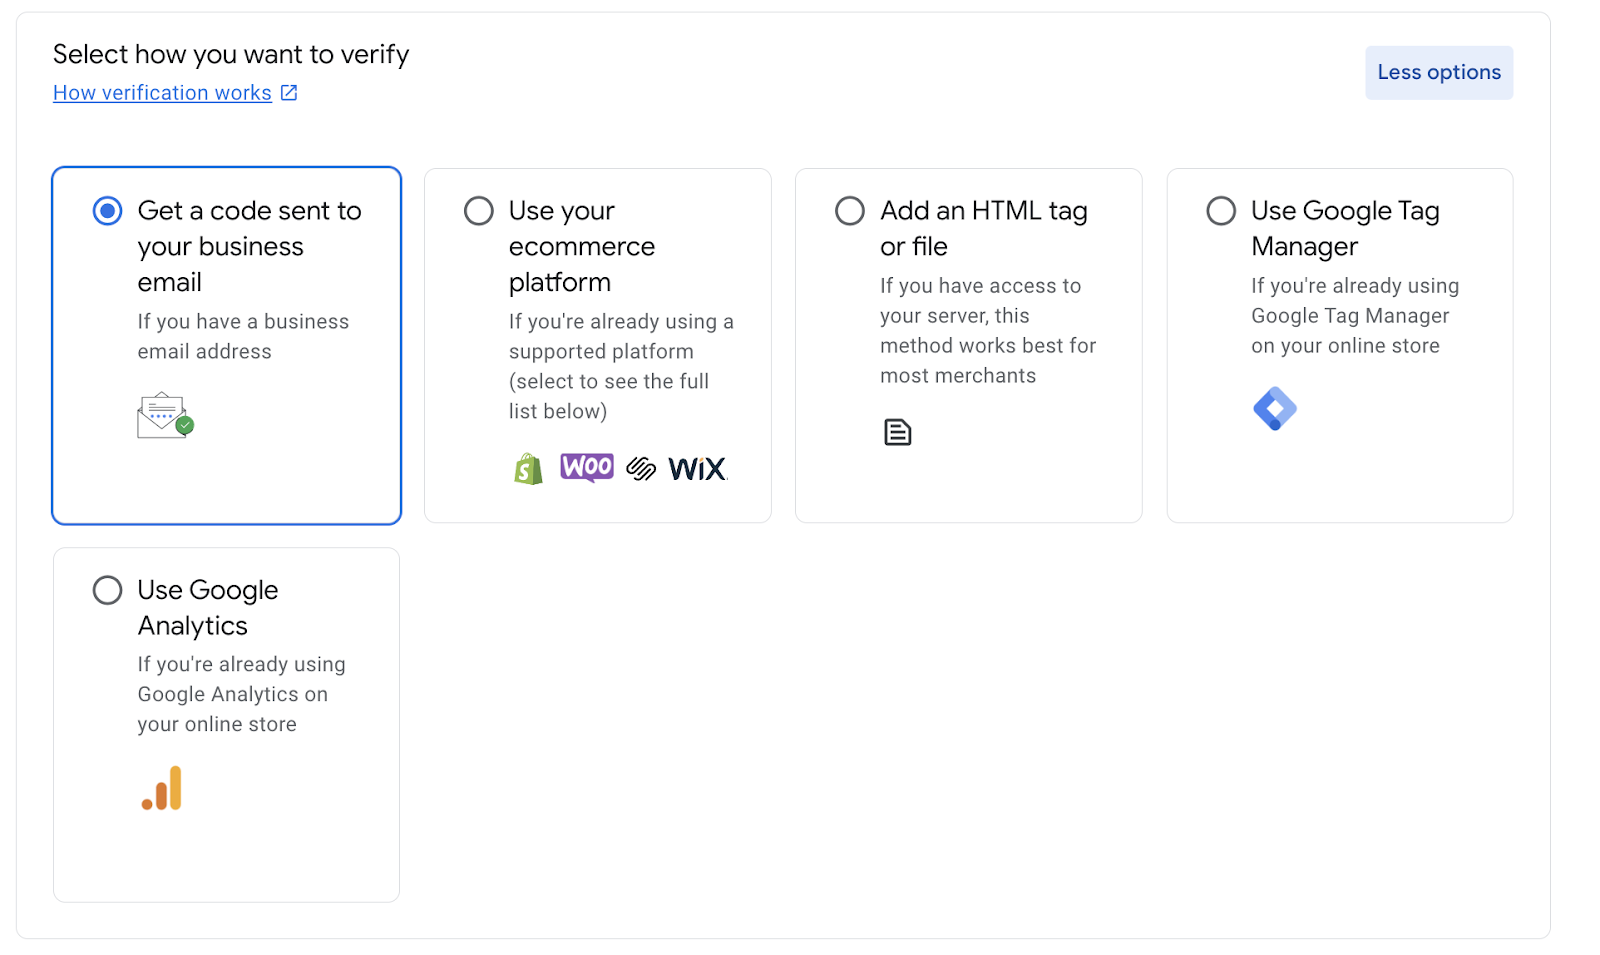
And there are multiple ways to do it. Let’s walk through these steps to ensure your products get the spotlight they deserve!
| Verification Methods | Verification Process |
|---|---|
| Business Code | Use the Code sent to your business email. |
| Use your eCommerce Platform | Use the code in your ecommerce platform. |
| Adding an HTML tag | Paste the HTML tag on the <head> section of your website’s homepage |
| Using Google Tag Manager | Use the Tag Manager code on your website’s homepage’s <head> section. |
| Using Google Analytics | Add the Google Analytics tracking code on the <head> section of the homepage. |
I use the Google Analytics method or upload an HTML file. It seems the easiest to me. But hey, you can use any of the methods as all of them are pretty easy.
Step-2: Optimizing the Product Images and Videos
Now that your Google Merchant Center account is up and running, let’s make your products pop! How?
Optimizing product images and videos is the secret sauce for shoppers. It creates the first impression for them. But you need to optimize them properly, following google’s image guidelines.
Here are the things you need to follow:
- Non-apparel: 100 x 100 pixels
- Apparel: 250 x 250 pixels
- Max image size: 64MP
- Max file size: 16MB
If you follow them, you can also use these pictures to sell your products on Amazon, eBay, Walmart etc. Because these requirements are standard.
Step-3: Uploading Product Data on GMC
This is the most crucial stage of the process. You can add products to GMC in two ways:
- individually( one by one).
- or upload a product feed containing all items in a single file.
In my case, I always use a product feed plugin because I have to use WooCommerce most of the time. And if you fall under the same category, where 29% of all e-commerce websites use WooCommerce, you can use it too.
And you might know that the most effective WooCommerce product feed plugin is CTX Feed. It is the easiest and least time-consuming way to create a feed.

Find the free version of the CTX Feed – WooCommerce Product Feed Manager Plugin in the WordPress plugin directory.
Now that you have found it, quickly start by installing the CTX Feed plugin from the WordPress plugin directory.
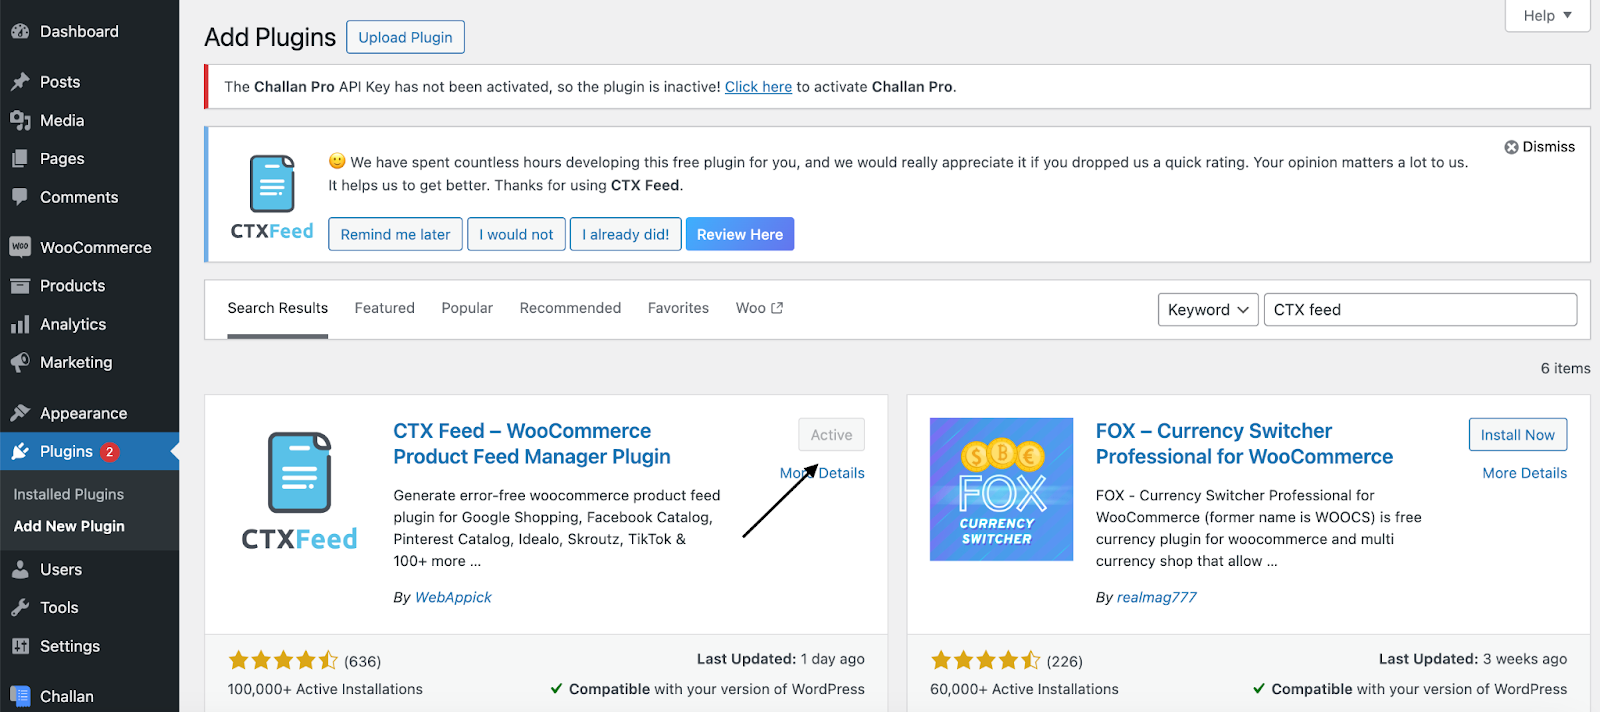
You can get most of your job done using the free version. You will be able to generate unlimited products and unlimited feeds using it. So, get the free version!
Hope you got to install the plugin.
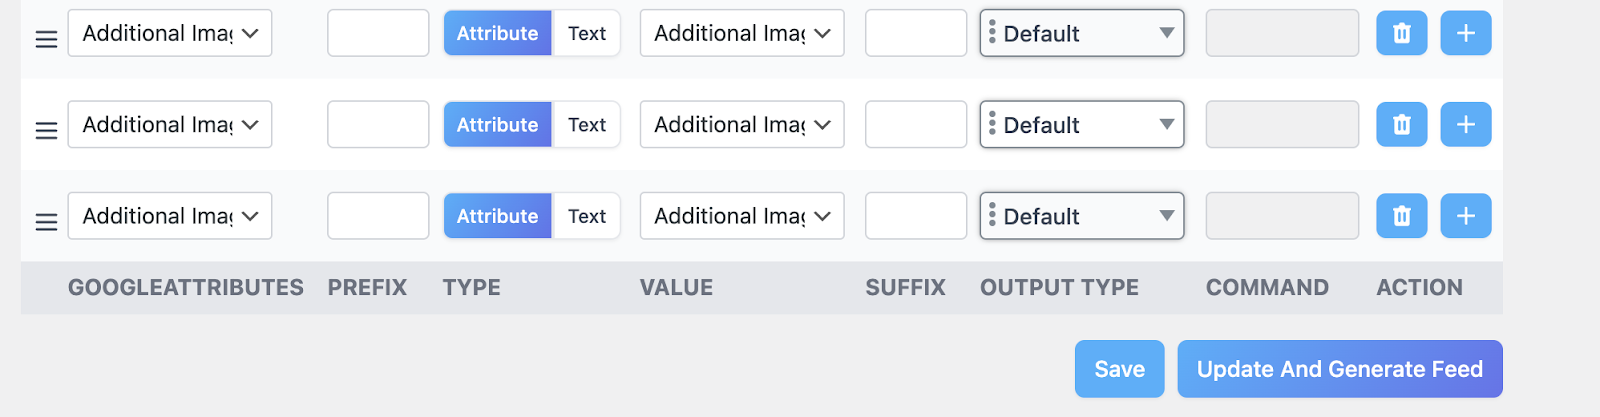
Now it’s time for the most interesting part. Generating a product feed.
So click on CTX feed and then go to Make a feed. Then fill up this information.
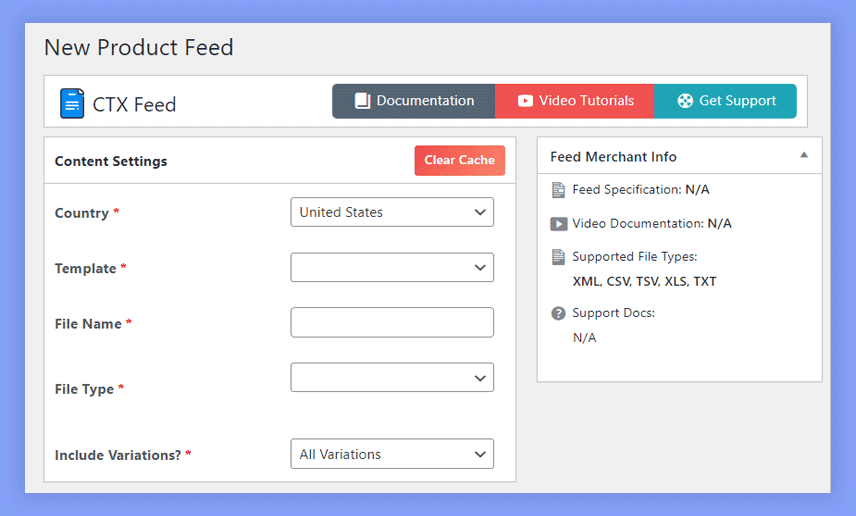
After entering all the necessary details, click the “Update and Generate Feed” button in the bottom-right corner.
Your product feed will be swiftly generated. Though the time may vary based on the number of products. But, it definitely won’t take much of your time.
Now you need to remember that Google Merchant Center facilitates the uploading of various feed types, including the main Google Shopping feed.
In total, Google supports 55 attributes, organized into 10 categories. Have a look-
| Category | Attributes | Information |
| Basic Product Info | 9 attributes | Includes product titles, descriptions, prices, and images |
| Detailed Product Description | 4 attributes | Includes dimensions, weight, and materials, |
| Product Category | 11 attributes | Specifies your product’s category in Google’s system, |
| Price and Availability | 8 attributes | Includes product’s price, stock availability, and shipping choices, |
| Product Identifiers | 5 attributes | These unique product codes, like GTIN or MPN, serve as digital fingerprints for your products, |
| Shipping | 4 attributes | Shipping cost, overall cost |
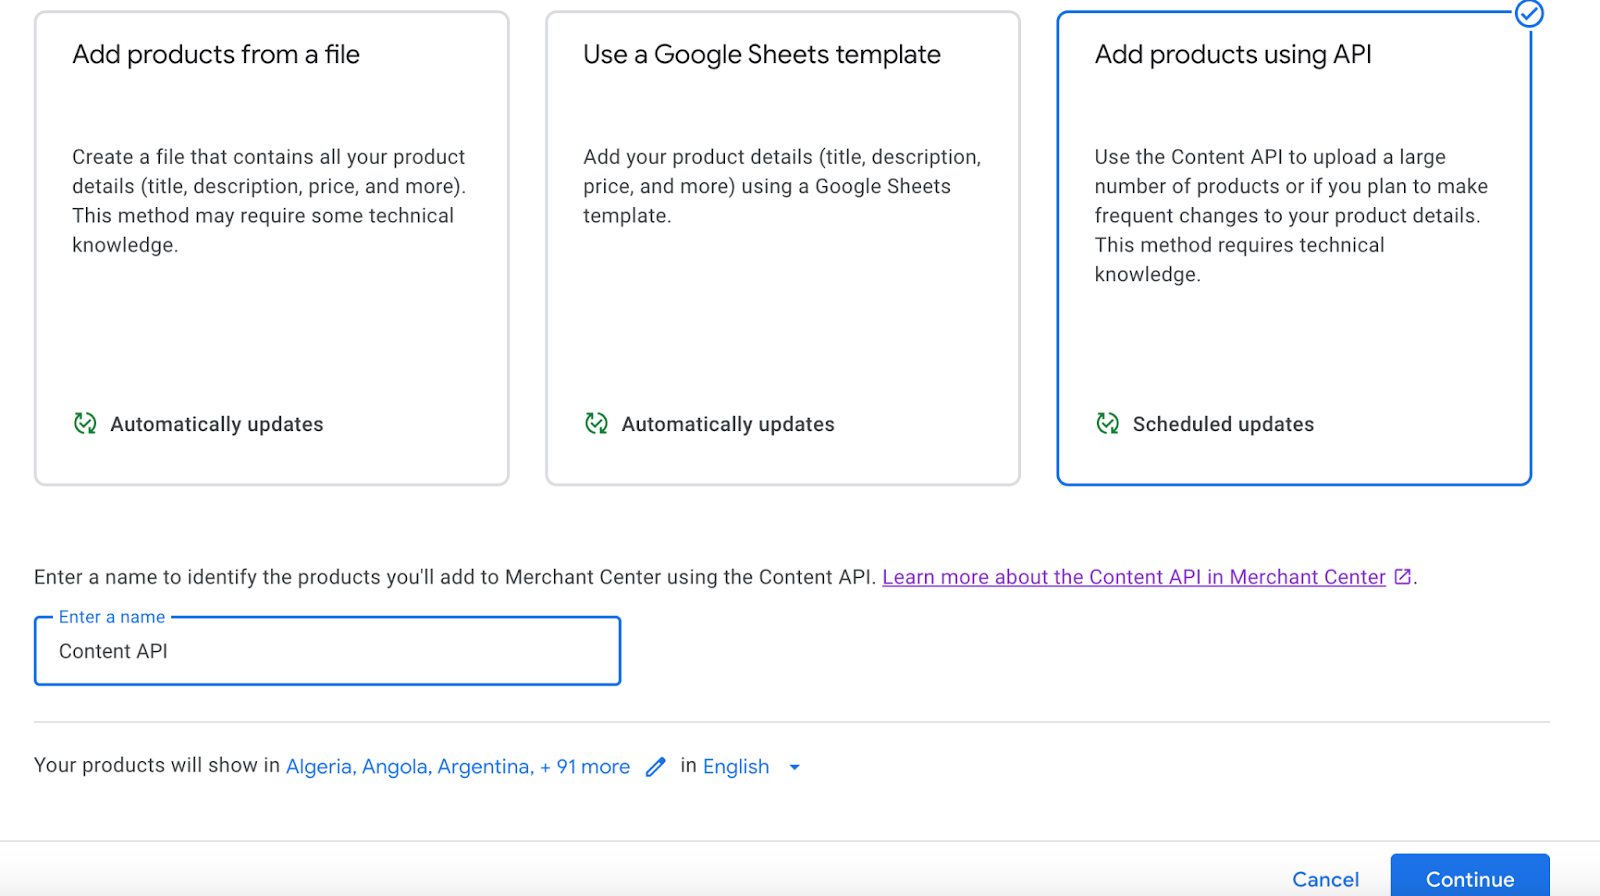
Next up, it’s time to upload the product feed to Google Merchant Center. You can choose from three methods:
- Upload via Google Sheets
- Upload products from a file
- Upload Products Using API
To access this option: go to the Merchant Center > Products > Feeds.
Now, let’s dive into the methods for uploading your products to Google Shopping.
Uploading the feed via Google Sheets
The initial choice for uploading the feed can be the Google Sheets option. Many people use it as it is easy.
It allows you to submit your products to Google Shopping in a short span of time as well.
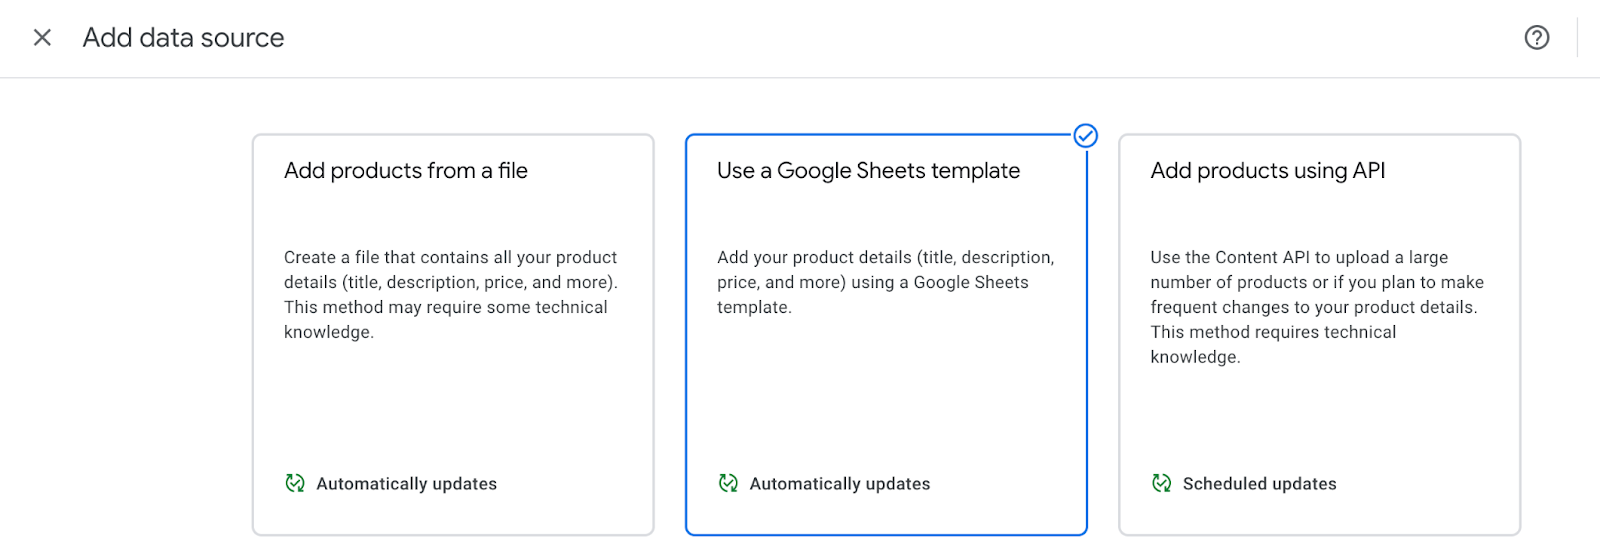
To proceed, select the Google Sheets template option as the feed input method.
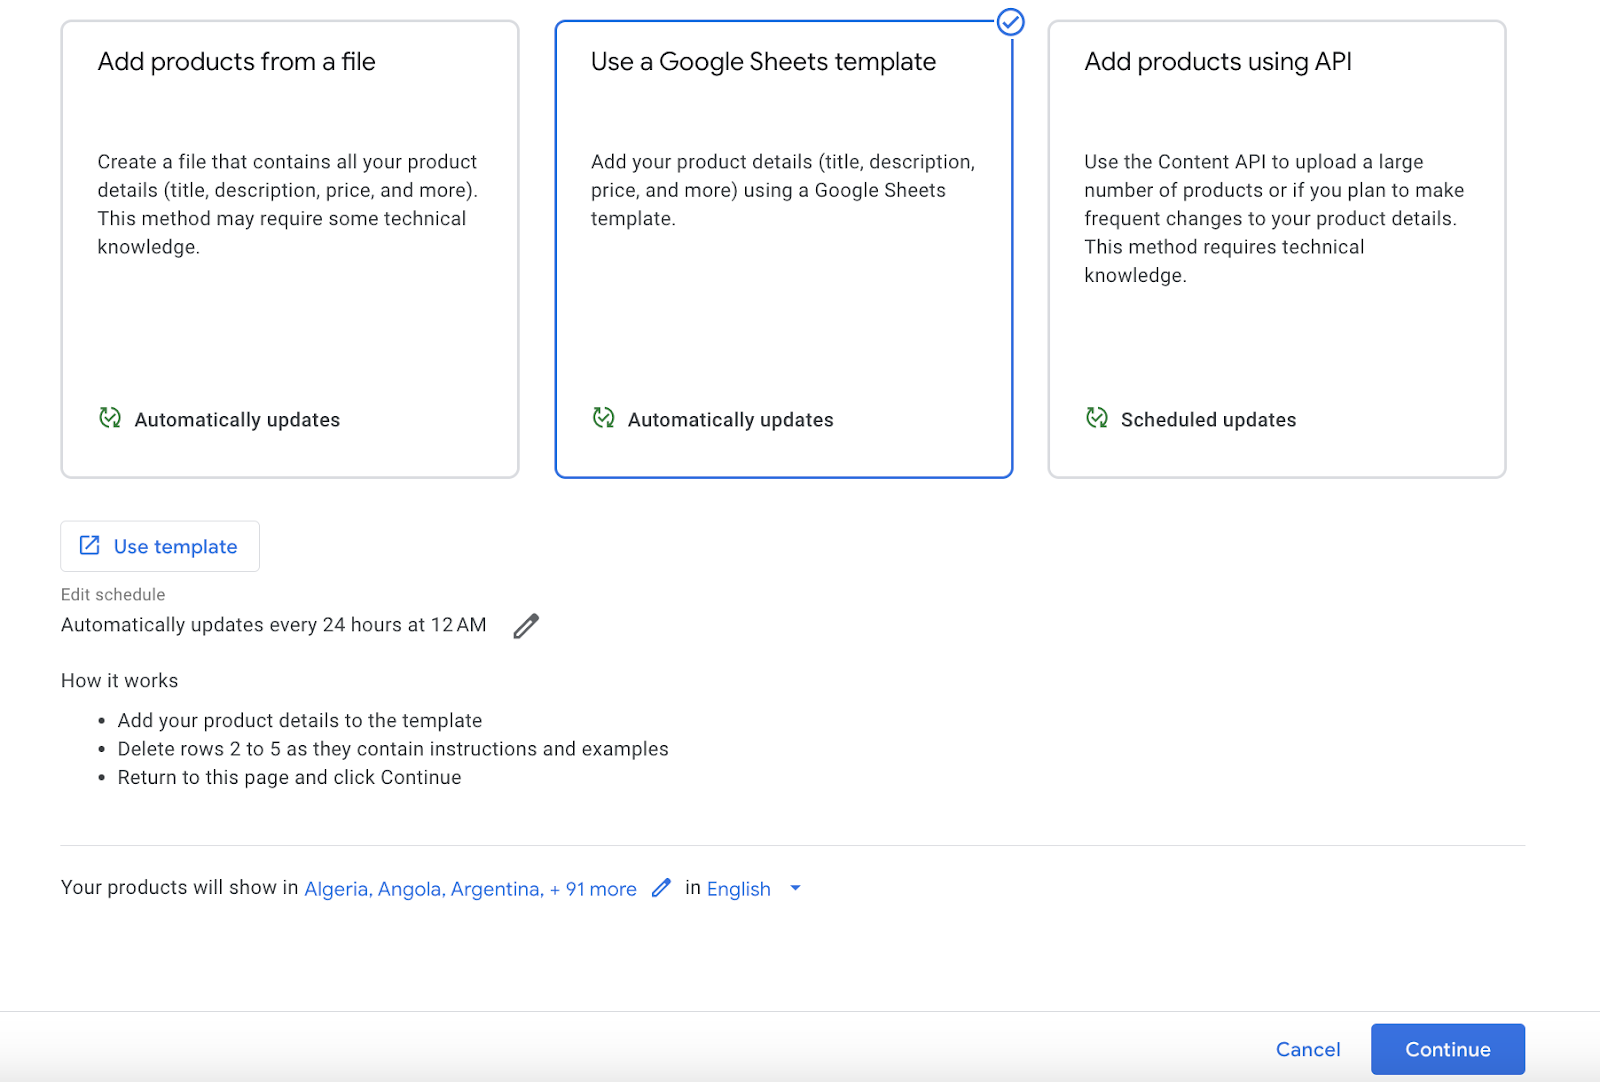
After clicking the Continue button, choose your preferred Google account to register a Google spreadsheet file.
You can either create a new Google spreadsheet from a template or select an existing one. So click on the ‘Template’ option.
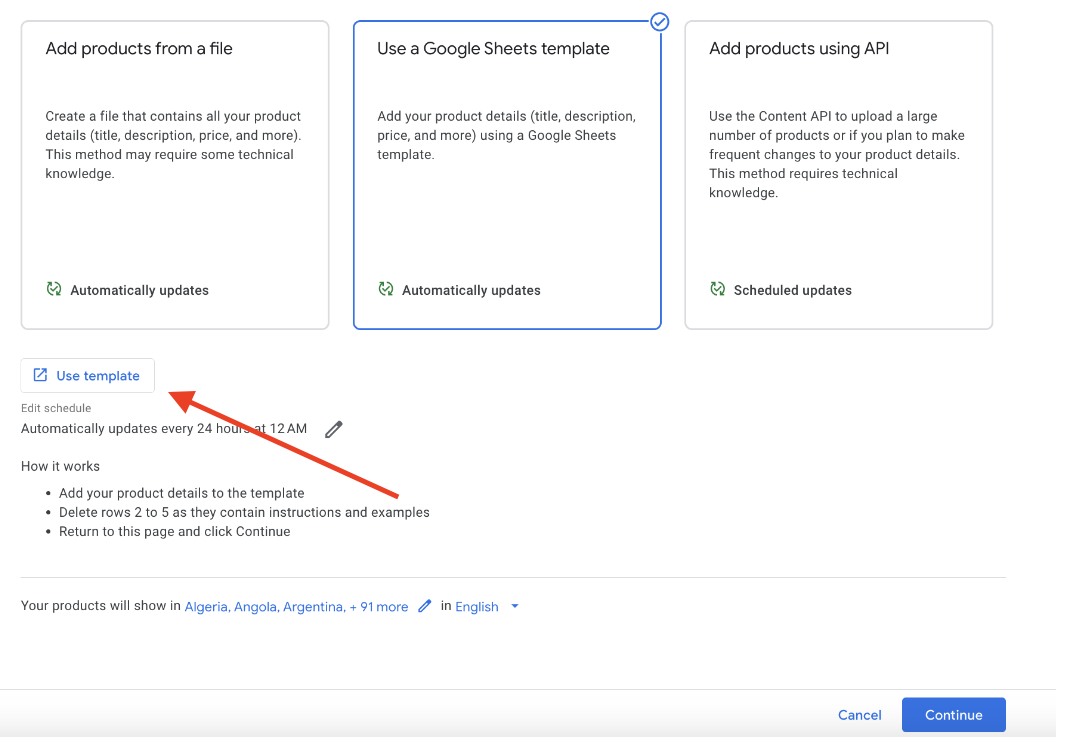
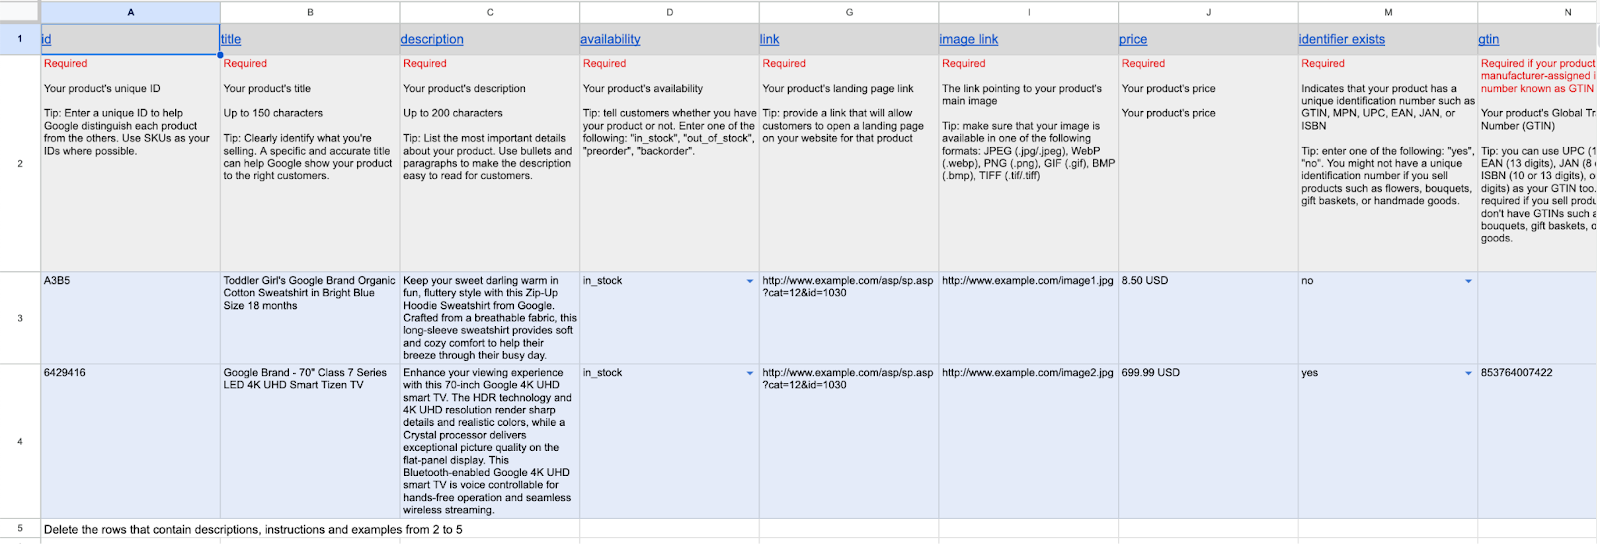
Now after going to the template, set up your product information such as ID, Title, Description, price, etc.
Then return to the page and click on Continue. It would generate your products in a couple of seconds. As you can see I have added 4 products. You can add new products in the same way as well.

Uploading Products From a File
For a hassle-free way to add products to Google Shopping, go for the URL upload method. Even I use it sometimes to add my products to google shopping.
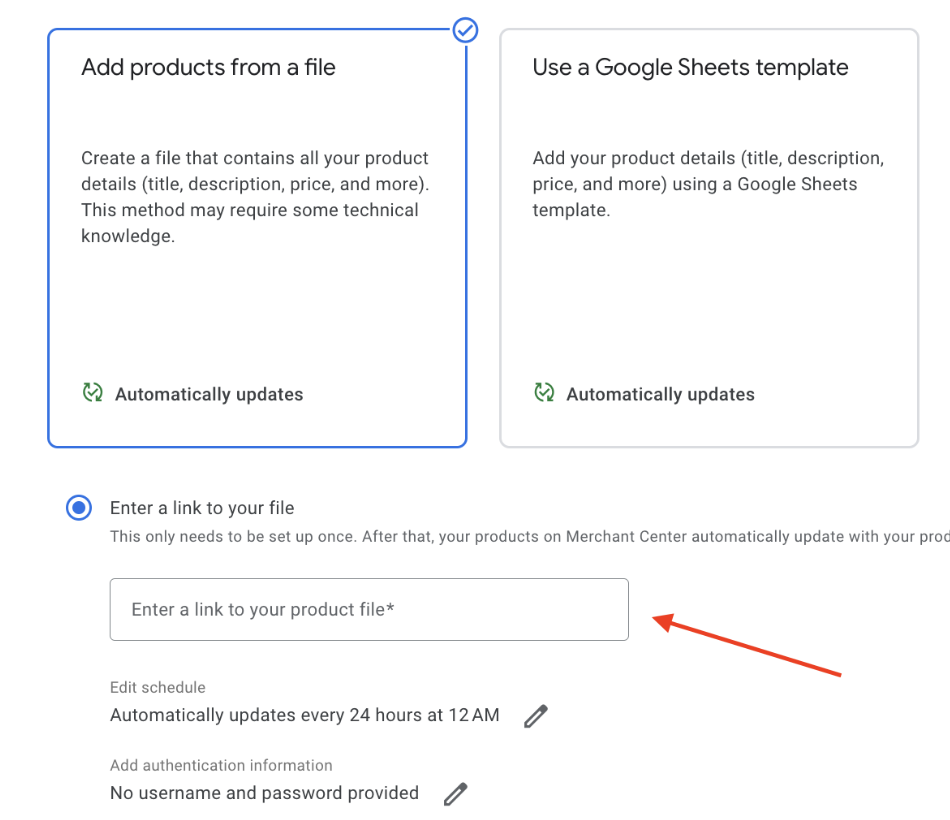
To proceed, you can add a link to your file. The file can be in a spreadsheet or XML format. However, you must maintain that the file format is maintained in the following way.
As you can see, the username or password option isn’t mandatory. You can use it if your feed file URL is password-protected. I usually do not need to but you can if you want to.
There are two other options in this part.
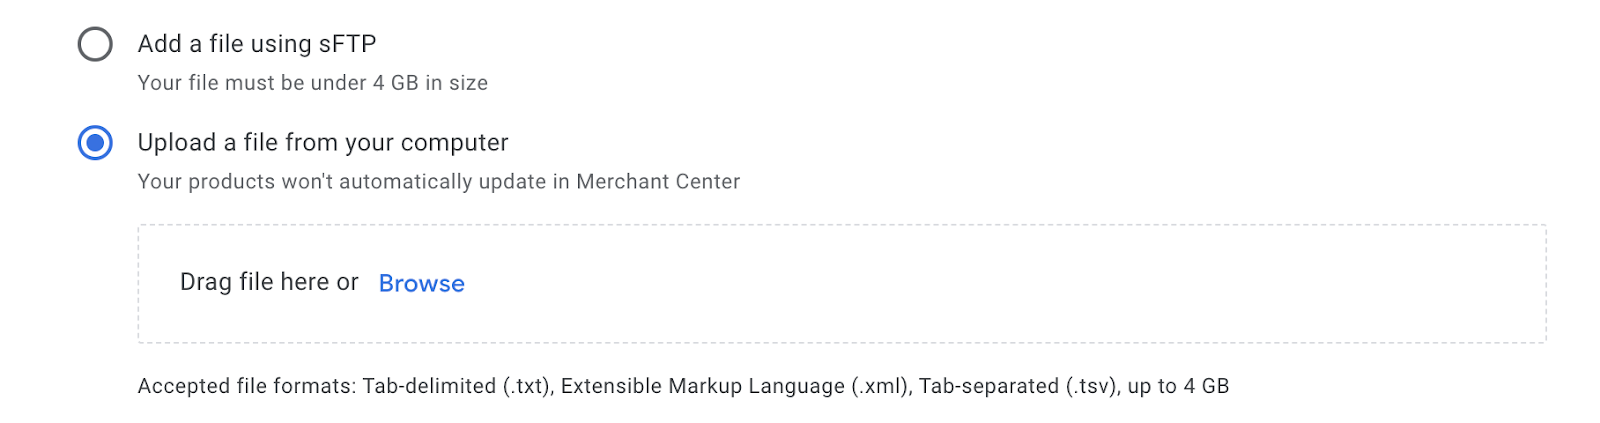
You can upload your products using sFTP. Remember that the size must always be under 4 GB.
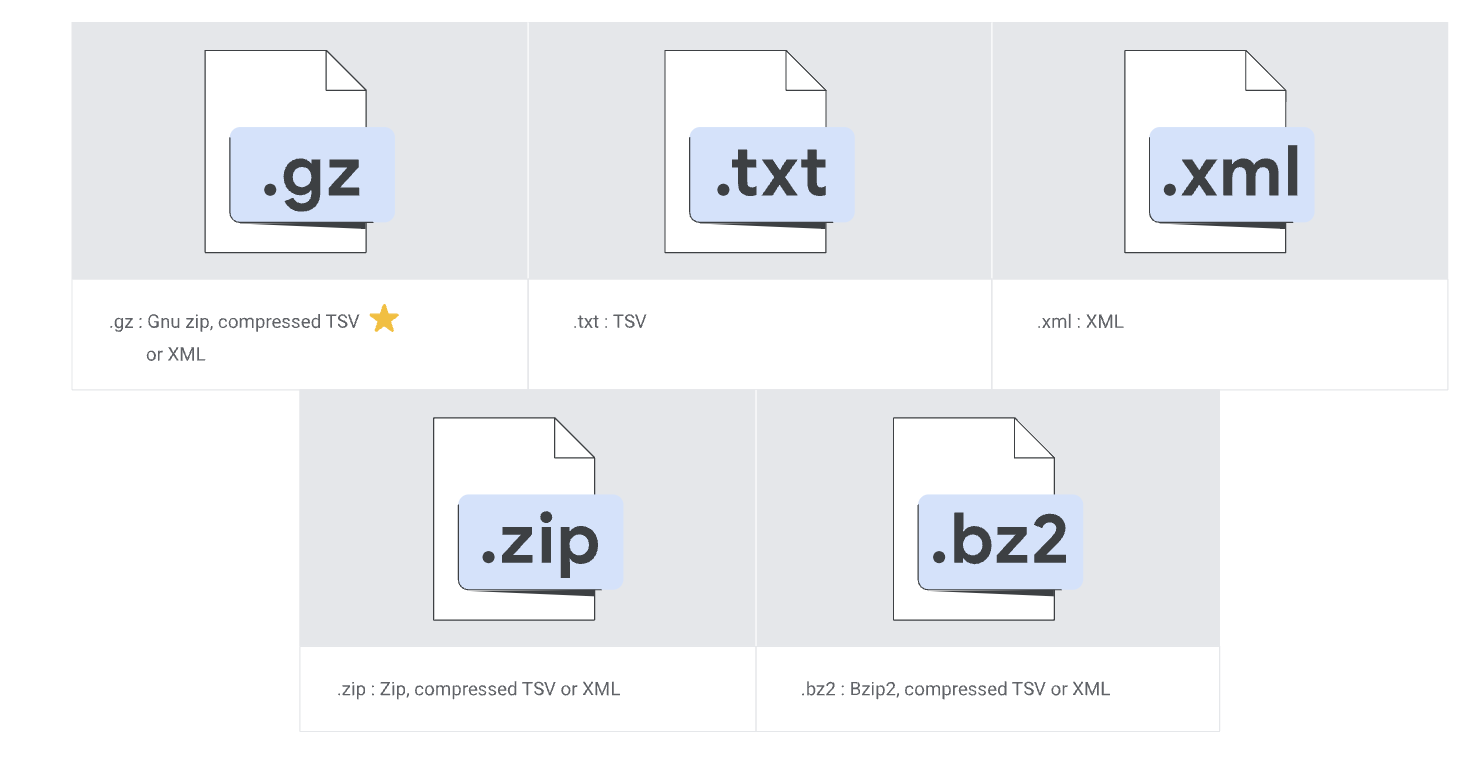
And one more option can be uploading the file from your computer. But there are a couple of requirements here as well.
- The format must be in txt, xml or tsv
- The file size must be less than 4 GB
The file you upload in this way will automatically update itself in 24 hours. Here’s additional information, the CTX feed plugin I talked about earlier for WooCommerce updates the feed file automatically. You can even choose the fetch interval between 1 hour to 1 week and more.
Upload Products Using API
Let me guess, you didn’t like any of the above methods as you are one of those people who have to make frequent changes.
Well, then the Content API is the way to go if you make frequent changes or deal with large datasets.
The Content API generates a feed file in the Google Merchant Center automatically. You can customize feed rules to handle these feeds efficiently. Refer to the official feed rules for guidance on setting rules in your product data.
There you have it. These are the primary methods for uploading product data to the Google Merchant Center.
Once done, your products will appear on the Google Shopping tab for relevant searches. However, you will need to actively promote your products on Google.
That is why you need to consider running a shopping campaign. So follow steps 4 and 5 to generate a Google shopping campaign.
Step-4: Link Google Ads with GMC (Bonus Step)
Hope you made it and successfully uploaded your products on GMC.
The next step is linking your Google Ads account with Google Merchant Center.
How do you do that?
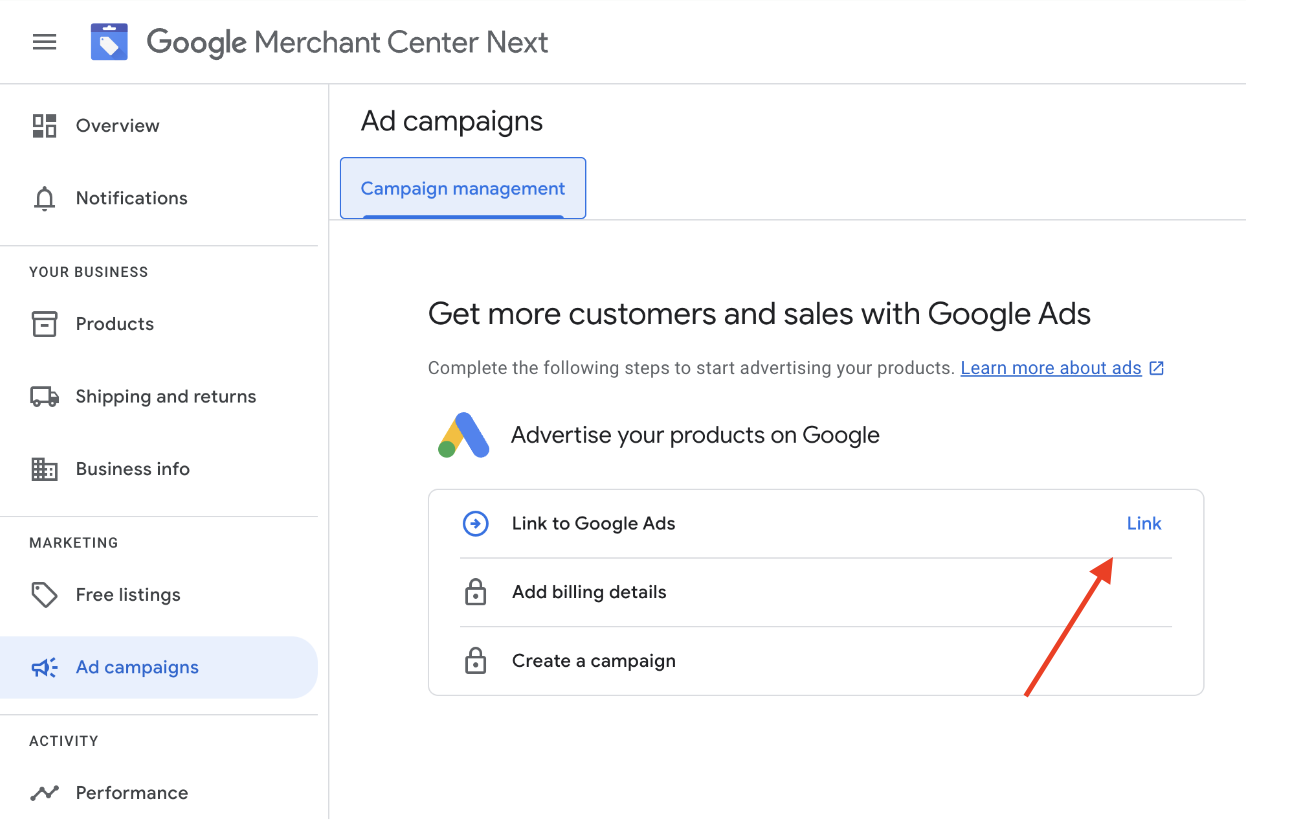
Don’t worry I got you covered. So set up your Ads account. Now from the top left side, go to ‘Ad Campaigns’.
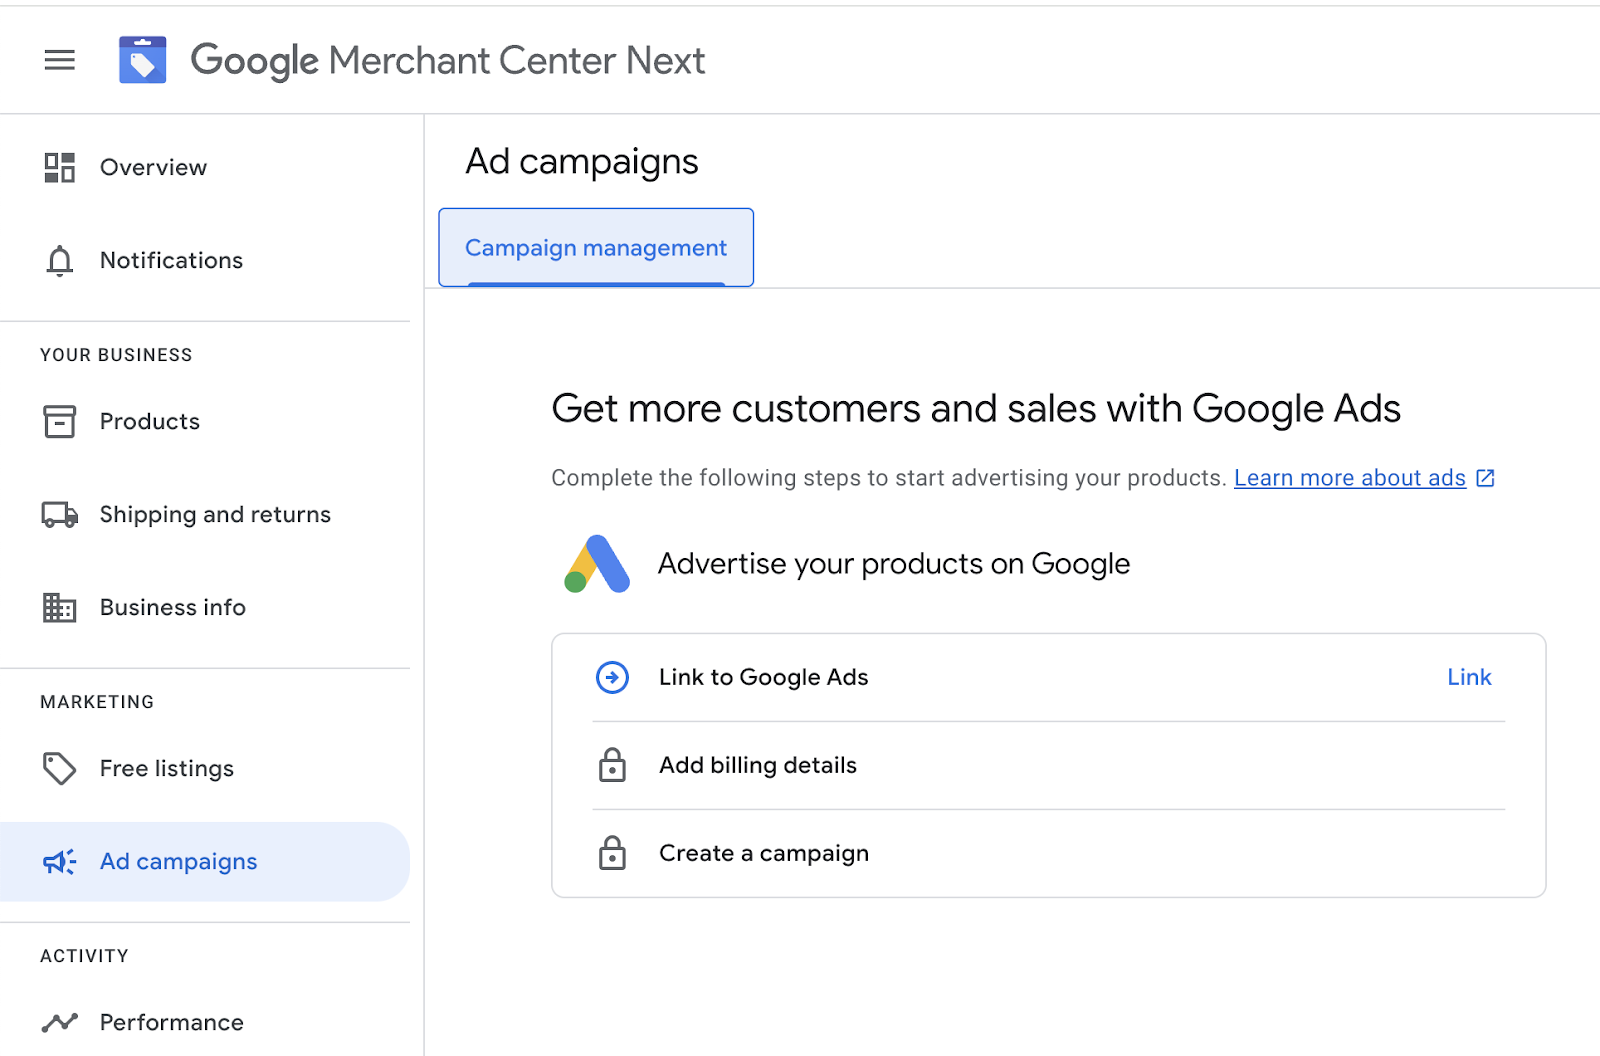
Then, you will find an option ‘Link to Google Ads’ on your right. Click on the ‘Link’ Button.
Then it will take you to the following page. You simply need to add your google ads account. In my case, it is ABC Business.
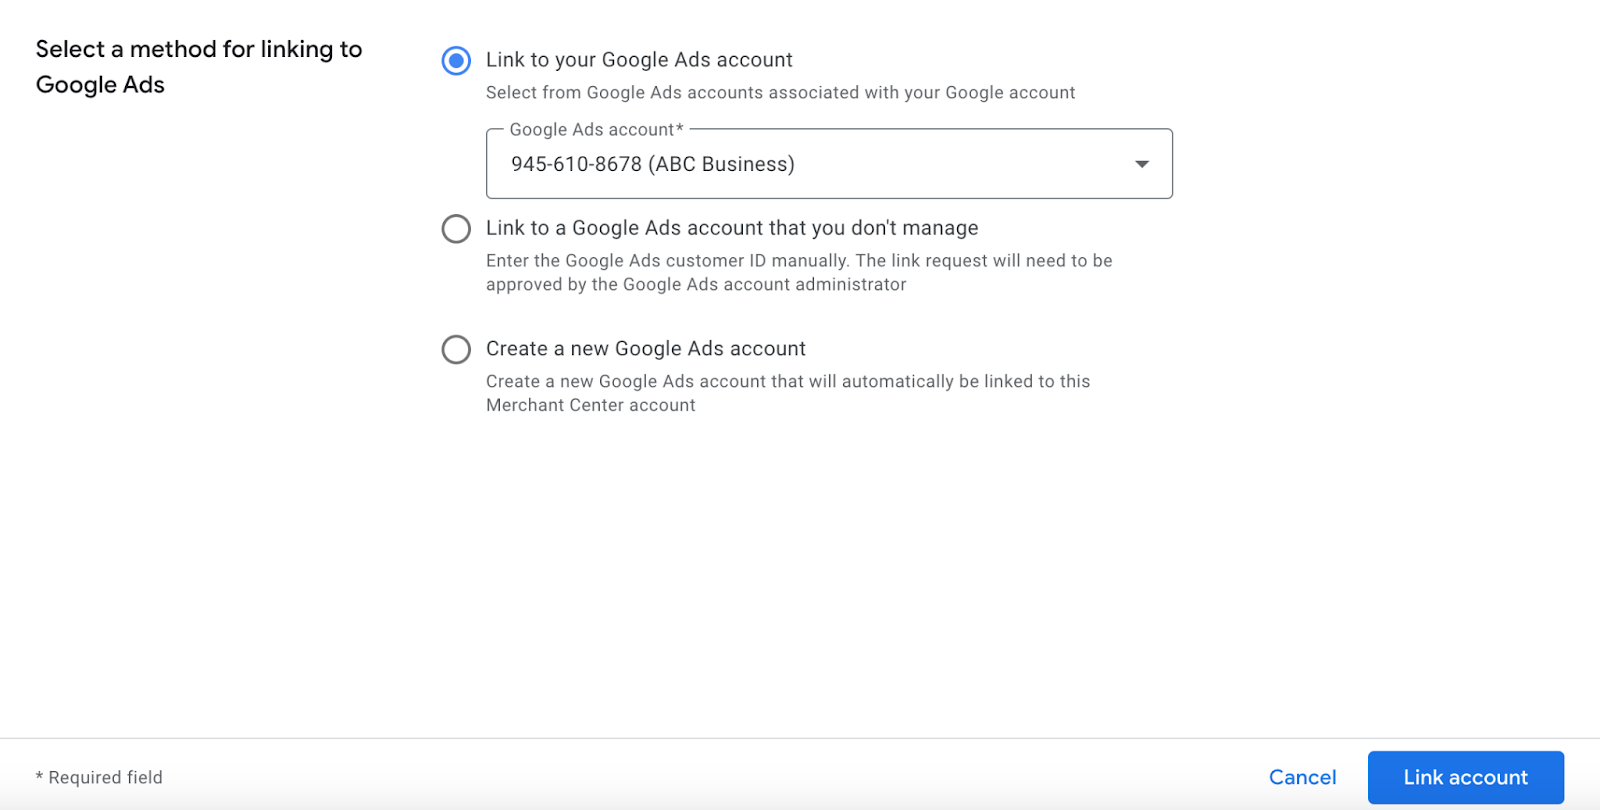
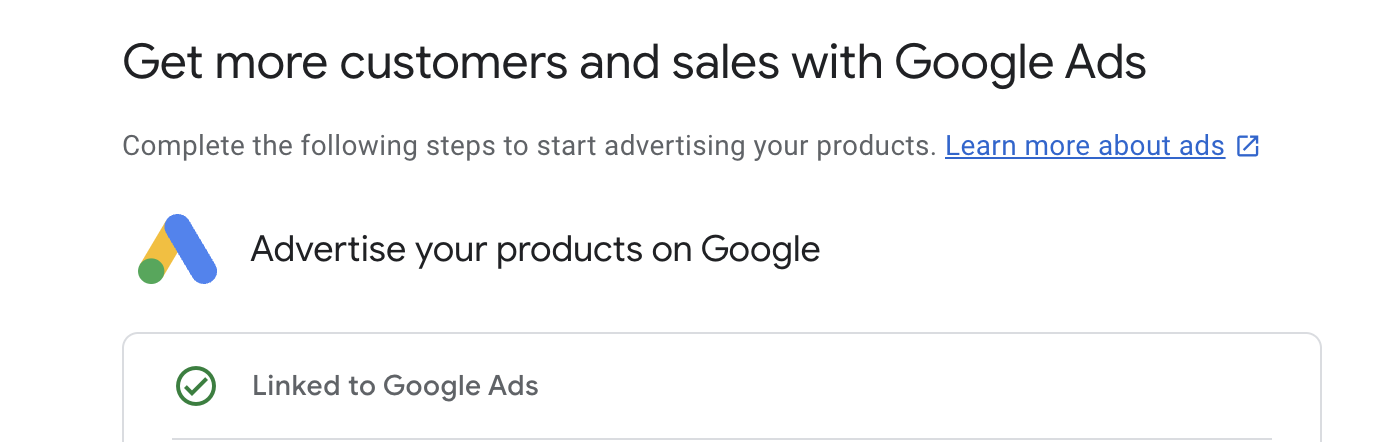
As you can see your account is linked with Google Ads.
Step-5: Create a Google Shopping Campaign (Bonus Step)
A Google Shopping Campaign can help you to promote your products massively in the Google shopping platform. Also, you get to monitor your product’s performance during the campaign runs.
So, how do you run a Google shopping campaign? Here’s a step-by-step guide to creating a Google Shopping campaign:
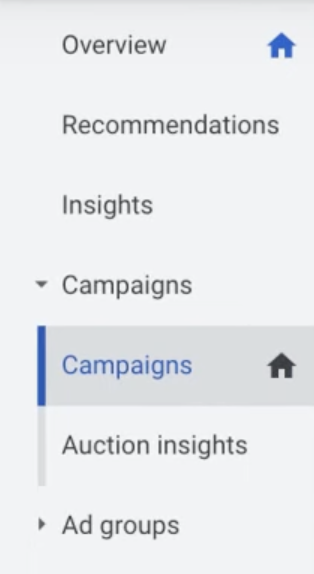
- Log in to your Google Ads account.
- Click on “Campaigns” in the left menu.
- Select “+New campaign.”
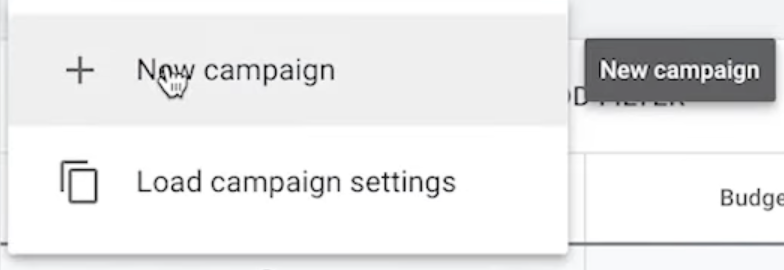
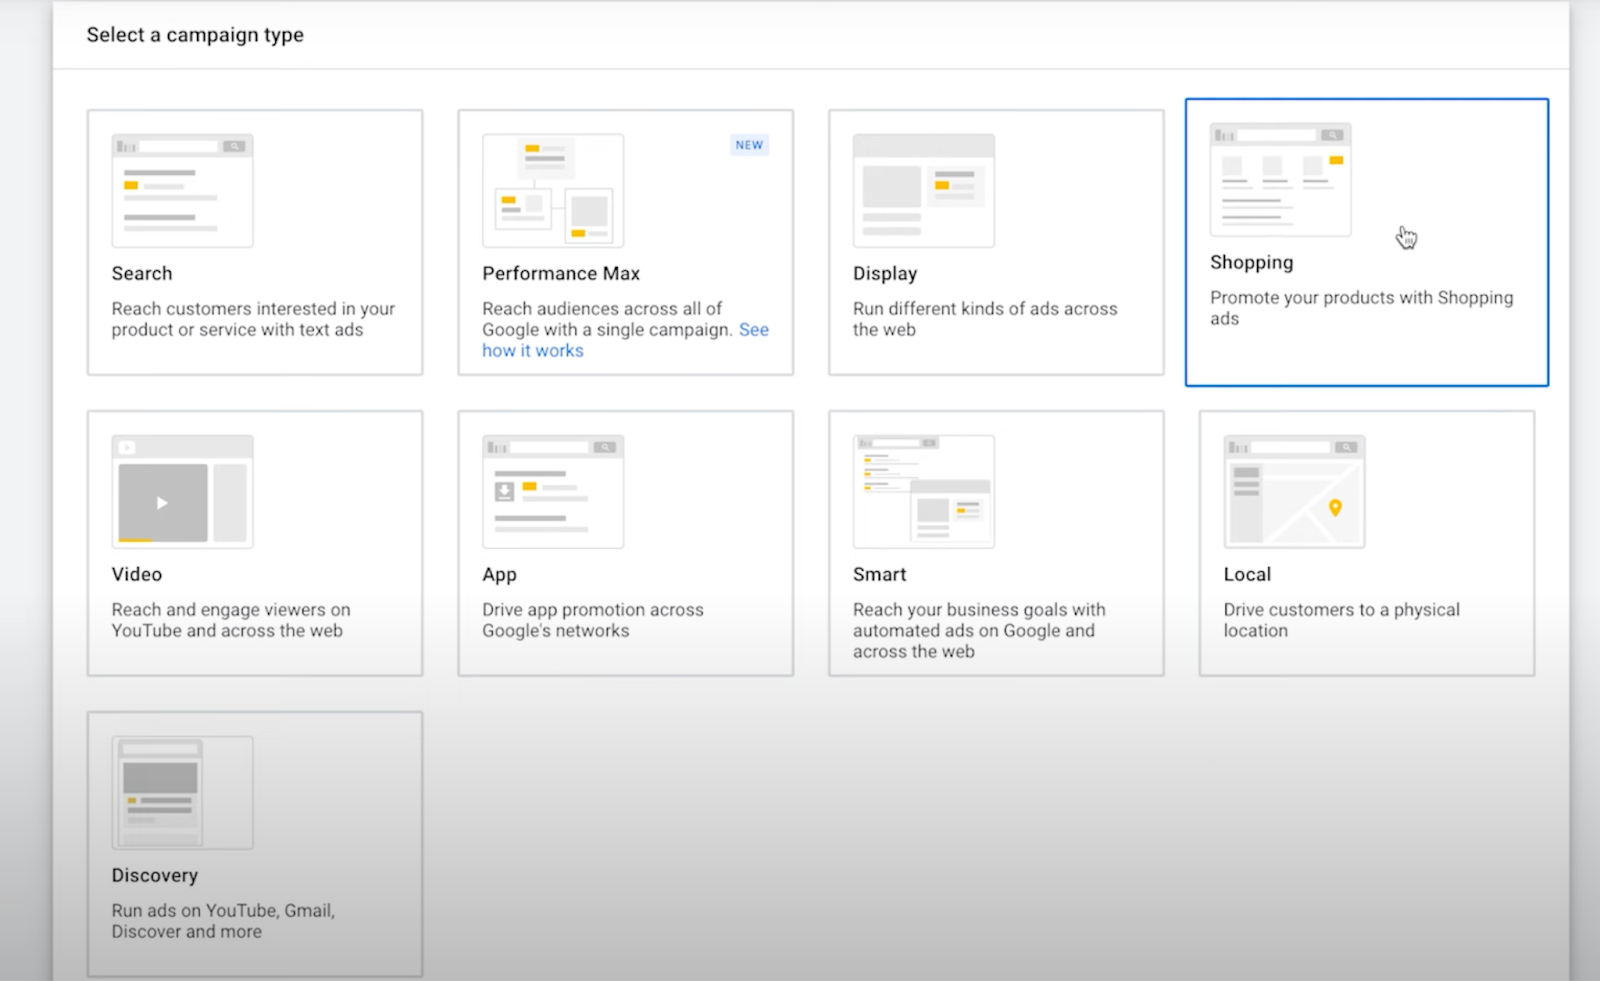
- Choose “Shopping” as the Campaign type.
- Click “Next.”
- Specify your advertising preferences.
- Click “Save and continue.”
- Build an Ad group.
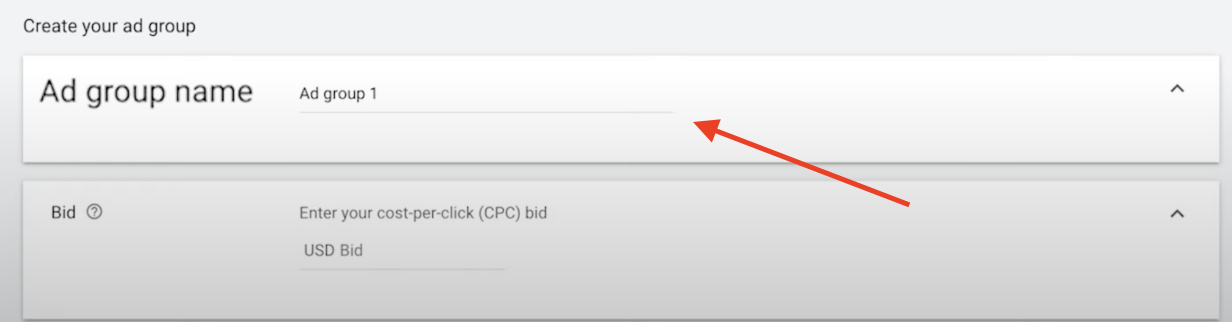
- Set your bid.

- Click “Save.”
Remember, to run a successful campaign, google product feed optimization needs to be done properly. So, remember to keep it in mind.
Also, give the most amount of time and effort to Google Shopping campaigns. Because of this, you will generate traffic, money, and everything else. It will undoubtedly increase the overall visibility and performance.
I believe you got a good idea from Google Shopping: how to add products. Go through the steps again if you need to. Also, have a look at the benefits and policies. Believe me, it’ll help you a lot.
5 Key Benefits of Adding Products to Google Shopping
Google shopping can be your spotlight for your products. It can make them stand out of the bunch. Here are some of the reasons why you should add your products on google shopping.
1. List your products for free on Google Shopping
Since 2020, you get to list your products for free on Google Shopping. So List your products for free on Google Shopping to get them in front of more people, increasing your online visibility.
2. Generates good ROI and ROAS
The average Return on Investment (ROI) for Google Shopping ads is $8. This means that for every $1 you spend on these ads, you can expect to receive $8 return. So expect better ROI and ROAS.
3. Get Quality Traffic
Google shopping can contribute a significant amount of traffic to your website. For your information, Shopping ads makeup 76% of retail search ad spending and capture 85% of clicks in Google Ads and Google Shopping campaigns.
4. Excellent Visual Appeal
Did you know?
The human brain has the remarkable ability to process visuals a staggering 60,000 times faster than text. So this is another key benefit of Google shopping.
5. Re-engage with Customers
Simplifies the process of reconnecting with potential customers who have previously shown interest in your products.
These were some of the benefits. If you want to know more, you can check out 20 Google Shopping Ads Benefits .
What are the Best Practices for Google Shopping
In this part, I’ll share some of the best practices to get the best out of your Google Shopping campaigns. It will certainly ensure that your products stand out and attract the right customers.
1. Using Title and Description Properly
The google shopping title optimization needs to be done properly. Try to use around 150 characters. So try to create short, catchy titles with key product details.
Write clear and engaging descriptions, highlighting the benefits.
This attracts more attention and helps shoppers understand what you’re offering.
2. Optimizing the feed
You can never run a successful Google shopping campaign without optimizing your product feed. So, make sure your feed is correct and contains all the information. You can always use the CTX Plugin if you want to.
3. Target the Right Audience
Use Google Ads settings to narrow down your audience. Specify locations, demographics, and devices for accurate targeting. What will this do?
This ensures your products reach people who are more likely to be interested, boosting your chances of making sales.
4. High-Quality Product Images
Try to use clear, professional images that showcase your products well.
Follow Google’s image guidelines for the best results. Great visuals grab attention and build trust with potential buyers. It also increases clicks and conversions.
5. Analyzing the Performance
Checking how well you’re doing is important to make things better. Look at the numbers. Numbers like how many people visit your site or buy your products. But why?
Understanding these details helps you figure out what’s working and what can be improved.
It’s like a roadmap to make your business even better. So make sure you do that.
Frequently Asked Questions:
Yes, you can. You can use the Google ad settings to target your customers based on locations, demographics, etc.
Log in to your Merchant Center account. Navigate to the Products section in the menu.
Now choose All products. Click the “Add products” button and opt for the option to Add products individually.
You must ensure your Google Shopping feed includes the following fields: id, title, description, link, image_link, price, condition, availability, brand etc. Again, you can use a good shopping feed plugin for your help.
Well, it depends on their status. Let me break it down for you.
If a product is pending, it won’t be visible in ads or free listings as it undergoes processing by Google.
For those new to Merchant Center or with products pending initial review, expect up to 3 business days for ads and a few weeks for additional features to become active.
Final Thought
Now, let’s wrap up things. I hope you got a good idea of how to add products to Google Shopping. The steps are quite beginner-friendly, so go through them again, and I believe you’ll be able to do it in one go.
Remember to write catchy titles, aim for the right audience, and showcase your products with awesome images. I hope the benefits, practices, and FAQs part will help you out too. However, if you have any queries or suggestions, don’t forget to reach out to us.
Till then, happy selling on your e-commerce adventure!
